Creamy Mushroom Soup, the Perfect Cold Day Meal

Creamy Mushroom Soup

Prep Time 15 minutes
Cook Time 30 minutes
Course Main Course, Soup
Servings 4 Servings

Ingredients
  

  • 4 cloves garlic (minced)
  • 1 bunch green onions (chopped, some of the greens separated for garnish)
  • 2 Tbsps butter
  • 900 g mix cremini and oyster mushrooms (32 oz; chopped)
  • 1/2 cup white wine
  • 1/4 tsp oregano
  • 1 Tbsp dried dill
  • 2 cups milk
  • 2 cups broth (beef, chicken, mushroom or vegetable)
  • 1/4 cup cream cheese (cut into small chunks)
  • salt and pepper (to taste)

Instructions
 

  • Place a medium to large pot on medium-high heat. Add butter, garlic and the green onions (except small amount of greens reserved for garnish) to the pot, and sauté until fragrant.
  • Add the mushrooms, and sauté, stirring regularly, until mushrooms are fully cooked. By the time they are fully cooked, they will likely have released quite a bit of liquid in the pot.
  • Add the white wine, oregano and dill, stirring well. Allow the mix to cook for around 5 minutes before turning the heat down to medium heat.
  • Add the milk and broth. Allow the soup to heat up, then remove about a cup to a separate small bowl and add the cream cheese and stir until the cream cheese has mostly melted and become more liquid. Pour this mix into the soup and stir well until fully mixed into the soup
  • Taste-test and add salt and pepper to prefer taste. Cook for another 5 minutes. Remove from heat, and serve immediately, with reserved green onions as garnish.
Keyword Cream Cheese, Cream Soup, Cremini, Mushrooms, Soup

And now for the details…

Hi there friends! I am not sure about you… but comfort food is definitely where my brain and stomach seem to be leading me lately. Not sure if it’s the changing seasons (we are into November and here in Canada, and I am looking out my window right now at a light blanket of snow on the ground), the continued impacts of this pandemic on our work and personal lives, or just a phase of my body wanting and needing familiar food for my soul, but here we are and I wanted to share this with you in case you are feeling similar, and you find mushroom soup equally as comforting as I do.

I love mushrooms. Like. So much. I am pretty sure I’ve mentioned this in previous posts, so I won’t wax poetic too much on the glory that are mushrooms, but dang, they’re good. High in umami, and with a slightly meaty texture when cooked, they provide a savoury bite that is hearty and satisfying. For this soup, I suggested cremini and oyster mushrooms in the recipe, but you can use a mix of whatever mushrooms you have available. Only have button mushrooms? Sounds great, this soup will be delicious. Have access to mushrooms a bit more on the pricey end, like morels, chanterelles or porcini? Toss them into the mix, they will be fantastic.

To get everything started, we are going to be chopping everything up. The garlic, green onions and mushrooms are all going to be chopped up to go into the pot. For the green onions, reserve some of the chopped green parts to the side to garnish the soup at the end. The primary reason I am using green onions in this recipe is I admittedly ran out of regular onions and shallots. So… green onions it was. If you don’t have green onions, you can instead use half of a small white onion or a shallot, minced fairly fine.

Place a medium to large pot on the stove and set it on medium-high heat. Add the butter, allow it to melt, and then add the garlic and the onions (less the greens you reserved to the side). Stir, allowing the onions and garlic to cook until they start releasing their delicious smells and the onions have started to soften. This shouldn’t take very long, a couple minutes at most.

Next, we add the mushrooms. You can add them all in one fell swoop, or add them a bit at a time, allowing them to cook down before adding the next bit. I like doing it the second way because it feels like I’m making better progress, but honestly, I think both methods take the same amount of time in the end.

As mushrooms cook, they release a heck of a lot of moisture. It doesn’t seem like they would when they are raw. They are kinda dry and spongey in texture. But when you cook them down they have a LOT of liquid to release. For this recipe, since our end goal is a soup, we are not as concerned with avoiding the liquid. Some recipes you see for sautéing mushrooms will advise to use a wide pan and not crowd it to avoid boiling the mushrooms. Well… we’re makin’ soup folks, so the liquid stays! When the mushrooms are cooked and there is liquid at the bottom of the pot, do not worry about draining it or cooking it off, that is just mushroom broth that will add to the soup!

The next step will be to add our spices (the oregano and dill), some salt and pepper, and the wine. We are going to keep the heat at medium-high for about five minutes to cook down the wine somewhat. Partially to help reduce it, partially to allow the alcohol to cook off before we add the broth. After five-ish minutes, turn the heat down to medium.

Next, add the milk and broth to the soup. Depending on whether the milk and broth were at room temperature, or if you brought them straight out of the fridge, you might have to wait a bit to have the soup heat back up. Wait for it to come back up to a simmer.

Different cream soups will use different methods of getting a creamy broth. Some will use flour, others will add heavy cream, and some will blend some of the mushrooms to thicken up the broth. In this case, we will not be going too thick with the broth and we will be using cream cheese to help provide a bit of body to liquid.

In order to get the cream cheese to blend well, we are going to try and dissolve most of it outside of the soup before adding it in. Cut the cream cheese into chunks to get it ready. Ladle some of the hot broth out of the pot into a small bowl. Add the cream cheese to the broth, and mash and stir it until the cream cheese has melted down some and the mixture is no longer lumpy. Add the mixture into the soup and stir in. If you want to just add the cut cream cheese right into the pot and skip this step and just wait for it to all melt and have the potential of a couple little lumps of cream cheese, have at ‘er. Admittedly, this is exactly what I did and just wanted to share a different option to you all that has a better result *eep*

Now is a good time to give the soup a quick taste-test and add additional salt to your personal taste (do I almost always add salt at this stage? Yes I do. Am I a borderline saltaholic? You know I am.) Allow the soup to come back up to a simmer after the addition of the cream cheese mixture, about another 5 minutes. Then ladle out the soup, top with the reserved green onions for garnish and serve immediately. I like serving this with a piece of crusty baguette to dip into the rich broth!

Happy eating.

Easy, Rich Tomato Bisque with Boursin Cheese

Tomato Bisque with Boursin Cheese

Prep Time 30 minutes
Course Main Course, Soup
Servings 10 cups

Ingredients
  

  • 2 cans Italian tomatoes (796ml, 28oz)
  • 1 zucchini chopped in medallions
  • 2 garlic cloves peeled and minced (or 1 Tbsp freeze-dried garlic)
  • 2 cups chicken or vegetable broth
  • salt and pepper to taste
  • 1 cup fresh basil loosely chopped
  • 1/4 cup heavy whipping cream
  • 3 Tbsps Garlic and Fine Herbs Boursin cheese (or preferred flavour cream cheese)

Instructions
 

  • Add all the ingredients except basil, cream and cheese into a large sauce pan over medium high heat. Bring to a simmer, then reduce heat to medium-low, cover the pot and cook for 20-25 minutes, or until zucchini are fully cooked and very tender. Add basil and cook for another 5 minutes.
  • Remove the soup from heat, and blend until smooth either with an immersion blender in the pot, or by transferring to a blender in batches. Return the blended soup to the pot and place over low heat, stirring in the cream and cheese until the cheese has fully melted into the soup. Serve immediately.
Keyword Basil, Cheese, Soup, Tomatoes

And now for the details…

Tomato soup is one of my favourite lunches. Pair it up with a grilled cheese sandwich, and for a few moments, while eating, I am in heaven. In this recipe I have paired up the tangy, umami-ness of tomatoes with the freshness of basil, the richness of cream and the salty, creaminess of Boursin cheese. The use of the pre-seasoned garlic and herbs cheese adds its flavour, eliminating the need to add much else in the way of herbs or spices. If Boursin is not readily available, using a flavoured cream cheese like herb and garlic would do in a pinch, and if you could even just go with plain cream cheese or marscapone, as the basil and tomatoes do not need much seasoning, as they do so well just on their own! I have also added some zucchini to the soup to provide some added veg content and to “beef up” the soup, so to speak.

The best part of this soup is how quickly it comes together. We are using canned tomatoes, and only loosely chopping the zucchini and basil. No need for meticulous preparation (aka high knife skills) of the different ingredients, since we will just be blending it all together at the end anyhow. I even took the let’s-make-it-easy approach a step further and ended up using freeze-dried garlic pieces rather than peeling and chopping.

So to get this soup started, place all the ingredients except the basil, cream and cheese into a large saucepan and put it over medium-high heat. Make sure to add the tomatoes with their liquid!

We are not going to be cooking at this higher temperature the whole time, just until we heat the soup up enough that it starts to bubble. Then, turn the heat down to medium-low. Here is where the magic happens, since we are just going to cover it up and can leave it to cook to get all soft. After about 20-25 minutes, we will add the basil in. You can just tear the leaves off and toss them in, or even loosely chop the leaves and the stalks together and throw everything in, as long as the stalks are not too woody. Cook the soup for another 5 minutes, just until the basil has wilted and spread its lovely scent into the soup.

Now its time to go on a blender. Remove the pot from the heat. There are two options for blending. If you have an immersion blender, you can do this right in the pot, stirring it regularly to make sure we get all the bits so that the soup is smooth. The second option is to transfer the soup to a blender to get a smooth soup. If using a blender, you will also need a second container, since the soup will likely not all fit into the blender at once, and we will need to blend in parts. As discussed in other soup recipes that needed blending, be careful in this step, as the hot soup might burst from the blender container if you overfill it or go to high speed right away. Fill the blender no more that halfway and start on low speed before increasing. When done blending, transfer the soup back into the pot.

Put the pot with the smooth soup over low heat. Add the cream and cheese (breaking the cheese up into pieces/chunks to allow it to melt faster) and stir, heating until it is at your desired temperature and the cheese is fully melted and mixed into the soup.

Serve immediately. If there are leftovers, allow them to cool fully, then transfer to a freezable container. This soup keeps in the freezer for several months and reheats really well. A great meal to keep handy for a quick defrost and reheat!

Happy eating.

Lightly Spiced Butternut Squash Soup

Butternut Squash Soup

Prep Time 15 minutes
Cook Time 30 minutes
Course Soup
Servings 6 Servings

Ingredients
  

  • 1 medium onion peeled and diced
  • 2 garlic cloves peeled and minced
  • 1 Tbsp olive oil
  • 1 butternut squash peeled, cored and cut into chunks
  • 1 medium sweet potato (yam) peeled and cut into chunks
  • 1 large apple peeled, cored and cut into chunks
  • 1/2 cup white wine
  • 4 cups chicken or vegetable broth
  • 1/2 Tbsp ground cumin
  • dash cayenne pepper
  • 1 tsp salt
  • 1 tsp ground pepper
  • 1/2 cup half and half cream

Instructions
 

  • Put a large pot over medium-high heat and add oil, onions and garlic. Cook for 3-5 minutes, or until onions become translucent. Add the wine and cook down until reduced by half.
  • Add all the rest of the ingredients except the cream. Stir well, pushing the veggies and fruit to be mostly under the liquid. Reduce the heat to just below medium, cover the pot, and cook for 30 minutes, stirring occasionally, or until the veggies are fully cooked and starting to fall apart.
  • Blend the soup, either using an immersion blender in the pot, or transferring the soup to a regular blender in batches. Transfer back to pot once all the soup is blended and smooth. Place pot on low heat, add the cream to the soup, stirring well and heat to desired temperature. Serve.
Keyword Apple, Butternut Squash, Soup, Yam

And now for the details…

Hi there friends! Here comes a new soup recipe your way, this time using butternut squash. Does anyone else call butternut squash “buttnut squash” for short, is that just me and some of my friends? And yes, we giggle like 11-year-olds after we say it. I may technically be an adult, but that does not mean I have matured, people.

I love this soup because it is so easy. Seriously. The most difficult part of making the soup is peeling and removing the guts from the squash. And being a teensy bit patient while waiting for it to cook.

This particular recipe is one that I have been making for years. It is actually roughly based off a recipe I found online a long time ago. I went a-hunting to find that recipe to credit it, but could not find it anywhere. So here is my version; I hope you enjoy!

Butternut squash is one of my favourites. It is a great vegetable that keeps extremely well, even at room temperature. While it is technically spring, here in Canada, we are not quite seeing the spring veg roll in, so using a winter squash like butternut is still in full force. Why are they considered winter squash? It is definitely not because they grow in the snow! Winter squash have that name because they get harvested in late fall, and last through the winter while they are stored away in a cool, dark place. Rich, sweet and satisfying, butternut squash is great cut in pieces and roasted in the oven or made up into a mash. In this particular recipe, though, we are going to add a few more ingredients and turn it into soup!

One element I like about this recipe is the addition of the sweet potato. It gives the soup that bright, orangey colour, as well as adding sweetness. The apple balances out the flavour by providing a little tartness. Finally, we are not going to be adding a sweet spice like cinnamon or nutmeg, oh no! We will be spicing lightly with some cumin to get a hint of earthiness to round this dish off, and a lil dash of cayenne to elevate the heat-from-inside feeling, perfect for a chilly, slushy spring day.

To start off, we peel and chop all the veg. Like I said earlier, prepping the butternut squash is the hardest part of this recipe. The squash, though very soft once cooked, is quite firm when raw, and its skin is thick and hard as well. There a quite a few different tips and tricks out there on how to peel the squash, find one that works for you! Don’t forget to scoop and toss the guts 🙂 Cut the different veg into large chunks, maybe about 2-3cm in size.

I am extra cautious at this step of cutting the squash… A few years ago, I was cutting butternut squash and a piece fell on the ground. Our Scottie swooped in, grabbed the piece of veg, and raced off with his prize. I usually do not think twice when he does something like this. He eats raw veg all the time (fun fact: kale stalks are one of his favourite treats) and so when he ran off, I continued on with my cooking. Then, a few minutes later, I heard this soft, mournful croon from the other room that I had never heard him make before. When I went to check on him, he was lifting his little nose in the air, making the crooning sound, then would bring his head down and pant quickly, as if he could not breathe. I am not proud to say that I panicked. I was so worried he was allergic to the squash and his little airway was closing. Long story short… a bit of panic, a sleepover at the vets, and an expensive vet bill later, Moz got sent home in great spirits, with the unchewed piece of raw butternut squash that they had pulled out (it had lodged itself into his esophagus, just before his tummy). Thanks bud. CHEW YOUR FOOD.

Anyhow… back to the soup. Once the squash, sweet potato, and apple have been peeled and cut into chunks, it is time to start cooking. Start by adding the oil, onion and garlic to a large pot on medium-high heat. Cook until the onion has softened. Add the wine and cook until the wine has reduced by about half. Add all the rest of the ingredients except the cream, stirring to mix fully. Lower the heat to medium, cover the pot and cook for 30 minutes, stirring occasionally, or until the veggies are cooked through and soft.

To finish this soup off, we will be blending it to get that nice, velvety texture. If you have one, you can blend the soup right in the pot using an immersion blender. If you do not have an immersion blender, you can blend in a regular blender as well. You will likely need to do the soup in batches if using a regular blender, as it is a lot of soup! Also, be careful when blending in a regular blender, starting off on a low speed and gearing up, or you and your kitchen may end up wearing more soup than you eat! (Speaking from experience? I don’t wanna talk about it…)

Once blended, add the soup back to the pot and put over medium-low heat. Add the cream, stirring in completely and bringing the soup back up to temperature. Serve immediately. I like garnishing using nuts of some kind, like walnuts, pecans or hazelnuts, and drizzling with sour cream or an infused olive oil.

Happy Eating.

Rich and Hearty Kubasa and Bean Soup

Kubasa and Bean Soup

Prep Time 10 minutes
Cook Time 20 minutes
Course Main Course, Soup
Servings 6 people

Ingredients
  

  • 1/2 medium-sized onion chopped
  • 1 clove garlic peeled and minced
  • 1 Tbsp olive oil
  • 540 ml canned white kidney beans (19 oz) drained and rinsed
  • 540 ml canned bean medley (19 oz) drained and rinsed
  • 454 g ring of kubasa (kielbassa)
  • 796 ml canned tomatoes (28 oz)
  • 3 bay leaves
  • 4 ribs celery chopped
  • 4 medium-sized carrots peeled and chopped
  • 4 cups beef or chicken broth
  • 1 Tbsp paprika
  • salt and pepper to taste

Instructions
 

Instant Pot directions

  • Set pot to "Sauté" setting and add the oil, onion and garlic. Sauté until onions are translucent. Add celery and carrots, stirring and cooking for another 3-5 minutes.
  • Add the rest of the ingredients, stirring well. Set the Instant Pot to "Soup" setting, under pressure, for 20 minutes.
  • Remove and discard bay leaves and serve.

Stovetop direction

  • Sauté onions and garlic in olive oil in a large pot over medium-high heat until onions are translucent. Add celery and carrots, stirring and cooking for another 3-5 minutes.
  • Add the rest of the ingredients, stirring well.
  • Turn heat down to medium to medium-low (soup should be simmering but not boiling). Cook for 45-50 minutes, stirring occasionally.
  • Remove and discard bay leaves and serve.
Keyword Beans, Instant Pot, Kubasa, Mixed Beans, Sausage, Soup

And now for the details…

Let’s set the scene: it’s the middle of winter. The temperature is cold and icy outside and just looking out the window causes a deep chill to set in, right to your bones. All you want is something warm and comforting to heat you up from the inside, something that feels like a hug in a bowl. This is exactly what our weather is like right now, and when I was looking in the fridge to see what was available, I came up with this recipe as a solution.

Kubasa, also known as kielbasa or kolbassa, is a sausage of Eastern Europe descent, often known as Ukrainian or Polish sausage. It’s a pretty broad term when you think about it… it seems pretty doubtful that an entire country (countries) has just one type of sausage, no? And that’s entirely true. The term “kielbassa” is a translation of “sausage” and in those countries, it refers to a wide range of different sausages. But, where I am from, the Canadian Prairies (think smack in the middle of Canada), the term kubasa/kolbassa is used for a smoked sausage, heavy on the garlic, that is most often served up alongside perogies (dumplings) and holuptsi (cabbage rolls).

In this recipe, I used the kubasa in a soup with beans and some veg to get a hearty, rich, salty, and slightly smoky soup that might actually be nearing “stew” in texture! The beans add a thick silkiness to the broth as they cook, and the addition of paprika gives a hint of heat without actually adding any spiciness. All in all, it’s the perfect meal to come home to after a cold day of skiing, skating or building a snowman 🙂

Let’s get to cooking, shall we?

There are two sets of instructions in the recipe, one for the Instant Pot and one for stovetop. They are both extremely similar, the biggest different is the amount of time to cook the soup for after adding all the ingredients in. I will go through both options, so follow along with your cooking approach!

We start with the veg. Peel and chop your onions and garlic and place in your pot with the oil. At this point, you can prep and chop your celery and carrots, and chop the kubasa into large chunks, to get everything ready to go.

A quick note on prepping the kubasa: most kubasa that I have had has edible, soft casings. But there are some that have a stiff, dry casing that needs to be peeled off before eating. You can usually tell if you try and peel a bit of the casing off. If it “flakes” off in small pieces that tear easily, it’s probably good to eat. If it easily comes off in large strips that peel off easily, peel the whole thing off to avoid unchewable pieces of casing.

With your onion, garlic, and oil in your pot, set to “sauté” setting (or medium-high heat on the stove) stirring and cooking until the onions have turned translucent. Then, add the carrots and celery, stirring and cooking for another 3-5 minutes, so that the celery and carrots soften slightly.

Next, we add all the rest of the ingredients to the pot, stirring well. In this recipe, we are using canned beans, but there is an opportunity to use dried beans if you would like. If you do use dried beans, you will need to add time (about twice the time listed here) as well as add a cup or two of water. If you are using canned beans, don’t forget to fully drain and then rinse the beans before adding them to the pot.

Next, we will be going one of two directions depending on whether you are using and Instant Pot or stovetop: If you’re using an Instant Pot, cover and seal it, and set it to “Soup” for 20 minutes. If you are going with the stovetop method, lower the heat of your stovetop to medium-low to medium heat, just enough so there is a little simmering action going on (a few bubbles every few seconds), but not a big, bubbling boil. Cover the pot and cook it for 45-50 minutes, opening it up every 5-10 minutes to stir and prevent anything from burning/sticking to the bottom of the pot.

And that’s it folks. It is that easy. Last step is to remove it from the heat and discard the bay leaves before eating. I like to have this soup with either some crunchy seed crackers, or a nice, fresh piece of crusty bread!

Happy eating.

Instant Pot Bò Kho (Vietnamese Beef Stew)

Bò Kho (Beef Stew)

Prep Time 10 minutes
Cook Time 1 hour
Total Time 1 hour 10 minutes
Course Main Course, Soup
Servings 4 people

Ingredients
  

  • 500 g beef shank (1 lb, but into 1.5cm thick pieces)
  • 1 Tbsp butter
  • 4 garlic cloves (peeled and sliced)
  • 2 small onions (one chopped loosely, one sliced thin)
  • 2 Tbsps Shaoxing/Shao Hsing cooking wine
  • 10 cm piece of ginger (peeled and cut into thick pieces)
  • 5 Tbsps tomato paste
  • 4 bay leaves
  • 4 whole star anise
  • 4 cm cinnamon stick
  • 1 lemongrass stalk (lightly pounded and cut into 1" pieces)
  • 6 cups beef stock (low sodium or unsalted)
  • 2 large carrots (peeled and cut in large pieces)
  • 2 large potatoes (peeled and cut in large pieces)
  • 2 Tbsps fish sauce
  • Fresh basil (for serving)
  • Fresh cilantro (for serving)
  • Fresh lime wedges (for serving)
  • 4 bánh mì (Vietnamese baguettes) (for serving)

Instructions
 

  • Melt the butter in Instant Pot on "Sauté" setting, add pieces of beef shank in batches, browning the pieces, then setting aside. Add garlic and the one onion cut in large pieces, stirring to cook until browned and onion softens. Add Shaoxing and stir. Make a packet using a piece of cheesecloth, and wrap the bay leaves, star anise, cinnamon stick, and lemongrass pieces, tying tightly. Add packet to the pot with the ginger, tomato paste, and stock. Stir well until tomato paste has mostly dissolved. Add carrots and potatoes and place the meat back in the pot, ensuring it is covered in liquid. Close Instant Pot, sealed on "Meat/Stew" setting and cook for 50 minutes. Release pressure, add fish sauce, stirring well. Ladle into bowls and serve with thinly sliced onion, basil, cilantro, lime pieces and baguette.
Keyword Beef, Beef Shank, Soup, Stew, Vietnamese

And now for the details…

This post is an ode to my mother in law. Of the many delicious Chinese and Vietnamese dishes that Mama makes for us, Bò Kho is one of my absolute favourites. And because Mama knows it’s my favourite, she makes it for us fairly often. However, during COVID isolation, we were cut off from Mama and Dad, as they are older and we wanted to make sure they were safe. And not only were we cut off from seeing them in person, we were also cut off from Mama’s delicious cooking! Which meant… I needed to figure out Bò Kho at home. I tried to get this recipe as close as I could to Mama’s, and it’s fairly close, but it’s still not a true replacement for the bowls of love she sends home with us 🙂

This stew is perfect for the type of weather we have outside right now. It’s fall here, and it’s cloudy, raining (oh god, it just started to snow) and there’s a distinct chill in the air, perfect for a nice, warming, well-spiced stew that seems to heat you up from the inside.

I have had different styles of Bò Kho at many different Vietnamese restaurants. The broth will range from thin to thick (the thick being similar to what one would expect from a western style stew), the spice combinations are often slightly different at each one, and the cut of beef used varies from shank to chuck to brisket. My favourite, of course, tends toward the style that Mama makes, which is a thinner (but very flavourful) broth and nice pieces of beef shank.

The shank is an extremely sinewy piece of meat. It comes from the leg of the cow, and because it is such a well-used muscle, it has quite a bit of connective tissue (collagen) marbled in with the meat. If you’re used to your beef being primarily for steaks, you might look at this cut and think “yuck, that is going to be one chewy piece of meat.” But stay with me here, because cooking this connective tissue low and slow (and in liquid) allows it to break down so that is becomes this rich, velvety bite. TBH, I like this cut in the stew for that soft, tender bite, even more so than the meat itself.

Finding beef shank in your local grocery store is likely not going to happen. I found ours at our asian supermarket, but in most western grocery stores, this cut is not frequently found. You can ask the butchers behind the desk to see if they can bring it in for you, or find a local butcher or specialty grocery store to get this cut of meat. This if often sold with the bone-in as well, but I prefer the boneless for this stew. Make sure to cut the pieces across the grain, as shown in the photo above to get the right “bite” once the meat is done cooking.

Let’s get into it, shall we? We start by heating up our Instant Pot to “Sauté” and melt the butter. Cook the beef pieces, turning halfway, to get a nice browned piece of meat. We will be cooking the beef pieces in batches so we don’t overcrowd the pot, setting aside the meat onto a plate after it has browned and adding the next batch. The reason we do not want to overcrowd the pot is we want to brown the meat, and get that richness to add to the stew, rather than the steaming that would result from having too many pieces in the pot. Don’t worry about trying to cook the beef pieces all the way through, we just want them to brown. They will be spending a lot of time in heat with the stew, so we do not need to worry about cooking them through just yet.

Once the pieces of meat have all been browned and set aside, add the garlic and one of the onions (that has been loosely chopped) to the pot. Stir until the garlic has just started to brown and the onion have started to soften. Then add the Shaoxing wine, stirring to help stir up some of the browned bits of meat on the bottom of the pot into the liquid, and cook until the wine is almost fully reduced.

Shaoxing wine is a rice wine originating from the city Shaoxing in China. You will be able to find it in most Chinese markets, or possibly in your own grocery store if you have a decent selection of asian cooking products. If you cannot find it, substitute with dry sherry or Marsala instead. If you want to know more, The Woks of Life blog has a great post about it! And to make it easier, here is a link to their post about Shaoxing Wine 🙂

Next, add the meat pieces back into the pot and pour the broth over top, stirring well to bring up any additional browned bits into the liquid. Beef, chicken, pork, or veal broth can all be used in this case. You can turn the pot off for now, because we are going to get our aromatics ready for the stew. In this recipe, we have quite a few aromatics helping to flavour the broth: star anise, lemongrass, cinnamon, bay leaves and ginger. When you are buying the ingredients for this dish, so not confuse star anise with anise seeds. They are actually from two different plants, and while they are very similar in smell/flavour, star anise is a quarter-sized, star-shaped dried fruit that imparts its flavour to the broth over time, and the recipe would not be quite the same with 5 little anise seeds 🙂

I ended up not wanting to use a whole cinnamon stick for this recipe, so I just snapped a cinnamon stick in half to get the appropriate length.

Because the majority of these aromatics are not something you want to chew and eat once you’re done the stew, I chose to wrap them in a little bundle of cheesecloth so I could easily pick it out once the cooking was done. You can also just add them right into the stew as is, and pick all the bits out later. But I am lazy, and while Mama typically picks these ingredients out for us before serving (yes, we are that spoiled), I wanted to make it as easy as possible to remove them before eating. I cut a 15 cm/6″ piece of cheesecloth and wrapped up the bay leaves, anise, lemongrass and cinnamon stick together, then secured the bundle with a piece of cooking twine. I threw the ginger into the stew on its own, outside of the bundle, because I actually enjoy the bites of ginger pieces. But if you are not interested, you can make a larger cheesecloth bundle and add the ginger in with the rest.

Now’s the time to get that stew cooking! Add that tasty little bundle and the ginger into the pot with everything else. At this time, we are also going to add the tomato paste, stirring well to mix it into the broth, and then the carrots and potatoes. If you want to try something a little different, you can use taro root instead of potatoes. It is a root vegetable very similar to potato in texture, and Mama has used this instead on a number of occasions.

Next, close and seal up your Instant Pot, setting it to “Meat/Stew” setting for 50 minutes. Now, you can always do all of this without an Instant Pot. The sautéing bits would be done on medium-high heat, and at this point, we would turn the heat to a low simmer on the stove (pot covered). But you are going to need to increase the cooking time to at least 3 hours in order to get the flavours to fully meld and for that beef shank to become tender instead of chewy.

Once done cooking, release the pressure and open up that glorious pot of deliciousness. One last thing to do before ladling the soup into bowls: add the fish sauce and stir well. You can always add the fish sauce before closing up and cooking, and still get the umami-hit, but you will lose the complexity and added flavour that the uncooked fish sauce provides.

Serve up the bowls with the fresh basil, cilantro, onion and lime wedges on the side. This allows folks to add however much of these fresh aromatics as they would like (especially the cilantro, since we all know someone out there who can’t stand the taste :P). Dig in, dipping torn pieces of the bánh mì into the broth as you slurp away at the stew. For extra authenticity and to match exactly as Mama serves it, mix together fresh squeezed lemon juice, salt and white pepper in a small, shallow dish and dip the beef into the mix as you eat.

Happy eating.

Creamy Roasted Garlic Soup, the Perfect Appie

Roasted Garlic Soup

Prep Time 10 minutes
Cook Time 1 hour 20 minutes
Total Time 1 hour 30 minutes
Course Appetizer, Side Dish, Soup
Servings 4 people

Ingredients
  

  • 6 garlic bulbs
  • 2 Tbsps olive oil
  • 1 Tbsp butter
  • 1/2 shallot (peeled and minced, can use 1/4 small onion)
  • 1 small potato (peeled and cubed)
  • 4-5 cups chicken or vegetable broth
  • 2 Tbsps brandy
  • 1/4 cup white wine
  • 1 pinch dried tarragon
  • 1/2 cup sour cream
  • 1/2 cup shredded parmesan cheese
  • salt and pepper (to taste)
  • 1/4 cup toasted hazelnuts (crushed into large pieces, for garnish)

Instructions
 

  • Preheat oven to 350ºC/175ºF Set garlic bulbs in aluminum foil or dish with a cover, drizzle with the olive oil. Place in oven and cook for approximately 1 hour. Allow to cool until easily handled. Remove cloves from skin. Melt butter in pot. Add shallots and cook until just softened. Add the potato and garlic, stirring. Add the broth, brandy, wine and tarragon. Bring the soup to a light simmer for 20 minutes. Either blend in pot with a handheld blender, or blend in regular blender in batches, until smooth. Return to pot, add the sour cream and parmesan, stirring in completely. Add salt and pepper to taste. Place in bowls, sprinkle the hazelnuts on top and serve.
Keyword Garlic, Parmesan, Potatoes, Roasted Garlic, Soup

And now for the details…

Hiya folks. Sorry for the huge delay between posting. I’ve ended up with a relapse of my concussion, and as a result have been trying to limit my screen time to reduce my symptoms. Since I do need to stare at a screen all day for my job, the blogging has taken a bit of a backseat of late. BUT! I think things are starting to turn, so I am going to be spending a bit more time putting together posts. I’ve had plenty of time to cook, so I’ve got a lot of content in backlog! I just need to get the stuff I have written down into posts!

With that, let’s talk about today’s recipe. A roasted garlic soup. This luscious, velvety bowl of deliciousness is so comforting and luxurious-feeling with ultimately fairly inexpensive ingredients (minus the booze and nuts). It plates really nicely too, so you can impress your dinner guests by serving this as a beautiful (and delicious) appetizer. Y’know… when we’re able to have dinner guests again (*silent tears*).

To get this recipe started.. we need to roast the garlic. This part is super simple, just place the garlic in some tin foil (or a covered oven-proof dish if you’re not wanting to use foil), drizzle it with the olive oil, seal the package up, and place it in a 350ºF/175ºC oven. If you want to make it easier to access the garlic later, you can cut tops off to expose the very top of the cloves before drizzling with the olive oil, but I don’t really find it all that easier. Bake the garlic for approximately an hour.

When the garlic is cooked, remove from the oven, open the package up and let the garlic cool until cool enough to handle. Then, remove those delicious little nuggets of roasted cloves from the skin and set them aside.

Next, melt the butter in a pot over medium heat, then add the shallot or onion, and stir until just softened. Add the potato, and stir until the potato is coated with the butter. Next, add the garlic, broth, brandy, wine and tarragon, stirring well. In the recipe I suggest adding a pinch of tarragon. For any cooking beginners, you may ask: how much is a pinch? Well, if you were to reach into your spice jar and pinch a small amount of the spice between your index finger and thumb? That’s about a pinch.

Bring the soup up to a light simmer, cover and cook for 20 minutes.

Next is how we get that nice, smooth texture. If you have one, you could use a hand blender to blend the soup right in the pot. I prefer to blend in a blender so the soup is soup-er smooth (yes I did that). If you have a smaller blender, you might have to do this in batches.

Once blended, return the soup to the pot, and add the sour cream and parmesan cheese until fully mixed. Can you use regular cream here? Absolutely. I just didn’t have any and going to get some just doesn’t seem like a necessary trip.

Finally, serve, topping with the hazelnut pieces, a drizzle of olive oil and some parmesan cheese, and serve.

Happy eating.

Instant Pot Tonkotsu Ramen

Instant Pot Tonkotsu Ramen

Umami-rich Ramen Soup, including a broth from scratch, in way less time thanks to the use of the Instant Pot!
Prep Time 15 minutes
Cook Time 3 hours 45 minutes
Total Time 4 hours
Course Main Course, Soup

Ingredients
  

  • 2 pork trotters (split)
  • 2 chicken backs
  • 2 leeks (green ends trimmed off, cut into chunks)
  • 2 shallots (peeled and cut into chunks)
  • 8 cm piece of ginger (peeled and cut into chunks)
  • 4 baby king oyster mushrooms (sliced, or 1 king oyster mushroom, sliced)
  • 600 g pork belly (rolled and tied tightly with kitchen twine)
  • 4 eggs (soft boiled)
  • 400 g fresh ramen noodles
  • 1 cup fresh or frozen corn kernels
  • 4 baby bok choy (leaves separated)
  • 3 green onions (chopped)
  • 2 Tbsps soy sauve
  • 2 Tbsps mirin

Instructions
 

  • Place pig trotters and chicken backs in a pot on stove of boiling water, reduce temperature to simmer. Simmer for a minimum of 10 minutes, skimming off foam as it cooks. Remove trotters and backs, set aside, discard liquid. Pick out any dark or bloody bits from trotters and backs.
  • Place trotters, backs, leeks, shallots, ginger, mushrooms, and pot belly in instant pot. Close pot and cook on "soup/broth" setting for 2.5 hours.
  • Place soy sauce, mirin and 4 Tbsps water in ziplock bag, place eggs in bag, and place in refrigerator, turn occasionally (can be done night before).
  • After 2.5 hours, release pressure and open. Remove belly, wrap tightly in cling film wrap and place in refrigerator. Close Instant Pot back up, set for another 60 minutes on "soup/broth" setting.
  • Once done, release pressure, then strain broth and throw out solids.
  • In separate pot on stove, boil water. Using a small mesh strainer, cook ramen in water until done, remove and strain, and place in bowls. Using same mesh strainer, cook bok choy leaves in same pot of boiling water for 30-60 seconds, strain.
  • Take pork belly from refrigerator, remove cling film and slice thinly. Arrange pork belly, bok choy, corn and green onions in bowl over ramen noodles. Ladle hot broth over other ingredients, top with halved eggs and serve.
Keyword Broth, Egg, Noodles, Pork, Pork Belly, Ramen, Soup, Tonkotsu

And now for the details…

Ramen. Delicious, delicious ramen. Until about a decade ago, I had no idea what real ramen was or could be. Before that, my brain associated the word ramen with Mr. Noodles or Ichiban, and I had no idea that there was so much more that ramen had to offer than instant noodles.

Since then, I have sought out ramen wherever I may roam. My favourite that I have tried so far is from the chain Tenkaippin in Japan. We made return trips to the same restaurant in Kyoto, several years ago. The broth is super flavourful, thick and rich. I have dreams about it even still. This recipe… is not that soup unfortunately. But, it is a nice rich broth that is pretty tasty, if I do say so myself. Cooking for an extended period of time in the Instant Pot is allowing the collagen to release from trotters and chicken backs, providing a thick mouth feel.

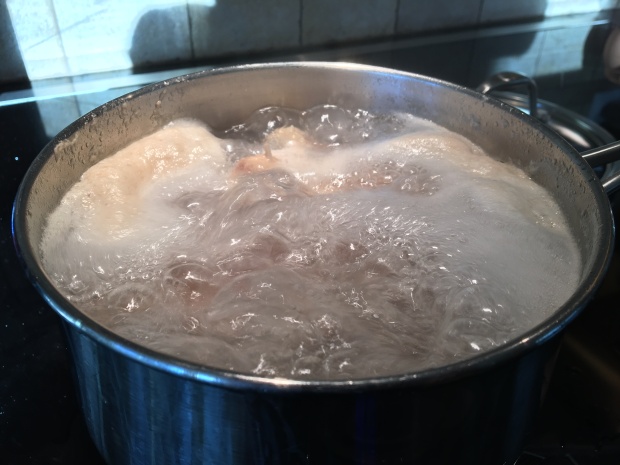
Let’s get started. We will start by “cleaning” the pig trotters and chicken backs. Bring a pot to a rolling boil and add the trotters and backs. Reduce to a simmer and cook for around 10 minutes, skimming off any gunky foam off the top. Once that’s done, dump the liquid. Using a fork, knife, or chopstick, we are going to pick at the trotters and back, removing any darkened bits or pieces that obviously have blood. We are doing this to clean out any bloody bits so we have a nice clear broth, rather than a skanky, cloudy, dark broth.

That icky looking foam is what you skim off and dispose of…

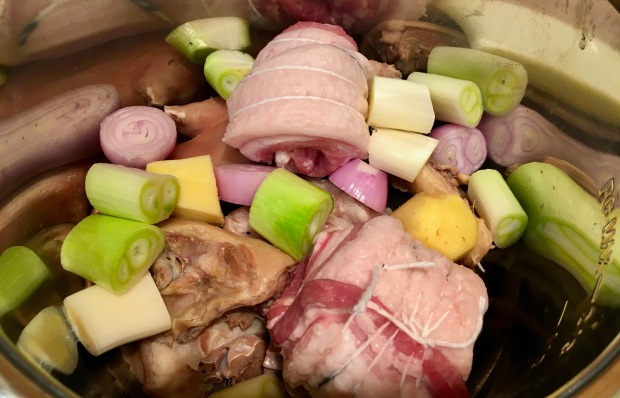
Once cleaned, place the trotters and backs in your instant pot. Stack in the leeks, shallots, ginger, and mushrooms. We are also going to roll the pork belly pieces and tie them tight with butchers twine, and place that in the pot with everything else.

Fill the pot with water up to the “MAX” line, and then close the pot, ensuring it is in the “Sealing” position and set for 2.5 hours on the “Soup/Broth” setting.

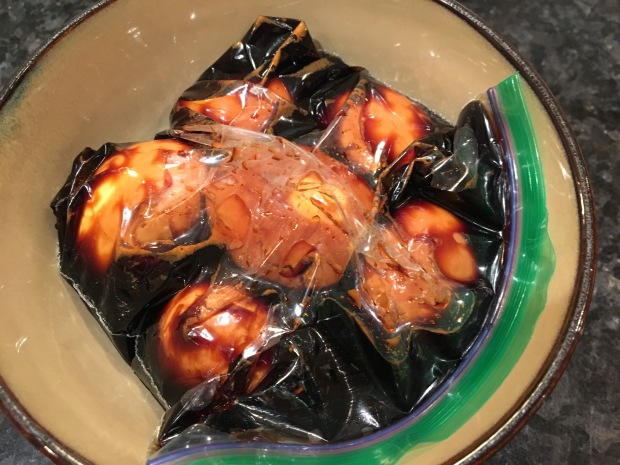
While the broth is cooking, we’ll set the eggs to marinating. We are making ajitsuke tamago, or seasoned eggs, to add to the ramen later. Mix the soy sauce, mirin, and 4 tablespoons of water in a ziplock bag, and then place your soft boiled eggs inside (need a refresher on how to soft boil an egg? Directions are included in this recipe). Close the ziplock up tight so as little air as possible is left inside, and then place in the fridge. Turn them around after an hour or two so they marinate evenly on all sides.

After 2.5 hours of cooking, release the pressure from the pot, and open ‘er up. Remove the pork belly, then close the pot back up, including resetting to “Sealing” position and set the pot back to “Soup/Broth” setting and cook again for 60 minutes. Wrap the pork belly tightly in cling wrap, and place in the refrigerator. The pork belly is more than cooked by now, and chilling the belly will allow us to cut it nice and thin to place in the bowl later.

Once the broth is done, strain it into a container, and discard any solids. I like using cheese cloth to help with the straining to get rid of any small, gritty bits.

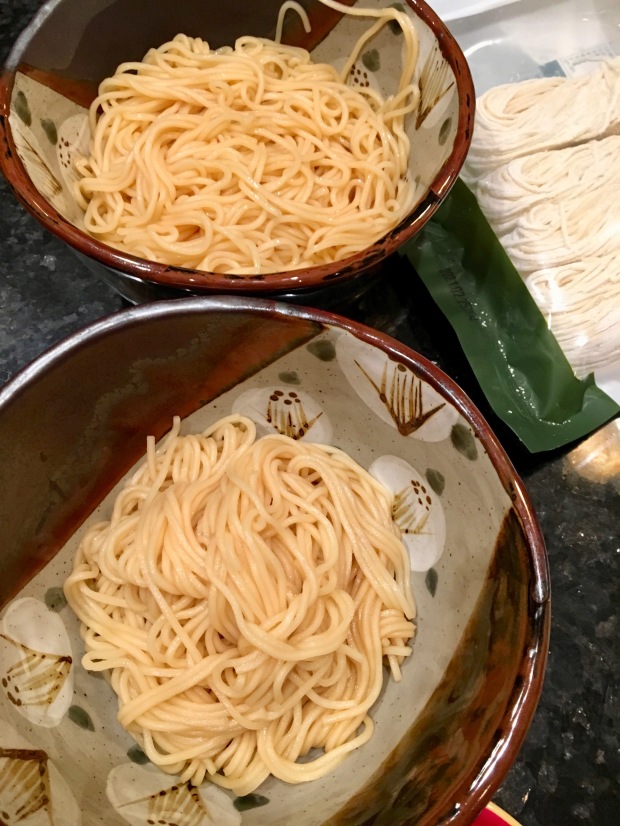
Time to get everything ready. Boil water in a pot, and place the ramen noodles in a wire mesh strainer. Dip the strainer into the pot to cook the noodles, and when done, drain the noodles and place in the bottom of a large bowl.

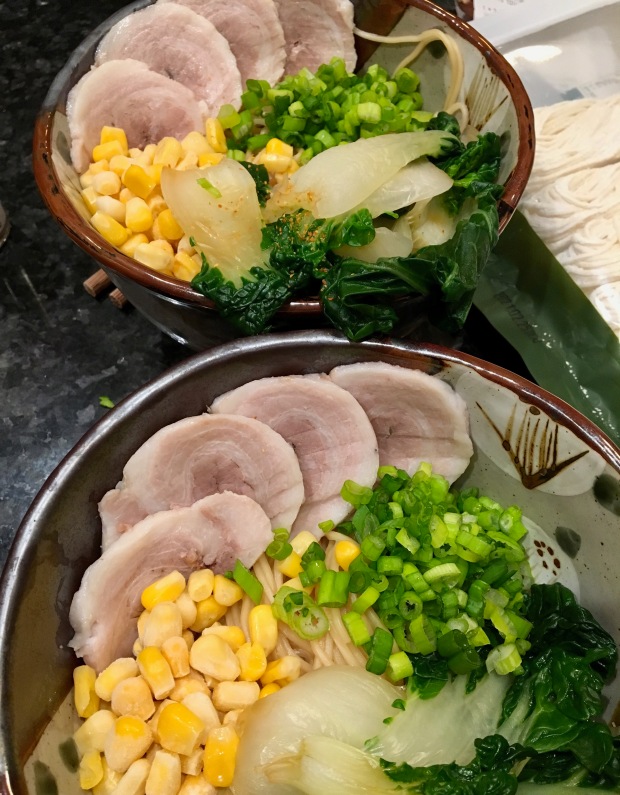
Using the same strainer and boiling water, cook the bok choy until the leave just turn vibrant green. Place the boy choy, green onions, and corn into the bowl. Remove the pork belly from the fridge, and take out of the cling wrap. Slice the pork belly thinly and place in the ramen bowl.

Finish the soup off by taking the eggs out of the marinating liquid, cutting in half, and placing in the bowl. Ladle the still-hot broth over the soup contents, and serve immediately. Enjoy immediately!

Happy eating.

Tom Yum Kai Soup (Thai Chicken Spicy and Sour Soup)

Tom Yum Kai Soup

An easy-to-make, spicy, lemongrass flavoured chicken soup, great for a chilly day or when recovering from a cold!
Prep Time 10 minutes
Cook Time 10 minutes
Course Soup
Servings 2 people

Ingredients
  

  • 1 chicken breast (boneless, skinless, cut into 5mm or 1/4" thick slices)
  • 4 cups chicken broth
  • 4 cups water
  • 2.5 cm piece of ginger or galangal (1" piece, peeled and sliced into thick pieces)
  • 2 stalks lemongrass (cut into 2cm or 3/4" pieces)
  • 2 makrut lime leaves (optional)
  • 1 garlic cloves (minced)
  • 1-2 Tbsps fish sauce
  • 2 Tbsps sambal olek
  • 1/2 Tbsp sugar (optional)
  • 8 button mushrooms (quartered)
  • 1 medium tomato (cut into wedges, or 10 cherry tomatoes, halved)
  • 1/2 lime (cut into wedges)

Instructions
 

  • Place the stock and water in a heavy bottomed pot. Heat until it starts to simmer. Add ginger/galangal, lemongrass, and lime leaves, cooking for about 5 minutes. Add fish sauce, sambal olek, and sugar. Cook for 2-3 minutes. Add chicken and mushrooms. Cook for 3 minutes. Add tomatoes. Cook until chicken is cooked through. Serve immediately with lime wedges.
Keyword Chicken, Ginger, Lemongrass, Spicy

And now for the details…

When I’m feeling under the weather, or feeling chilled and want something to stoke that internal fire to feel warmed up, this soup is immediately what I crave. It’s got the warm comfort of a chicken soup, with the spicy bite from the sambal olek and ginger, and a tart or sour note thanks to the lime juice, lemongrass and tomatoes.

I have a few ingredients in here that I have noted as optional, as they do add to the flavour of the soup, but are not critical. Especially the makrut lime leaves, which can often be a challenge to find in some western markets. While the additional of the lime leaves adds a certain floral note and emphasizes the citrus notes, it is not hypercritical if you have a hard time tracking them down.

Let’s get to cooking.

Before we go anywhere, get all the ingredients ready to go. Wash, slice, cut and mince everything and have it next to you at the stove, because the time between additions to the soup are relatively short, which is great because it means we get to eating that much faster!

A tip for the lemongrass: tap it up and down its length with the dull side of your knife. This will help to release some of the oils to make your soup that much more fragrant.

A tip for the chicken: if cutting it thinly is a challenge, try placing the piece of chicken breast in the freezer for 5-10 minutes. It will not freeze completely, but will chill up enough that it is easier to handle while you are cutting. Because we are cutting it so thin, this extra chill to the chicken will not result in any extended cook time.

We start everything off by adding the broth and water into a pot and setting them to medium-high heat on the stove. Heat until the liquid starts to simmer, then reduce to just above medium heat.

Next, add the lemongrass, ginger and lime leaves. Before adding the lime leaves, give them a light squish between your hands; this will help release the oils and allow them to impart more flavour.

Cover the pot and let this simmer for about 5 minutes. Add the fish sauce, sambal olek and sugar (if you are using the sugar). And allow everything to simmer for another 2-3 minutes.

Next, we add the chicken and mushrooms. Yes, I know that the dishwasher will likely sanitize the cutting board and I do not need to be so anal retentive about using multiple boards, but I am just too cautious when it comes to cross contamination.

Let the soup come back up to a simmer, and then cover and cook for about 3 minutes.

Our final addition are the tomatoes. Whether you use a large tomatoes and cut it into wedges, or simply slice up some baby tomatoes, it is really about preference and what you have on hand. Add the tomatoes and stir them in, then simmer everything for another 2-3 minutes, or until the chicken is fully cooked and the tomatoes have softened slightly.

Serve immediately with chopped cilantro and green onions and enjoy that heart-warming deliciousness!

Happy eating.

Pork Kimchi Stew (Kimchi Jjigae)

Kimchi Jjigae

A Korean stew made using Kimchi, pork belly and tofu
Cook Time 30 minutes
Total Time 30 minutes
Course Main Course, Soup

Ingredients
  

  • 700 g pork belly (1.5 lbs, cut in small slices)
  • 300 g kimchi (2/3 lbs, chopped loosely)
  • 1 garlic clove
  • 2 Tbsps soy sauce (dark)
  • 1 Tbsp mirin
  • 2 Tbsps gochujang
  • 3 cups chicken or pork broth
  • 2 cups water
  • 1 bunch green onions (cut into 1" pieces)
  • 1 package shimeji mushrooms (trimmed)
  • 1/2 package medium tofu (~170g, sliced)
  • 2 tsp butter

Instructions
 

  • Sauté the pork on medium-high heat until browned. Add the chopped kimchi, reserving the kimchi liquid, and stir regularly until kimchi is heated fully. Add the water and broth. Add the soy sauce, mirin,  gochujang, and kimchi liquid. Stir and cook until the stew starts to simmer. Stir in the shredded garlic. Add the mushroom and the green onions, stirring to mix. Lay the tofu across the top of the stew, spooning some of the stew over the tofu to coat. Cover the soup and cook for 5-10 minutes or until the mushrooms and tofu are cooked through. Spoon the stew into bowls and drop about 1 tsp of butter on the top of each bowl. Serve with a side bowl of cooked white rice.
Keyword Kimchi, Pork, Stew, Tofu

And now for the details…

I know what you must be thinking… ummm… Emily, I didn’t realize you were Korean…? No, no I am not. And what do I know about authentic Korean cooking? Not much at all, except that what Korean food I have eaten is delicious and I will do what I can to recreate it. Particularly this stew. This stew was love at first bite when I tried it at Ogam Chicken. It has all the things you could hope for in a stew. The flavour is a mouth-watering combination of salty, umami-rich, spicy, and tangy. With the little chunks of pork, kimchi, and tofu, this stew is also quite hearty. Pair it with a bowl of white rice and it is pure magic.

Eating kimchi jjigae in restaurants, you often get it served in a hot stone bowl called a dolsot. I do have a dolsot that I received as a gift. But alas, I still have not used it, as it does not work so well (i.e. at all) on an induction stove. I will need to get myself a hot plate to resolve this issue! Until then, a heavy bottomed pot will need to do the job.

Cooking with new ingredients is always both scary and exciting. There were a number of ingredients in this recipe that I had never used for cooking until I made this stew the first time.

Gochujang, which is a chilli paste, was a brand new ingredient for me the first time I made jjigae. I find it more earthy than spicy, although it definitely does provide some heat. It’s a deep, rich red and has an almost smoky yet sweet quality to it that really deepens the flavour of the dish.

Kimchi itself was something I had eaten on a number occasions, but had never cooked with at home. My favourite is baechu kimchi, which is made from the whole Napa cabbage. Luckily, it is usually the easiest to find in stores as well. Kimchi can be quite different brand-to-brand, and the store I get my ingredients from also does some fresh house-made kimchi as well. They will vary in the level of tartness, saltiness, and spiciness, which will change the way the stew ultimately tastes. Play around with the different kinds to find one you enjoy.

Let’s get to cooking.

Start by preparing your ingredients. Cut the green onions into 1″ pieces and set them aside. Take the kimchi out of its liquid, allowing most of the liquid to drain back into its container (set the liquid aside, we will be using that!), and chop the kimchi roughly to get some bite-sized pieced. Set the kimchi aside. Trim the mushrooms and set them aside. I use shimeji mushrooms because I enjoy them so much, but if you prefer white or brown button mushrooms, simply cut them into quarters or halves, depending on the size of the mushrooms (cut them into 1/8th’s if they are really big). Slice the tofu into 5-6mm (~1/4″) slices and set aside. Lastly, cut the pork belly into small, bite-sized slices.

We start by cooking the pork belly. Many recipes will call to add the pork belly to the broth once it is prepared, but I like cooking the pork first, getting a nice build up of the pork fat as it renders, and caramelizing the meat slightly. Add the pork belly to your pot with the heat set at medium-high. Sauté until the meat has cooked through almost completely and has started to brown. Stir this regularly, as I find the pork belly will try to stick to the bottom of the pot. If there is an large amount of fat pooling in the bottom of the pot, drain some, but keep the majority of the fat in the pot.

Once the pork belly is cooked through, add the kimchi to the pot, stirring regularly until any liquid that remained with the kimchi has cooked off and the kimchi is heated all the way through.

Next we start to add our liquid. Add the broth and the water, stirring while paying particular attention to the bottom of the pot to help stir in any of the caramelized pork that may have stuck to the bottom of the pot. Then, add the soy sauce, mirin and gochujang. Add a tablespoon or two of the kimchi liquid into the pot and allow everything to heat up until the stew starts to simmer.

Taste test the broth at this point to see if it is meeting your taste preference. Add more kimchi liquid if you want to increase the spiciness, saltiness and tartness of the broth. Now is also the point when you will add the shredded garlic to the stew. Lower the temperature to about medium or medium-low.

Next, add your mushrooms and green onions, and stir them into the broth. Then lay the tofu across the top, and spoon some of the broth over the tofu to coat it. I forgot to buy tofu the first time I made this for photos, so please excuse the, er, temporary costume (i.e. pot) change in this next photo.

Cover the pot an allow the stew to… well… stew… for about 8-10 minutes. You’ll know it’s done when the tofu is heated through completely and everything is a nice, bubbly container of deliciousness.

Finally, we eat. Spoon the stew out into bowls, top with about 1 tsp of butter per bowl, and serve on its own or with a small bowl of cooked white rice.

Happy eating.

Ukrainian Instant Pot Beet Borscht, just like Grandma used to make

Ukrainian Beet Borscht

Prep Time 15 minutes
Cook Time 15 minutes
Total Time 30 minutes
Course Main Course, Soup

Ingredients
  

  • 1 small onion (shredded)
  • 6 small red beets (peeled and shredded)
  • 4 medium carrots (peeled and shredded)
  • 4 fingerling potatoes (roughly chopped)
  • 4 garlic cloves (peeled and minced)
  • 6 cups chicken or vegetable broth
  • 1 can tomato paste
  • 2 Tbsps dried dill
  • 3 bay leaves
  • 1 Tbsp olive oil
  • salt and pepper (to taste)

Instructions
 

  • Peel and shred the veggies, either in a food processor, or using a grater.
  • Add the olive oil to the instant pot on Sauté setting. Add the onions, garlic and carrots, sautéing until the carrots start to soften. Add the rest of the ingredients, stirring well.
  • Set pot on Soup/Broth setting and cook on pressure for 10 minutes.
  • Serve with fresh dill and sour cream.
Keyword Beets, Instant Pot, Soup, Vegetables, Vegetarian

And now for the details…

My family on both sides have always had a focus around food. Since I was a little girl, I remember all getting together for big family meals, cracking out some snack or recently baked good when someone would come to visit, and most importantly to me, often cooking or baking together. I must have been so annoying to my mom, grandmas and aunties, because from a young age “I help too” was a common phrase coming out of my mouth, quickly followed by the screech of the kitchen chair legs against the floor as I insistently dragged it over to the counter to stand higher and “help”.

One of the people I would insist regularly on “helping” was my Grandma on my dad’s side. Since my Grandma was Ukrainian, this resulted in me learning to make foods like perogies, periski, holupchi, or borscht. And as the weather turns cooler and root vegetables are readily available now that it is officially fall, my craving for borscht peaks at an all-time high. Even though this classifies as a soup, I feel as though borscht should be more of a stew. Hearty, rich, and hitting the spot on a cool fall day. The addition of the potatoes gives a nice thick broth, and the deep, earthiness and sweetness of the beets gets elevated with the herbaceousness of the dill and the zing of the tomato paste. Admittedly, my Grandma’s borscht was a bit more on the “soup” side of things, but the main thing I did pick up from her, and I hold tight to, was on her being quite adamant that borscht should not contain cabbage. Cooked cabbage… is not my cup of tea. Let’s be frank people, it smells like farts. And so, zero cabbage in this recipe. Is it un-Ukrainian? Possibly. But since I learned this from my Grandma, I’m going to claim a certain level of authenticity!

For this recipe, we are making it in the Instant Pot. You can always make this exact same recipe in a regular pot, it will just need to cook on the stove on medium-low heat for much longer (about 5 times as long).

Let’s start by prepping our veggies. I used a food processor to shred all my veggies. You can always use a hand grater instead. Peel the carrots, onion, and beets first. Then shred the carrots and onion. Remove them from the processor into the pot, and do the beets next. We are doing these all separately so we can sauté the other veggies without the beets, as a sort of mirepoix, without the celery. Mince your garlic and add it to the pot as well. Add a splash of olive oil, set the pot to “Sauté” (medium high on a pot on the stove), and cook the veggies, stirring occasionally, until the carrots start to soften and the garlic and onions are fragrant.

While those veggies are cooking, peel and diced your potatoes. Once they are ready, add the potatoes and beets to the pot, and the broth (chicken for Grandma’s, vegetable if you are going vegetarian with your borscht) and stir well, mixing everything all together.

Add the last few ingredients to the pot, give it one last stir to mix everything in, especially the tomato paste, and the cover your pot and set to “Soup/Broth” setting, with pressure on. If no Instant Pot, turn the temperature down to medium-low temperature. We are going to cook here for 10 minutes in the Instant Pot, or 50-60 minutes on the stove, stirring occasionally if on the stove.

Once the cooking time is done, give the borscht one last stir, then serve in bowls. You can serve just like this, or if you’d like to go the way I had it at Grandma’s, add a dollop of sour cream and stir it in before your first big, soul-warming bite.

Happy eating.