Breakfast Biscuit-Style Cinnamon Rolls with Raisins and Pecans

Biscuit-Style Cinnamon Rolls

Prep Time 20 minutes
Cook Time 20 minutes
Course Bread, Breakfast, Snack
Servings 12 buns

Ingredients
  

  • 2 cups flour (all-purpose)
  • 2 Tbsps sugar
  • 4 tsps baking powder
  • 1 tsp kosher salt
  • 1/4 cup cold butter
  • 1/3 cup room-temperature butter
  • 1 cup whole milk
  • 1 cup brown sugar
  • 1 Tbsp cinnamon
  • 1/3 cup raisins (optional)
  • 1/4 cup toasted pecan pieces (optional)

Instructions
 

  • Preheat oven to 400ºF/205ºC Blend the flour, granulated sugar, baking powder, and salt. Cut in the 1/4 cup cold butter. Add the milk and stir until just combined. Let sit in fridge while making the filling. Mix together the 1/3 cup softened butter, brown sugar and cinnamon until formed into a paste. Take the dough out of the fridge, roll out on a floured surface to a rectangle approximately 12"/30cm by 18"/46cm. Grease a 12 cup muffin tin well. Place approximately 1/2-1 tsp of the filling into the base of each cup of the muffin tin. Spread the remaining filling over the rectangle of dough. If using, sprinkle raisins and pecans over the topping. Roll the dough from the long edge up, so you end up with a 18"/46cm roll. Cut the roll into 12. Place the rolls, with a cut side down, into the prepared muffin tin. Bake for 20 minutes, or until the buns are golden brown. Let cool 5 minutes, then remove from tin. Serve.
Keyword Baking, Biscuits, Buns, Cinnamon

And now for the details…

Howdy folks! Admittedly, this one is not my recipe. It’s a recipe I had gotten from my mom, and she has been making it since I was a kid. My parents were in to visit this past weekend and I asked her the origin of the recipe, since all I have is a recipe card I diligently copied years ago from hers when I moved away. Turns out, this is a recipe from Canadian Living magazine that my mom found years ago (it was when I was a kid, so I’m not going to talk about just how long ago… just… it’s been awhile.)

Do you have cinnamon bun fanatics in your home? These rolls are not quite the same as a cinnamon bun, since the leavening agent here is baking powder instead of yeast, and you won’t get that same fluffy texture. But to be honest, I prefer these rolls over yeast cinnamon buns any day. Yeast cinnamon buns remind a little bit of the texture of pancakes or French toast. Particularly the middle of the bun, where it’s kinda doughy and if it’s had time to sit in the moist filling, it almost gets a little soggy… no thank you, no thank you! Biscuit cinnamon rolls are still a little soft in the middle, but they’ve got this crispiness going on around the edges, and the filling caramelizes a bit since the rolls are cooked apart in separate baking tin cups. MmmmmmmmMMMMmmmmm…

So let’s get to cooking, shall we? First off? Preheat that oven to 400ºF/205ºC!

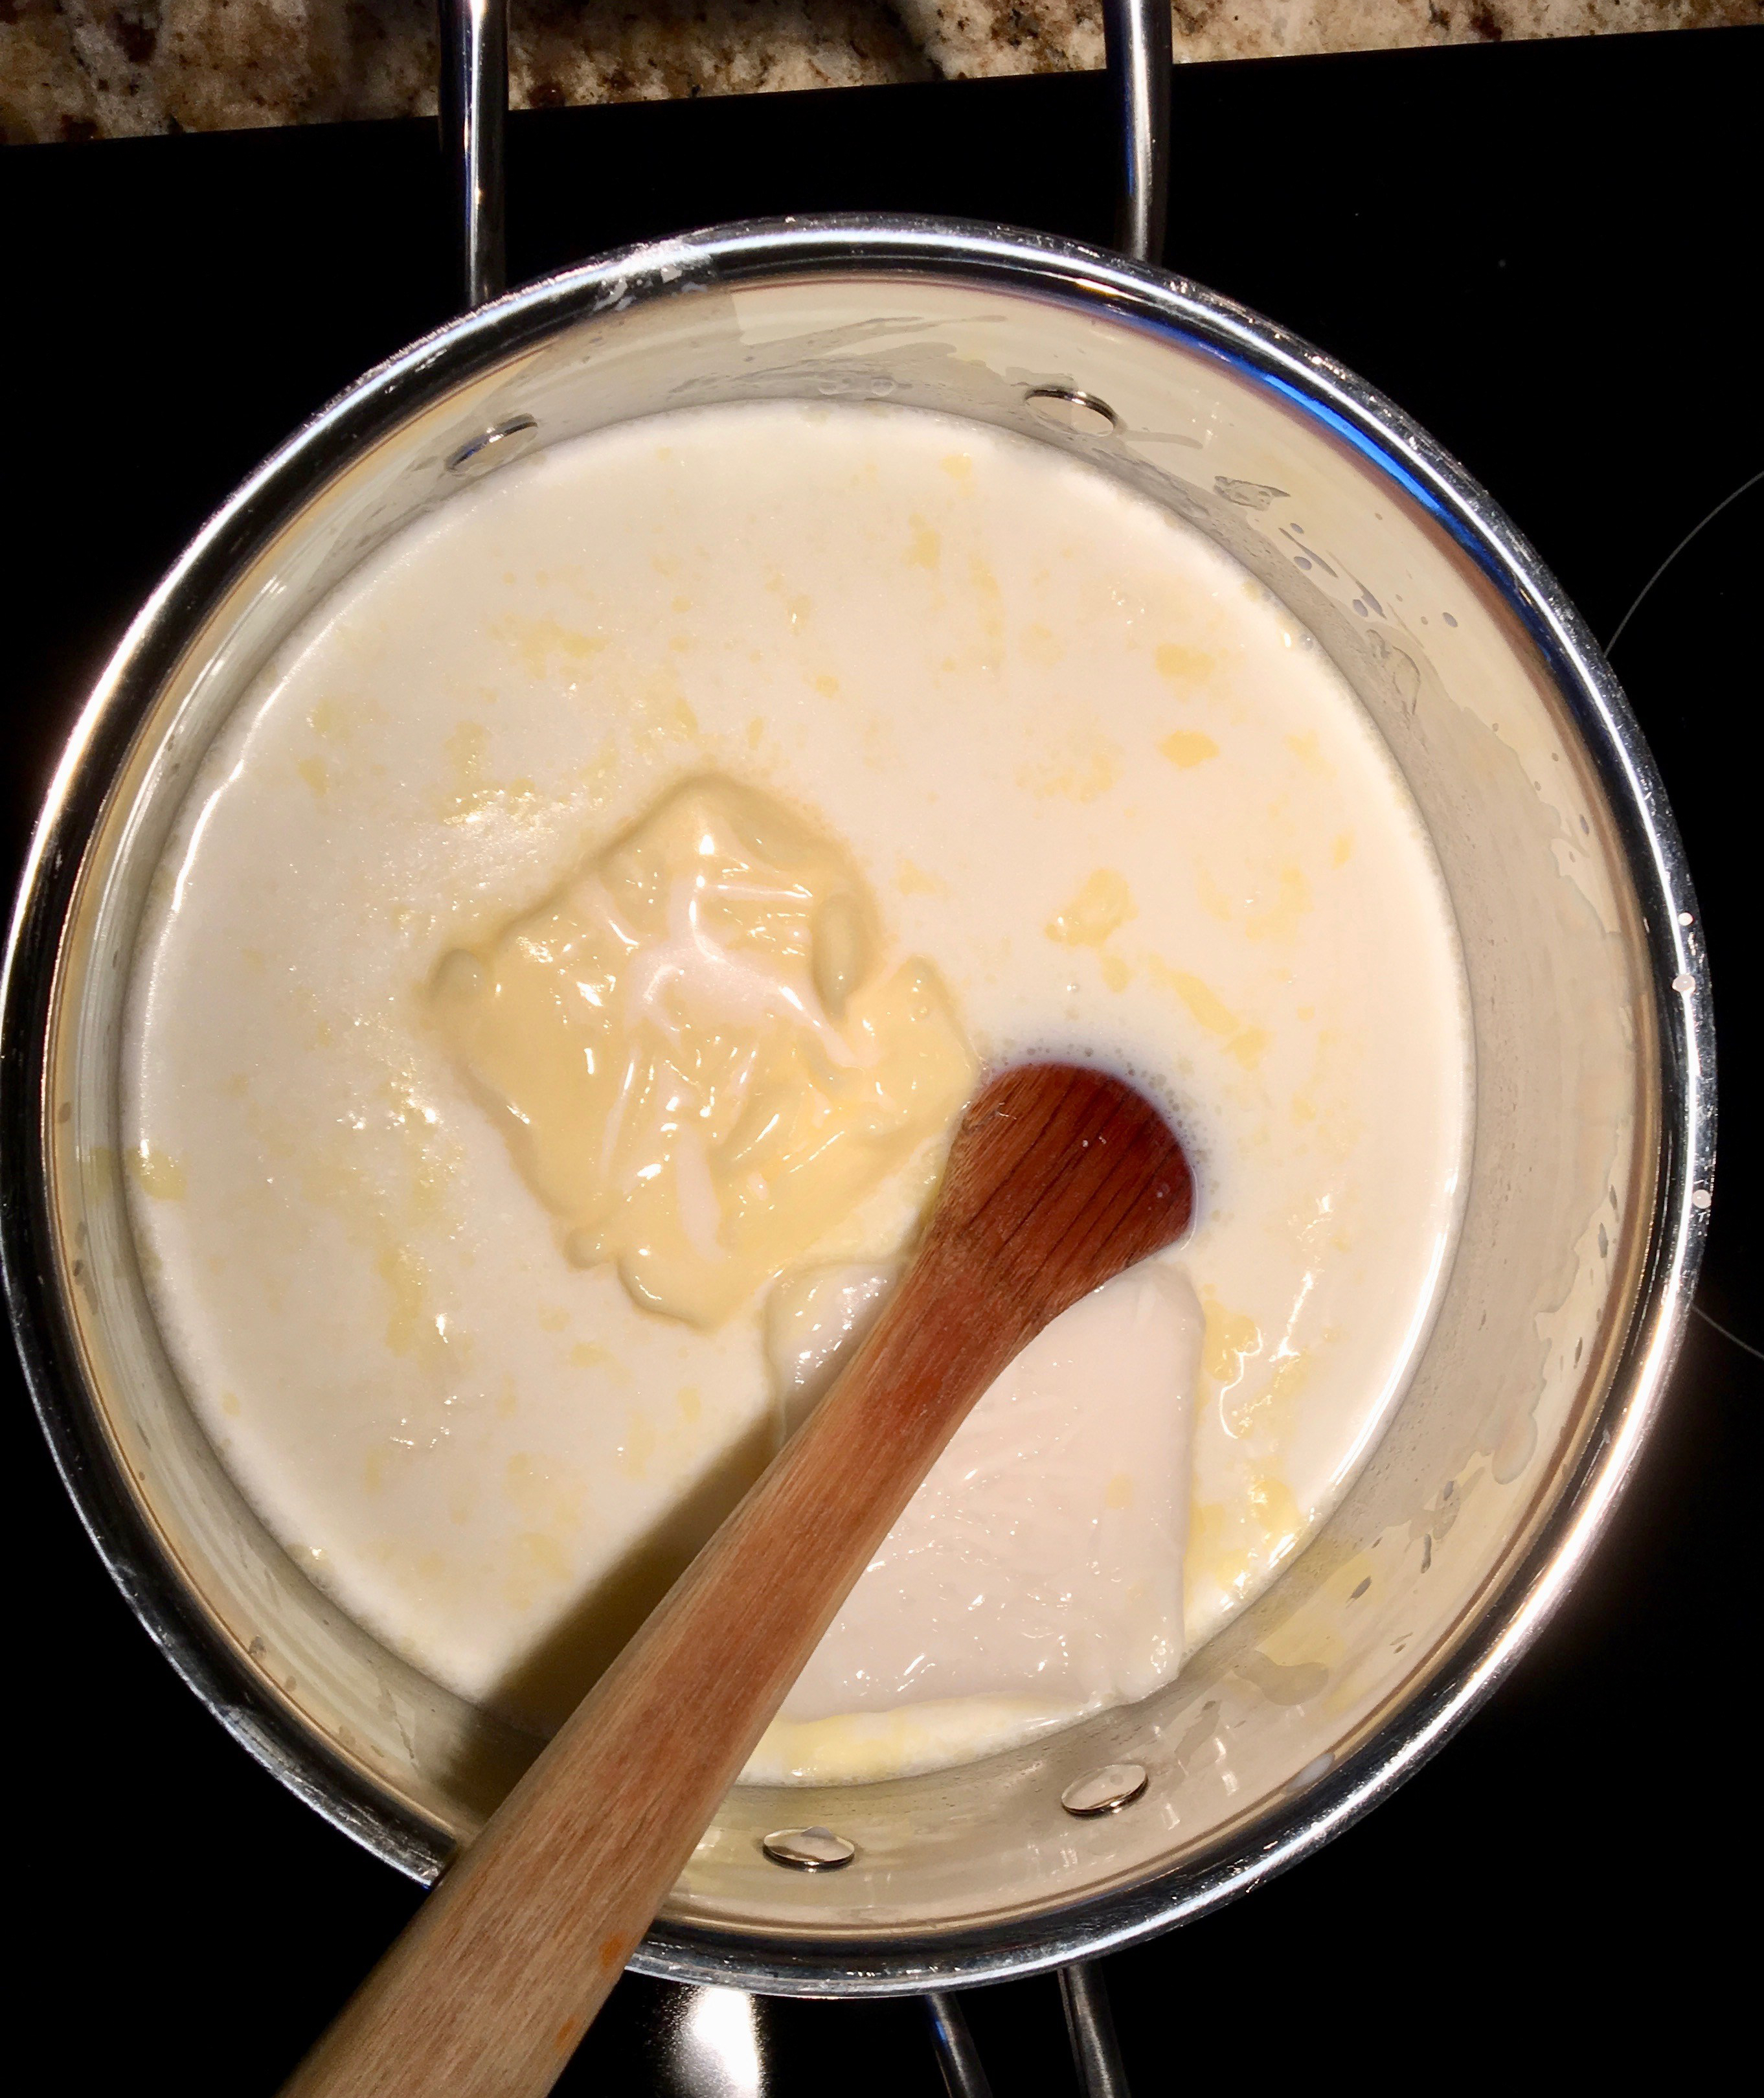
We start with the dough. Mix/sift together the dry ingredients for the dough (flour, granulated sugar, baking powder, kosher salt). You can use regular salt here, in fact, I think that’s what the original recipe calls for, but I liked the idea of using kosher salt so you would get occasional bites of the salty bits, giving the buns an almost salted caramel type flavour. Once the dry ingredients are mixed together, cut the cold butter (1/4 cup worth) in, using a pastry blender or knives. You can do all of this in a food processor too, which will make it even easier! Cut the butter in until its down to about pea-sized pieces. Next, we add the milk. Mix it in just until the dough has formed up. We don’t want to mix too long or the dough will get tough. Set the dough aside, maybe even sticking it into the fridge, while you get the filling ready.

To get the filling ready, we are going to smush together the softened butter (1/3 cup), brown sugar, and cinnamon. Get it mixed all nicely together so it’s a smooth paste. Before it makes its way into the cinnamon rolls, we’re going to prep the muffin tins by greasing them well (or not at all if you’re using silicone tins; man, I love this muffin tin!) and then dropping about 1/2-1 teaspoon of the filling into the bottom of each cup. This is going to give us that gooey, but crispy bottom for each roll.

Next step is to get those rolls ready! Flour the surface of your kitchen counter quite well so the dough does not stick. Roll out the dough so it becomes a rectangle about 12″/30cm by 18″/46cm. It does not need to be perfect, just an approximation of a rectangle of that size. The dough should be about 1/2″/1cm thick. I just used my fingers to pat and flatten out the dough, but you could also use a rolling pin if you’d like. As you flatten it out, lift each corner occasionally to make sure there is enough flour underneath that the dough will not end up sticking to the counter.

Once the dough is the right size/shape, smear the topping over the dough, trying to get close to the edges and corners. If you are using them, add the raisins and pecans by sprinkling them over the topping. I polled on the Instagram to see what the consensus was on raisins vs. none, and wow, I was not expecting so many folks to be anti-raisin! I was assuming 50/50, but it ended up being closer to 70% of folks who would prefer no raisins! Since I was making these primarily for my dad while he was visiting, the raisins stayed 😉

Next, we roll these up and get them ready for baking! Roll the dough from the long edge up, so that the roll ends up being about 18″/46cm long. If parts of it are sticking, pull them up lightly, and if there is a LOT of flour as you roll, dust it off onto the counter as you roll. Once rolled, let the seam come to the bottom, and then cut the roll into 12 pieces. I find the easiest way to get a somewhat consistent set of pieces is to cut the roll in half first, cut each of the halves in three, then cut each of those pieces in two.

Finally, place each of the pieces into cups of the muffin tins, with the cut sides facing down and up, and bake for 15-25 minutes, or until the rolls are a nice golden brown.

Once they are done, let them cool for about 5 minutes, then remove them from the tins while they are still warm. If you leave them too long, and they cool completely, the bottom, caramel-like middles will harden, and they will be very hard to remove from the tin.

Finally, serve!

Happy eating.

Grilled and Garlic-filled Eggplant (Aubergine) Bruschetta

Eggplant Bruschetta

Prep Time 20 minutes
Cook Time 20 minutes
Course Appetizer, Snack

Ingredients
  

  • 1 medium sized eggplant/aubergine
  • 2 garlic cloves (peeled and shredded)
  • 10 cherry tomatoes (cut into 1/8ths)
  • 1/4 cup basil (chopped)
  • 2 Tbsps olive oil
  • 1/8 tsp smoked paprika
  • 1 tsp balsamic vinegar
  • salt and pepper (to taste)
  • Baguettes or crostini (to serve)

Instructions
 

  • Preheat the grill to medium-high heat (~400ºF/205ºC). Poke holes in eggplant skin, using a toothpick or skewer. Place eggplant on grill, and cook for 15-20 minutes, turning every few minutes, until eggplant skin has been blackened and eggplant is soft.
  • Remove eggplant to a strainer and allow to cool and any liquid to drain out while cooling.
  • Add the shredded garlic, tomatoes, basil, olive oil, and paprika to a bowl and stir.
  • Once the eggplant has cooled, remove and discard the skin. Cut the eggplant in quarters and place back int the strainer to drain for 5 more minutes. Slice the eggplant into small pieces, and add to the bowl with the tomato mixture. Stir, then season with salt and pepper to taste. Serve with pieces of baguette or crostini.
Keyword Aubergine, BBQ, Bruschetta, Eggplant, Grill

And now for the details…

Oh the eggplant. Also know as aubergine and brinjal in different parts of the globe, this piece of produce is used in a variety of ways, all over the world. Some of us know this “vegetable” (it is actually technically a berry) as the emoji symbol that represents… not… culinary activities… But despite its phallic representation in more recent media, I have a more romantic view of this produce. Not that kind of romance…

Eggplants have such a variety of possibilities when it comes to cooking. Because they are fairly flavourless, but absorb flavours so well, they have an ability to be incorporated into so many different dishes in many different ways. The can be the star of a dish and be served up, lightly dressed, all on their own, or they can be added into sauces, curries, dips, soups, stir fries, and the list goes on…

The fruit itself has such an unusual look and texture. The skin is such a deep, vibrant, shiny purple, and then by contrast, the flesh is a bright, stark, and matte white. Add in the bright green foliage, and the fruit presents its own, unique colour palette.

While it is beautiful to look at, raw eggplant is a bit unpleasant to consume. It’s astringent, and has a weird, spongy texture. However, once cooked, eggplant loses a lot of the tannin-like taste, and the texture instead becomes soft and silken. We are going to use that to add a different textural “bite” to the bruschetta topping in this recipe.

Let’s get to cooking.

Start by preheating your grill. Set it to medium-high heat, so that the temperature will sit around 400ºF/205ºC.

Before we place the eggplant on the grill, we are going to poke holes through the skin all over the eggplant. This will allow the heat to get into the eggplant a bit more thoroughly, and provide a means for the water trapped inside to escape while the eggplant is cooking. You can use a skewer, toothpick, or even a fork to do this. Try to get a fairly consistent pattern of holes all the way around the eggplant, and they can be spaced about 2cm apart.

We are going to place the eggplant on the grill, and cook it for 15-20 minutes, turning every couple minutes to get the char and cook consistent around the whole fruit. Timing will depend on your grill (and its temperature consistency) and the size of eggplant you are cooking. The goal is for the skin to partially char the entire way around, and for the flesh to have cooked all the way through. How do you tell if it is cooked all the way through? You can make a good assumption that once it has gone from being plump skin and is springy to the touch to shrivelled skin and feels squishy that you have reached your end point. The photo below shows the eggplant when it has first started cooking versus the halfway cooking point. While the skin is shrivelled in the photo on the right, the flesh was still a bit springy when pushed, and so the eggplant was not quite done cooking yet.

Once the eggplant is done, remove from the grill, and place in a wire mesh strainer and allow the liquid to drain from the eggplant as it cools. We are allowing this drainage to happen for a couple reasons, one being that we do not want to bruschetta to have all that liquid… it will turn our bread into a soggy mess. And the second reason is that the liquid has a lot of that astringent/bitter taste, and we want to to drain that off. Now, admittedly, from what I understand, eggplant nowadays are not nearly as bitter as they used to be, and the draining is not as necessary as it once was, but there’s still reason number 1, so just let that sucker drain.

And now you have an… *ahem* flaccid… eggplant… Our next step will be to remove the skin and cut the flesh into little pieces. Thanks to all that cooking, the skin should peel off very easily. Cut the top off, and then peel and discard the skin. Cut the eggplant flesh into four pieces, and place back into the strainer to drain for a few more minutes while you prepare the rest of the bruschetta.

Cut the tomatoes into small pieces. Roma or beefsteak tomatoes can be used instead of cherry tomatoes; I used the cherry tomatoes because they were what I had available. Regardless of what kind of tomato you used, it should be about 1/2-3/4 cup of tomato pieces once they’re all cut up. Place the tomatoes, basil, shredded garlic, smoked paprika, and olive oil into a bowl, and mix well.

Finally, bring the eggplant back to the cutting board, and cut it into small pieces, about 1cm in size. Mix the eggplant in with the other ingredients, and add salt and pepper to taste.

To serve, you can either split the topping between the bread or crostini and serve, or you can bring the bowl to the table and allow folks to scoop their preferred amount of topping onto their own bread or crostini. Technically, to be a true bruschetta, the bread should be toasted or grilled in some way, but I got super lazy with this one, and instead I just tore a few pieces of fresh, crispy baguette and in half, and scooped the bruschetta topping right onto the bread pieces and sprinkled with a little Maldon salt. It was delicious.

Happy eating.

My Grandma’s Paska (Ukrainian Easter Sweet Bread)

Paska (Ukrainian Easter Bread)

Prep Time 5 hours
Cook Time 45 minutes
Total Time 5 hours 45 minutes
Course Bread, Breakfast
Servings 6 loaves

Ingredients
  

  • 1/3 cup sugar (plus 1 tsp)
  • 1 cup water (lukewarm)
  • 1 package instant yeast (approx. 2 + 1/4 tsps)
  • 3 cups scalded whole milk
  • 13-15 cups flour
  • 6 eggs (beaten)
  • 1/2 cup butter (melted, plus 2 Tbsps)
  • 1 Tbsp salt
  • 2 cups raisins (sultanas recommended)

Instructions
 

  • Preheat oven to 350ºF/175ºC. Dissolve 1 teaspoon of sugar in water, sprinkle yeast over top and let stand for 10 minutes. Combine bloomed yeast with milk and 5 cups flour. Beat well until smooth. Cover and let rise in warm place until light and bubbly (~5 minutes). Add eggs, sugar, 1/2 cup butter, and salt. Mix thoroughly. Stir in enough flour to make a dough that is neither too soft or too stiff. Let rise for 60 minutes. Turn on to a floured surface and knead for 5-10 minutes, mixing the raisins into the dough. Place back in bowl and let rise for 1 hour, until doubled in bulk. Divide and shape into loaves. Place in greased loaf pans, let rise for 1 hour until doubles in bulk. Bake 30-45 minutes until golden brown. Serve.
Keyword Bread, Raisins, Ukrainian Food

And now for the details…

This recipe is directly out of my grandma’s recipe box. Every year around Easter, she would make multiple loaves, and send several home with each of us. Easter weekend just doesn’t seem quite the same without toasted paska slices, smeared with lots of butter, served with some slices of old cheddar. Seriously, it makes me drool just thinking about it.

What is paska, you may ask? It’s a sweet bread, typical of many Eastern European countries, served on Easter Day, often after is has been blessed at church. Different folks will do different things with the paska dough. And this isn’t even different countries, but different families may have traditions that alter from family to family. Some will braid it or form it into ornaments, and some may add things like custards, sprinkled sugar, seeds, or raisins. For us? There was never any braiding, it was always simple loaves, and it was always with raisins.

Most paskas have their primary ingredients as milk, eggs, flour and butter. Because of the added fat in the dough from the milk, butter and egg yolks, the texture of the bread is fluffier and more “crumby” than a typical white bread, as the fats inhibit the formation of gluten chains. And with the addition of slightly more sugar than a typical bread dough, paska is fairly sweet, but not cake sweet. It is similar in flavour and texture to brioche or challah.

Let get to cooking. I was a bit worried about this batch… because of COVID, apparently lots of people are baking bread right now, and there was zero yeast left at all three stores I either visited or called. The only yeast I had in the house was stuffed at the back of the pantry and had an expiry date of 2016. Yikes. But… it’s all I had, so away we went.

Mix the 1 tsp of sugar into the lukewarm water and stir to dissolve. Sprinkle the yeast overtop, and let the yeast sit, to allow it to bloom, for about 10 minutes.

While you are waiting for the yeast, scald the milk and let it cool to lukewarm. What does scalding the milk mean? Place it in a pot and heat it up until it just starts to bubble and let off steam (it will get that “milk scum” formation on top). Why scald the milk? I have no idea. I’m venturing to guess that this is recipe that has been passed down a few hands/generations, and scalding the milk was needed because milk was not necessarily pasteurized when this recipe was first created… but… it’s the recipe, so I’m following it as taught by Grandma.

Once the milk has cooled to lukewarm, and the yeast has bloomed, add the milk and yeast mixture to 5 cups of flour. Mix thoroughly.

The dough at this point will be very soft and sticky. Let it rest in a warm place for about 5 minutes, until light and bubbly.

Next, add the beaten eggs, the rest of the sugar, 1/2 cup of melted butter, and salt. Mix thoroughly. The dough will be almost liquidy at this point, more like a batter than a dough.

To get it looking more like a dough, now is when we start to mix the rest of the flour in. Mix it in 1-2 cups at a time, fully mixing the flour into the dough between each additions. After the first few additions, the dough will become too thick to mix with the spoon, start kneading the flour in with your hands at this point. Stir in enough flour to make a dough that is neither too soft or too stiff. It should be a bit tacky, but doesn’t stick to your hands when you pull away.

Cover the dough with a tea towel and set it in a warm place to rise for an hour.

After the dough has risen, turn it out onto a floured surface, and knead the dough for 5-10 minutes until it is smooth and satiny (grandma’s word, seriously, it was on the recipe that I copied from her), and knead the raisins into the dough.

Place the dough back into the bowl, cover, and let it rise again for another hour or until the dough has doubled in bulk.

Divide the dough and shape it into loaves. Place the loaves into greased loaf pans, and let them rise another hour, until they have doubled again.

Preheat the oven to 350ºF/175ºC. Once the dough has risen in the pans, brush the tops with the remaining melted butter, and place them into the preheated oven for 30-45 minutes, or until the bread is golden brown.

Remove the loaves from the pans to allow them to cool. Or! Even better, cut into the bread while it’s still warm, slather with butter, and enjoy!

Happy eating.

BSTH Sandwich (Bacon, Spinach, Tomato and Honey)

BSTH Sandwich

Prep Time 5 minutes
Cook Time 10 minutes
Total Time 15 minutes
Course Main Course
Servings 2 people

Ingredients
  

  • 4 slices bread
  • 8 slices bacon
  • 2 small tomatoes (or 8 cherry tomatoes)
  • 2 Tbsps mayonnaise
  • 8-12 leaves spinach
  • 2 Tbsps liquid honey
  • salt and pepper (to taste)

Instructions
 

  • Cook bacon in a large pan to desired level of doneness. Set aside and drain most bacon fat.
  • Keep some fat in pan and toast the bread in the pan.
  • Put mayo on two of the slices. Place bacon, spinach and tomatoes. Drizzle with honey. Add salt and pepper to taste. Top with other slice of bread. Serve.
Keyword Bacon, Honey, Sandwich, Spinach, Tomatoes

And now for the details…

Okay, so yes, this a pretty simple recipe. But… well… it was delicious. And… I have limited resources to work with 😛

We’re into day four of quarantine, and day three of recipe challenge. Today’s recipe is nice and easy. Rather than a BLT, because… well… I had no lettuce… I decided instead to go off-script and go for a BST, since I did have spinach. And then I thought… can I do something even more different? And realized I had some liquid honey in the pantry that would be a great complement the tartness of the tomatoes and the saltiness of the bacon.

And so, the BSTH was born!

I don’t know that I would recommend urban dictionary-ing BSTH… it is not the “theme” I am going for here… *eep*

Let’s get to cooking.

To start out, we will be cooking out bacon. Cook in a large pan on medium-high heat, and transfer the bacon to a paper towel-lined plate.

Drain most of the bacon fat from the pan, but leave some. This is what we are going to use to toast our bread. On medium high heat, smear the the bread pieces into the bacon fat so they soak up some of it up, then let them toast on both sides to a nice golden brown.

Remove the bread pieces to plates. Spread the mayo on one piece of the bread. We will use the mayo as glue to stick the spinach in place. Place several of the leaves of spinach on the bread.

Add the bacon, and then place the tomato pieces on top. I did not have regular tomatoes here. Again, quarantine mystery box was my source, and there were only cherry tomatoes available to me. There were a few bigger ones that I sliced to be able to fit the sandwich, and they worked really well, actually, but small to medium tomatoes would probably fit a little better.

To finish this sandwich off, drizzle the liquid honey over your ingredients, and then top with the other slice of bread.

I served this sandwich with some delicious chips that I’d procured from Urban Grub a few weeks ago, before we were travelling, that were delicious with this meal. The flavour I had purchased was “Mmmm, tastes like roast chicken” and they were indeed pretty “Mmmm”-worthy.

Serve your sandwich with your side of choice, or on its own, and enjoy.

Happy eating.

Cocoa Butter Banana Bread with Chocolate Chunks and Pecans

Cocoa Butter Banana Bread

Prep Time 30 minutes
Cook Time 2 hours 15 minutes
Course Breakfast, Dessert
Servings 1 loaf

Ingredients
  

  • 2 ripe bananas
  • 1/2 cup cocoa butter (melted)
  • 2 eggs
  • 1/3 cup whole milk
  • 1 cup vanilla sugar
  • 1 tsp vanilla
  • 2 cups flour (pastry or all-purpose)
  • 1 tsp baking soda
  • 1 tsp baking powder
  • 1/4 cup ground flax
  • 1 tsp salt
  • 1 cup dark chocolate (broken into small pieces)
  • 1 cup pecans (chopped)

Instructions
 

  • Mash the bananas with a fork until mostly smooth. Mix the melted cocoa butter, bananas, eggs, milk, sugar, and vanilla. 
  • Sift together the flour, baking soda, and baking powder, then stir in the flax and salt. 
  • Stir together the dry and wet ingredients until the dry ingredients have just been moistened. Stir in the chocolate and pecans, then pour into a prepared 5"x9" loaf pan. 
  • Bake for 75 minutes at 325ºF until a toothpick inserted in the middle of the loaf comes out clean.
Keyword Banana, Banana Bread, Chocolate, Cocoa Butter, Loaf

And now for the details…

Before getting into the full story, I should probably mention that this banana loaf was much more in the crumby cake side of texture as opposed to the more typical ultra moist banana bread. This is a texture I prefer, but if you like the super smooshy type of banana bread, this is not the loaf for you.

As far as where my inspiration came from, it was from, as usual, meandering around my grocery store. I randomly found some raw cocoa butter on sale. I stood in front of the shelf for quite awhile with the bag in my hand. What was I going to use it for? No idea. It’s supposed to be really good for you. But what are these purported health benefits of this fat compared to most others? And how would I use it? I think I melt it down as a fat replacement in meals? Surely I can figure something out. Hadn’t I heard of people putting it into smoothies at the very least? If I used it for cooking, would it make everything taste like chocolate? But most importantly it’s on sale… how could I say no?

Well, I took it home… and it sat sad and lonely in my pantry closet for months. So yeah, it was on sale, and I bought it, and then I almost forgot about the gorram thing.

So months went by and one day I had some uber ripe bananas that clearly needed a home in a baked good. Which I suppose is not saying a lot for me… once a banana has one brown spot on it, it’s too ripe for fresh eating, and is officially a baking banana. I do thoroughly enjoy me some banana baked goods, however, and a good banana bread is a pretty delicious snacking option. And then, I remembered *ba-ba-da-baaaaaa* cocoa butter! Now could be its big break!

Looking into the cocoa butter since I bought it, the health benefits that I’d thought I’d heard or read about seemed… weak. Does it provide a good fat source for folks functioning off a keto diet? It sure does… like pretty much any fat source out there. Is it quite high in phytosterols, which have claim to lowering LDL cholesterol? Yes it is… like many vegetable oils. But… I don’t follow a keto diet, and while I try to maintain an overall healthy and balanced diet, phytosterol intake is not something I am monitoring. Sure hope this stuff is delicious, cause that’s the main thing I am now focused on. Worse case, I suppose, I could slather it on my body instead and have an expensive, but delicious smelling moisturizer!

Let’s get to cooking.

My mistake when making this was to start with mashing the bananas. What I really should have started with was getting the melting process of the cocoa butter going. Cocoa butter is clearly a winner from a shelf stability perspective. It’s melting point is higher than coconut oil or butter, and it takes quite bit longer to melt down to a useable liquid than most other fat options I have used. One of my favourite parts, though: when a little bit of the melted butter smashed onto my hands while stirring, and I rubbed it into my skin instead of wiping it off. Seriously, great moisturizer if nothing else.

Before we get to the next step, preheat the oven to 325ºF.

Once you have the butter melted and the bananas mashed, mix the two together, than add in the eggs, milk, sugar, and vanilla. I used vanilla sugar in the recipe, which I have in my pantry by throwing a used vanilla pod into some sugar in a hermetic glass jar in the pantry. Regular sugar would do just just fine, just increase your vanilla addition to about 1.5 teaspoons.

In a separate bowl, mix together the flour, baking powder, baking soda, flax, and salt. You can buy flax pre-ground, but I buy the flax whole and grind it just before you use it. I have a separate coffee grinder that I keep specifically for grinding seeds and spices, which I used to grind the flax.

Next, mix the dry and wet ingredients until they are just combined. Next is to add the chocolate and pecans, and stir into the batter until fairly evenly mixed in.

Grease the loaf pan, and line it with parchment paper. Turn the batter out into the prepared pan, and place into the preheated oven. Bake for around 75 minutes, or until a toothpick inserted in the loaf comes out clean.

Remove the pan from the oven, let it cool, then cut and enjoy!

Happy eating.

First post… Whew. Perisky, here we come.

Sauerkraut Perisky

A recipe from my Ukrainian grandma: little buns that can be stuffed with sauerkraut, meat or stewed fruits.
Prep Time 4 hours
Cook Time 20 minutes
Proofing Time 2 hours
Course Side Dish
Servings 5 dozen buns

Ingredients
  

Perisky Dough

  • 1 cup warm water
  • 4 tsp sugar
  • 3 Tbsp fast rising yeast
  • 1 cup butter Split into 1/2 cup + 1/2 cup
  • 1/2 cup lard
  • 1 Tbsp salt
  • 5 cups milk whole
  • 1 egg
  • 12-14 cups flour

Sauerkraut Stuffing

  • 1 onion medium, sliced
  • 2 Tbsps butter
  • 1 800mL jar sauerkraut drained
  • fresh ground pepper to taste

Instructions
 

Perisky Dough and Assembly (Stuffing Instructions to Follow)

  • Mix together the water, sugar and yeast, and let sit.
  • Warm 1/2 cup of the butter, the lard and milk together in a saucepan just until the butter and lard have melted, do not overheat.
  • Combine the milk mixture and the yeast mixture in a very large bowl. Then mix in 8 cups of the flour. Cover and allow to rise in a relatively warm location for approximately 2 hours.
  • After the dough has risen, mix in the salt and egg.
  • Heavily flour your clean counter surface with remaining flour. Starting kneading the flour into the dough, adding more flour to the mixture as needed, until the dough no longer sticks to the counter surface. Transfer the dough back to a bowl, cover, and let rest for a minimum of 15 minutes.
  • Preheat oven to 400ºF and get the filling ready (recipe below) while waiting for the dough.
  • Punch down the dough. Pinch off a small piece of dough. Roll into a ball, then flatten into a disk. Fill with 1-2 tsp. of your filling, then gather and pinch your dough together to close. Lay the perisky sealed-side-down on a baking sheet. Bake for 15-20 or until golden brown. Melt 1/2 cup of butter, and brush buns with butter as soon as they come out of the oven.

Perisky Sauerkraut Stuffing

  • In a large sturdy pan, sauté the onion in the butter until caramelized. Add the sauerkraut, and cook until fully heated. Add fresh coarsely ground pepper to taste.
Keyword Baking, Buns, Perisky, Sauerkraut, Ukrainian Food

And now for the details…

I recently lost my grandma and have become extremely nostalgic for the things that remind me of her. A significant amount of my memories with my grandma take place either in her kitchen or her garden. This recipe touches on both, since, although I am suggesting using bought sauerkraut, Grandma would make the sauerkraut with cabbage from her garden. She would shred the veggie, salt it heavily to get the water to release, then put it in the basement to ferment. My grandma was the OG of the reuse movement: a large, diligently cleaned KFC bucket was the vessel of choice for this undertaking. Once emptied, the bucket was cleaned back up, and put into storage for the next time. You may note that the only two ingredients Grandma used were cabbage and salt. It is the reason I’ve suggested avoiding wine sauerkraut. It has a different flavour than a sauerkraut that only contains cabbage and salt, and wouldn’t taste nearly the same as Grandma’s 🙂

Perisky were often made for special occasions. I remember having them frequently at the big baby or wedding showers that would be held for extended family or friends of the family in local community halls across southern Manitoba. Finger sandwiches, pickles, veggies and dainties (***see note on dainties) were already on the table, but the headliner was when baskets of hot perisky were brought out out from the kitchen to signal the start of the meal.

***Dainty: noun plural dainties; Manitobism; any cookie, square, cake or other form of sweet deliciousness, placed on plates as a random assortment for sweet tooth consumption. Often placed in muffin cups prior to plating, to make them prettier (which I like to call “daintifying”). A great visual example can be found here, courtesy of Goodies Bake Shop.

A quick note on pronunciation. Despite the spelling, we never pronounced it “per-riss-kee”. The “r” is a hard roll of the tongue, almost coming out as a “d”, and the “y” at the end is more of a shortened “eh” sounds, kinda like you would use for “meh.” Also, the “s” is a “sh”, so in all you get something that sounds like “ped-ish-keh”. Isn’t learning fun?

Okay, enough background information, let’s get to the cooking.

We are going to start by mixing the yeast with sugar and water to feed our little yeasties so they will give us delicious bread. While waiting for the yeasties to eat their breakfast, we heat our milk, lard and butter. Keep the temp low-to-mid, so we allow the fats to melt more slowly, without scorching the milk. The fats in this dough recipe will hinder the gluten from getting too long, resulting in a fairly crumby (not crummy!) bread, almost pastry-like.

Melting our fats in milk

After we have fully melted the fats in the milk, mix it together with the yeast solution and dry ingredients (minus some of the flour). The result should be an incredibly soft, almost liquid, dough that we let sit in the bowl in a warm place for 2 hours to do its first rise. If you are going to cover the dough (which is a good idea to keep it from forming a dry crust on top), make sure there is PLENTY of room in the bowl for the dough to rise, otherwise you’ll end up with a sticky mess adhered to whatever you’ve used to cover it with (learned from experience? …maybe…)

First rise

After the yeasties have finished their lunch and the dough has risen, we will use some of the leftover flour to thoroughly cover the countertop and then turn the dough out onto the flour.

Soft gooey dough ready for kneading

We mix the flour into the dough through kneading, adding more flour as we go, until the dough no longer sticks to the counter. The dough will be extremely soft and sticky to start, but as we knead in more flour, the dough will form up.

Dough ready for one last rest before forming our perisky

Let the dough rest, covered, one more time. While we wait, we’ll make the filling. If you are fast with your filling, make sure you let the dough rest for at least 15 minutes before you start assembly.

In a pan, melt the butter, then add the sliced onions, and cook slow over medium heat to caramelize to a nice golden brown.

Not a lot smells better than onions getting toasty brown in butter…

When the onions are ready, we add the sauerkraut. If you’ve chosen to use a wine or vinegar sauerkraut, you will likely need to drain the kraut first, but I find most of the salt-based krauts have very little liquid in the jar and can be added directly to the pan. We sauté the kraut and onions until any liquid that did exist has evaporated, then add some nice coarse black pepper to taste preference. Now is a good time to preheat the oven (400ºF).

Tasting just a little bit will be necessary to ensure quality, right?

Now we are ready to assemble! Punch down the dough, and then pinch off a small portion for your first bun. The amount you pinch off should about 50% to 75% of the size you want your buns to be. You might need to flour your fingers a little bit to make the dough easy to work with. With a light touch, roll the dough into a ball, then flatten into a pancake.

Add 1-2 tsp of your filling to the centre of the dough, and pinch the outsides together to form the bun. I’ve found it easiest to use a fork for sauerkraut, and twirl the fork in the sauerkraut like you would with spaghetti to get a nice dense little filling piece to pinch around.

Once we’ve pinched the dough into a little bun, we place the bun sealed-side down on a cookie sheet. We will continue stuffing until we’ve filled the sheet, and then place in the oven. My original recipe said 12-15 minutes, but I’ve found it typically takes 15-20 minutes for the perisky to reach the right amount of golden. Why the extra cooking time? Am I making the perisky too big? I might be. My grandma had opinions on the sizes… I think it had to do with the care and time involved, but my grandma usually made her perisky, perogies and holupchi quite small, and anything that was too big was considered poorer quality… eek.

Once golden, pull the perisky out of the oven and brush some melted butter (salt it, if it is unsalted butter) and let cool. You’re ready to eat! Careful! The insides will be steaming hot!

As an end note, you can fill the perisky with all kinds of different fillings. I had more dough than sauerkraut filling (I only made a single recipe of the sauerkraut filling), so also I made a thick applesauce with crabapples, butter, sugar and cinnamon and filled the rest of the dough with that. My dad also has memories of one of his aunt filling them with stewed dates, and a friend of mine had a family member who would fill them with a bacon and ham filling, which I feel I will need to try and recreate at some point because that sounds amazing. The possibilities are endless!

I’m excited to start this cooking adventure with you all, stay tuned for more posts!