My Grandma’s Paska (Ukrainian Easter Sweet Bread)

Paska (Ukrainian Easter Bread)

Prep Time 5 hours
Cook Time 45 minutes
Total Time 5 hours 45 minutes
Course Bread, Breakfast
Servings 6 loaves

Ingredients
  

  • 1/3 cup sugar (plus 1 tsp)
  • 1 cup water (lukewarm)
  • 1 package instant yeast (approx. 2 + 1/4 tsps)
  • 3 cups scalded whole milk
  • 13-15 cups flour
  • 6 eggs (beaten)
  • 1/2 cup butter (melted, plus 2 Tbsps)
  • 1 Tbsp salt
  • 2 cups raisins (sultanas recommended)

Instructions
 

  • Preheat oven to 350ºF/175ºC. Dissolve 1 teaspoon of sugar in water, sprinkle yeast over top and let stand for 10 minutes. Combine bloomed yeast with milk and 5 cups flour. Beat well until smooth. Cover and let rise in warm place until light and bubbly (~5 minutes). Add eggs, sugar, 1/2 cup butter, and salt. Mix thoroughly. Stir in enough flour to make a dough that is neither too soft or too stiff. Let rise for 60 minutes. Turn on to a floured surface and knead for 5-10 minutes, mixing the raisins into the dough. Place back in bowl and let rise for 1 hour, until doubled in bulk. Divide and shape into loaves. Place in greased loaf pans, let rise for 1 hour until doubles in bulk. Bake 30-45 minutes until golden brown. Serve.
Keyword Bread, Raisins, Ukrainian Food

And now for the details…

This recipe is directly out of my grandma’s recipe box. Every year around Easter, she would make multiple loaves, and send several home with each of us. Easter weekend just doesn’t seem quite the same without toasted paska slices, smeared with lots of butter, served with some slices of old cheddar. Seriously, it makes me drool just thinking about it.

What is paska, you may ask? It’s a sweet bread, typical of many Eastern European countries, served on Easter Day, often after is has been blessed at church. Different folks will do different things with the paska dough. And this isn’t even different countries, but different families may have traditions that alter from family to family. Some will braid it or form it into ornaments, and some may add things like custards, sprinkled sugar, seeds, or raisins. For us? There was never any braiding, it was always simple loaves, and it was always with raisins.

Most paskas have their primary ingredients as milk, eggs, flour and butter. Because of the added fat in the dough from the milk, butter and egg yolks, the texture of the bread is fluffier and more “crumby” than a typical white bread, as the fats inhibit the formation of gluten chains. And with the addition of slightly more sugar than a typical bread dough, paska is fairly sweet, but not cake sweet. It is similar in flavour and texture to brioche or challah.

Let get to cooking. I was a bit worried about this batch… because of COVID, apparently lots of people are baking bread right now, and there was zero yeast left at all three stores I either visited or called. The only yeast I had in the house was stuffed at the back of the pantry and had an expiry date of 2016. Yikes. But… it’s all I had, so away we went.

Mix the 1 tsp of sugar into the lukewarm water and stir to dissolve. Sprinkle the yeast overtop, and let the yeast sit, to allow it to bloom, for about 10 minutes.

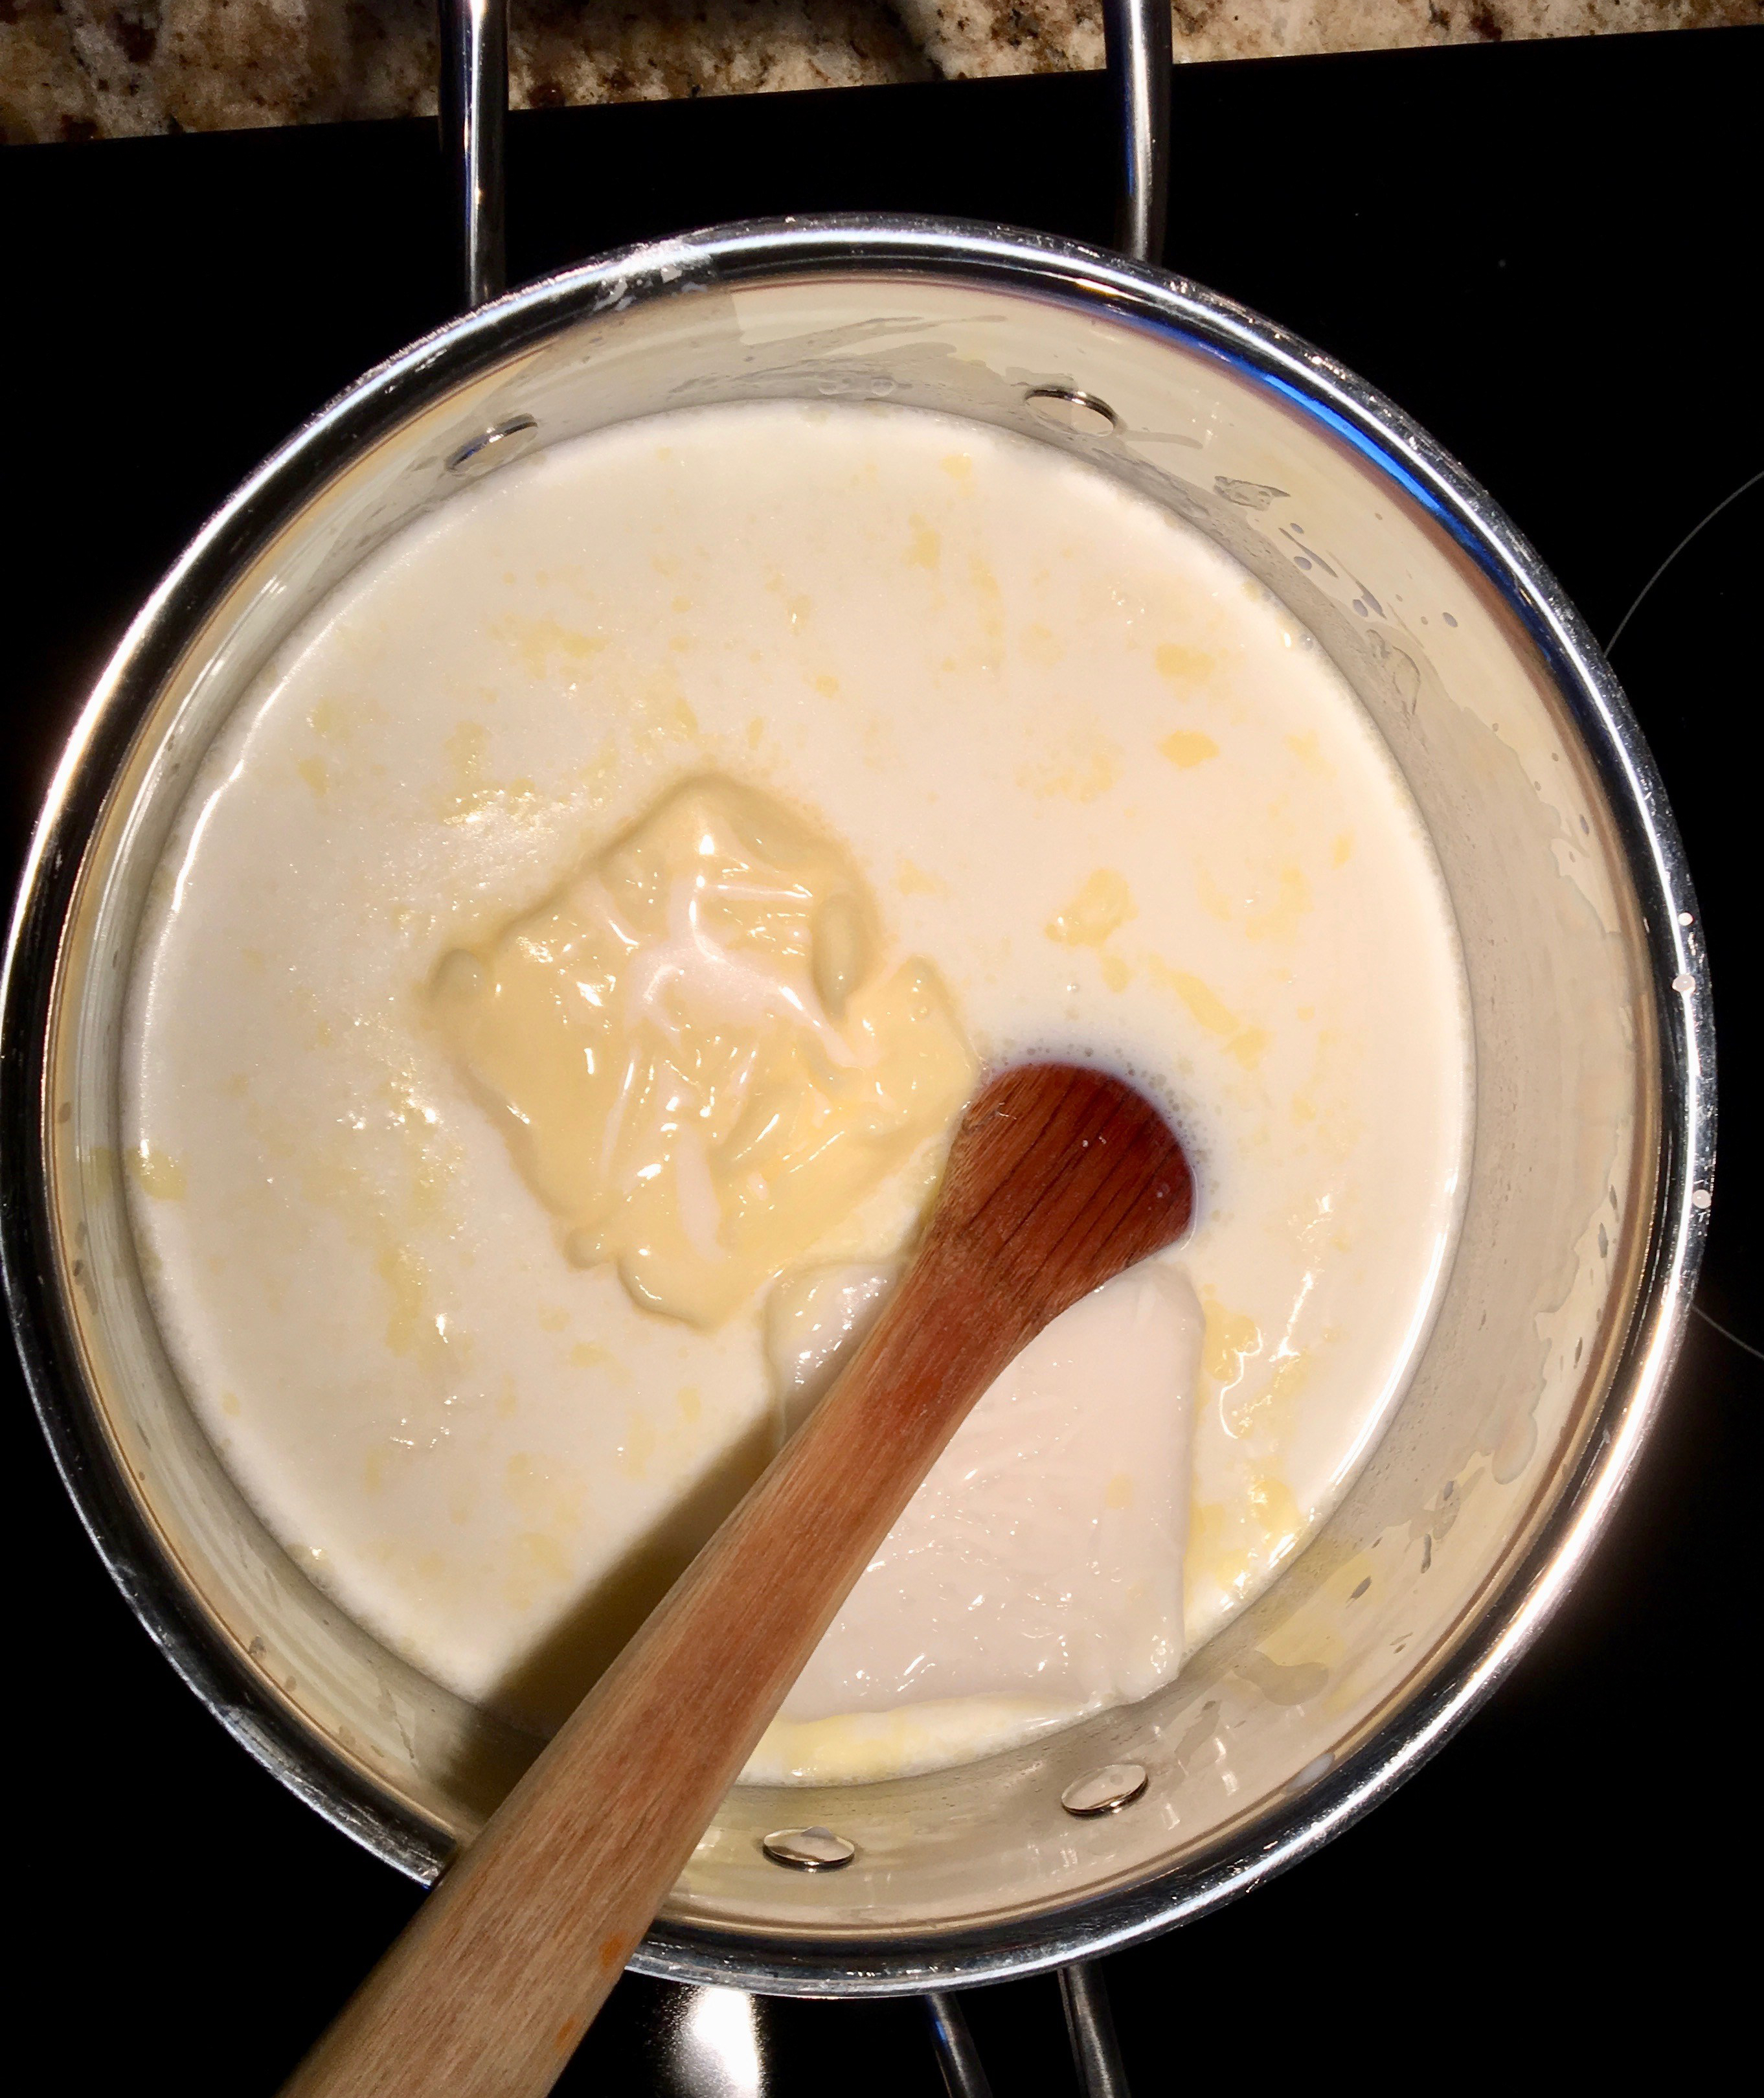
While you are waiting for the yeast, scald the milk and let it cool to lukewarm. What does scalding the milk mean? Place it in a pot and heat it up until it just starts to bubble and let off steam (it will get that “milk scum” formation on top). Why scald the milk? I have no idea. I’m venturing to guess that this is recipe that has been passed down a few hands/generations, and scalding the milk was needed because milk was not necessarily pasteurized when this recipe was first created… but… it’s the recipe, so I’m following it as taught by Grandma.

Once the milk has cooled to lukewarm, and the yeast has bloomed, add the milk and yeast mixture to 5 cups of flour. Mix thoroughly.

The dough at this point will be very soft and sticky. Let it rest in a warm place for about 5 minutes, until light and bubbly.

Next, add the beaten eggs, the rest of the sugar, 1/2 cup of melted butter, and salt. Mix thoroughly. The dough will be almost liquidy at this point, more like a batter than a dough.

To get it looking more like a dough, now is when we start to mix the rest of the flour in. Mix it in 1-2 cups at a time, fully mixing the flour into the dough between each additions. After the first few additions, the dough will become too thick to mix with the spoon, start kneading the flour in with your hands at this point. Stir in enough flour to make a dough that is neither too soft or too stiff. It should be a bit tacky, but doesn’t stick to your hands when you pull away.

Cover the dough with a tea towel and set it in a warm place to rise for an hour.

After the dough has risen, turn it out onto a floured surface, and knead the dough for 5-10 minutes until it is smooth and satiny (grandma’s word, seriously, it was on the recipe that I copied from her), and knead the raisins into the dough.

Place the dough back into the bowl, cover, and let it rise again for another hour or until the dough has doubled in bulk.

Divide the dough and shape it into loaves. Place the loaves into greased loaf pans, and let them rise another hour, until they have doubled again.

Preheat the oven to 350ºF/175ºC. Once the dough has risen in the pans, brush the tops with the remaining melted butter, and place them into the preheated oven for 30-45 minutes, or until the bread is golden brown.

Remove the loaves from the pans to allow them to cool. Or! Even better, cut into the bread while it’s still warm, slather with butter, and enjoy!

Happy eating.

First post… Whew. Perisky, here we come.

Sauerkraut Perisky

A recipe from my Ukrainian grandma: little buns that can be stuffed with sauerkraut, meat or stewed fruits.
Prep Time 4 hours
Cook Time 20 minutes
Proofing Time 2 hours
Course Side Dish
Servings 5 dozen buns

Ingredients
  

Perisky Dough

  • 1 cup warm water
  • 4 tsp sugar
  • 3 Tbsp fast rising yeast
  • 1 cup butter Split into 1/2 cup + 1/2 cup
  • 1/2 cup lard
  • 1 Tbsp salt
  • 5 cups milk whole
  • 1 egg
  • 12-14 cups flour

Sauerkraut Stuffing

  • 1 onion medium, sliced
  • 2 Tbsps butter
  • 1 800mL jar sauerkraut drained
  • fresh ground pepper to taste

Instructions
 

Perisky Dough and Assembly (Stuffing Instructions to Follow)

  • Mix together the water, sugar and yeast, and let sit.
  • Warm 1/2 cup of the butter, the lard and milk together in a saucepan just until the butter and lard have melted, do not overheat.
  • Combine the milk mixture and the yeast mixture in a very large bowl. Then mix in 8 cups of the flour. Cover and allow to rise in a relatively warm location for approximately 2 hours.
  • After the dough has risen, mix in the salt and egg.
  • Heavily flour your clean counter surface with remaining flour. Starting kneading the flour into the dough, adding more flour to the mixture as needed, until the dough no longer sticks to the counter surface. Transfer the dough back to a bowl, cover, and let rest for a minimum of 15 minutes.
  • Preheat oven to 400ºF and get the filling ready (recipe below) while waiting for the dough.
  • Punch down the dough. Pinch off a small piece of dough. Roll into a ball, then flatten into a disk. Fill with 1-2 tsp. of your filling, then gather and pinch your dough together to close. Lay the perisky sealed-side-down on a baking sheet. Bake for 15-20 or until golden brown. Melt 1/2 cup of butter, and brush buns with butter as soon as they come out of the oven.

Perisky Sauerkraut Stuffing

  • In a large sturdy pan, sauté the onion in the butter until caramelized. Add the sauerkraut, and cook until fully heated. Add fresh coarsely ground pepper to taste.
Keyword Baking, Buns, Perisky, Sauerkraut, Ukrainian Food

And now for the details…

I recently lost my grandma and have become extremely nostalgic for the things that remind me of her. A significant amount of my memories with my grandma take place either in her kitchen or her garden. This recipe touches on both, since, although I am suggesting using bought sauerkraut, Grandma would make the sauerkraut with cabbage from her garden. She would shred the veggie, salt it heavily to get the water to release, then put it in the basement to ferment. My grandma was the OG of the reuse movement: a large, diligently cleaned KFC bucket was the vessel of choice for this undertaking. Once emptied, the bucket was cleaned back up, and put into storage for the next time. You may note that the only two ingredients Grandma used were cabbage and salt. It is the reason I’ve suggested avoiding wine sauerkraut. It has a different flavour than a sauerkraut that only contains cabbage and salt, and wouldn’t taste nearly the same as Grandma’s 🙂

Perisky were often made for special occasions. I remember having them frequently at the big baby or wedding showers that would be held for extended family or friends of the family in local community halls across southern Manitoba. Finger sandwiches, pickles, veggies and dainties (***see note on dainties) were already on the table, but the headliner was when baskets of hot perisky were brought out out from the kitchen to signal the start of the meal.

***Dainty: noun plural dainties; Manitobism; any cookie, square, cake or other form of sweet deliciousness, placed on plates as a random assortment for sweet tooth consumption. Often placed in muffin cups prior to plating, to make them prettier (which I like to call “daintifying”). A great visual example can be found here, courtesy of Goodies Bake Shop.

A quick note on pronunciation. Despite the spelling, we never pronounced it “per-riss-kee”. The “r” is a hard roll of the tongue, almost coming out as a “d”, and the “y” at the end is more of a shortened “eh” sounds, kinda like you would use for “meh.” Also, the “s” is a “sh”, so in all you get something that sounds like “ped-ish-keh”. Isn’t learning fun?

Okay, enough background information, let’s get to the cooking.

We are going to start by mixing the yeast with sugar and water to feed our little yeasties so they will give us delicious bread. While waiting for the yeasties to eat their breakfast, we heat our milk, lard and butter. Keep the temp low-to-mid, so we allow the fats to melt more slowly, without scorching the milk. The fats in this dough recipe will hinder the gluten from getting too long, resulting in a fairly crumby (not crummy!) bread, almost pastry-like.

Melting our fats in milk

After we have fully melted the fats in the milk, mix it together with the yeast solution and dry ingredients (minus some of the flour). The result should be an incredibly soft, almost liquid, dough that we let sit in the bowl in a warm place for 2 hours to do its first rise. If you are going to cover the dough (which is a good idea to keep it from forming a dry crust on top), make sure there is PLENTY of room in the bowl for the dough to rise, otherwise you’ll end up with a sticky mess adhered to whatever you’ve used to cover it with (learned from experience? …maybe…)

First rise

After the yeasties have finished their lunch and the dough has risen, we will use some of the leftover flour to thoroughly cover the countertop and then turn the dough out onto the flour.

Soft gooey dough ready for kneading

We mix the flour into the dough through kneading, adding more flour as we go, until the dough no longer sticks to the counter. The dough will be extremely soft and sticky to start, but as we knead in more flour, the dough will form up.

Dough ready for one last rest before forming our perisky

Let the dough rest, covered, one more time. While we wait, we’ll make the filling. If you are fast with your filling, make sure you let the dough rest for at least 15 minutes before you start assembly.

In a pan, melt the butter, then add the sliced onions, and cook slow over medium heat to caramelize to a nice golden brown.

Not a lot smells better than onions getting toasty brown in butter…

When the onions are ready, we add the sauerkraut. If you’ve chosen to use a wine or vinegar sauerkraut, you will likely need to drain the kraut first, but I find most of the salt-based krauts have very little liquid in the jar and can be added directly to the pan. We sauté the kraut and onions until any liquid that did exist has evaporated, then add some nice coarse black pepper to taste preference. Now is a good time to preheat the oven (400ºF).

Tasting just a little bit will be necessary to ensure quality, right?

Now we are ready to assemble! Punch down the dough, and then pinch off a small portion for your first bun. The amount you pinch off should about 50% to 75% of the size you want your buns to be. You might need to flour your fingers a little bit to make the dough easy to work with. With a light touch, roll the dough into a ball, then flatten into a pancake.

Add 1-2 tsp of your filling to the centre of the dough, and pinch the outsides together to form the bun. I’ve found it easiest to use a fork for sauerkraut, and twirl the fork in the sauerkraut like you would with spaghetti to get a nice dense little filling piece to pinch around.

Once we’ve pinched the dough into a little bun, we place the bun sealed-side down on a cookie sheet. We will continue stuffing until we’ve filled the sheet, and then place in the oven. My original recipe said 12-15 minutes, but I’ve found it typically takes 15-20 minutes for the perisky to reach the right amount of golden. Why the extra cooking time? Am I making the perisky too big? I might be. My grandma had opinions on the sizes… I think it had to do with the care and time involved, but my grandma usually made her perisky, perogies and holupchi quite small, and anything that was too big was considered poorer quality… eek.

Once golden, pull the perisky out of the oven and brush some melted butter (salt it, if it is unsalted butter) and let cool. You’re ready to eat! Careful! The insides will be steaming hot!

As an end note, you can fill the perisky with all kinds of different fillings. I had more dough than sauerkraut filling (I only made a single recipe of the sauerkraut filling), so also I made a thick applesauce with crabapples, butter, sugar and cinnamon and filled the rest of the dough with that. My dad also has memories of one of his aunt filling them with stewed dates, and a friend of mine had a family member who would fill them with a bacon and ham filling, which I feel I will need to try and recreate at some point because that sounds amazing. The possibilities are endless!

I’m excited to start this cooking adventure with you all, stay tuned for more posts!