Spicy Anchovy Eggplant with Ground Pork

Spicy Eggplant with Ground Pork

Prep Time 15 minutes
Cook Time 25 minutes
Total Time 40 minutes
Course Main Course
Servings 4 people

Ingredients
  

  • 2 eggplants (long eggplants, quartered length-wise and then cut in 5-7cm/2-3" pieces)
  • 450 g ground pork (~1 lb)
  • 1 Tbsp cornstarch
  • 6 Tbsp vegetable oil
  • 1 Tbsp sesame oil
  • 3 garlic cloves (peeled and minced)
  • 1 cm piece of ginger (peeled and julienned or shredded)
  • 1 Tbsp anchovy paste
  • 1 red bell pepper (cored and sliced thinly)
  • 1 tsp shaoxing wine
  • 1 tsp red wine vinegar
  • 2 tsp soy sauce
  • 1 Tbsp hot chili bean oil
  • 1/2 cup water
  • salt and white pepper (to taste)
  • 4 green onions

Instructions
 

  • Cut the eggplants into quarters length-wise, and then chop them into pieces, around 5-7cm/2-3" long. Core and slice the red pepper thinly. Peel and mince the garlic and ginger. Keep eggplant, pepper, and ginger and garlic separate.
  • Cut the whites of the green onions away from the greens. Chop the whites into small pieces. Cut the green into 2cm pieces. Keep the whites and greens separate.
  • In a medium bowl, mix the ground pork well with the cornstarch and a sprinkle of salt, and set aside.
  • In a small bowl, mix the water, wine, vinegar, soy sauce, and chilli bean oil.
  • Heat a wok or large frying pan on just below high heat and add 2 tablespoons of the of vegetable oil and 1/2 tablespoon of the sesame oil to the pan and heat until just smoking. Add half the eggplant, stirring constantly and cooking until some of the edges and sides have browned and the pieces have started to soften. Remove to a dish and repeat the process with the second half of the eggplant pieces and add the second set of eggplant pieces to the dish with the rest.
  • Reduce the temperature to medium-high heat. In the empty wok, add remaining 2 Tbsps vegetable oil. Add garlic, ginger and whites of onions and cook until fragrant. Next, add the pork, and stir constantly until pork is mostly cooked, about 5 minutes. Add red peppers and anchovies and cook, stirring, for 1 minute.
  • Add the liquid mixture and cook, stirring, until the liquid has fully coated everything and has started to thicken. Add the eggplant back into the wok with everything else and stir all together. Cook until eggplant is soft, but not falling apart. Add the greens of the onion and cook for another 30-60 seconds.
  • Serve immediately with rice.
Keyword Eggplant, Peppers, Pork, Soy Sauce

And now for the details…

Well hello friends. It has been a long time. Like… a really long time. I am so happy to be back with you and I apologize for the hiatus… but… life. *shrugs*

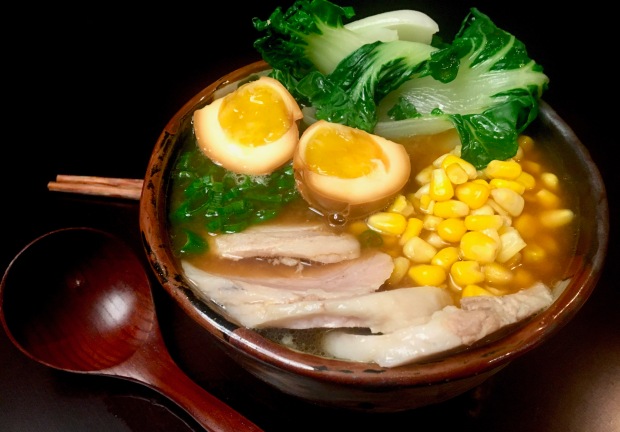
My return back on the scene comes with a dish that is a personal favourite. Delicate, velvety pieces of smoky eggplant, in a salty, umami-rich and slightly spicy sauce. Some strips of barely-cooked red pepper for sweetness and ground pork for both bite and to amp up the umami-ness? Heaven.

This dish is one of my favourites when we go for Peking duck as a side dish. Which is somewhat hilarious that we order it as a side, since it is quite hearty and is easily a meal all on its own. I did my best to recreate it at home with this recipe, but admittedly, it is not quite the same as the bubbling earthenware pot of deliciousness that comes to the table when we are out for dinner. However, when heading to the restaurant just isn’t a possibility, this is a great meal that comes together fairly quickly, and all it needs to wrap it all up is some steamed rice.

Let’s get to cooking, shall we? Now one of the biggest things for this that I found is that you really need to have everything ready BEFORE you start the actual cooking. The beauty of a wok is that things come together quite quickly, with the high temps and fast stir frying. But because of those high temps and the need to have almost constant attention on the food in the pan, there is little time to turn away from the stove and finish chopping that one last piece of veg, or grab that last ingredient from the pantry to mix into the sauce. That is my usual style in the kitchen… so I am definitely speaking from failed experience when I say that prepping and having everything ready first will mitigate burning, drying, or inconsistent cooking of the ingredients.

First first… if you are planning on having this with steamed rice… NOW is the time to get that rice in the cooker! The rest of the cooking process is going to be moving quick, so get the rice rinsed, in the cooker and hit the button now so it’s ready to go when the dish is done! (Am I speaking again from experience and needed to wait 20 minutes for the rice to be ready after the food was done? Maybe. *blushes slightly*)

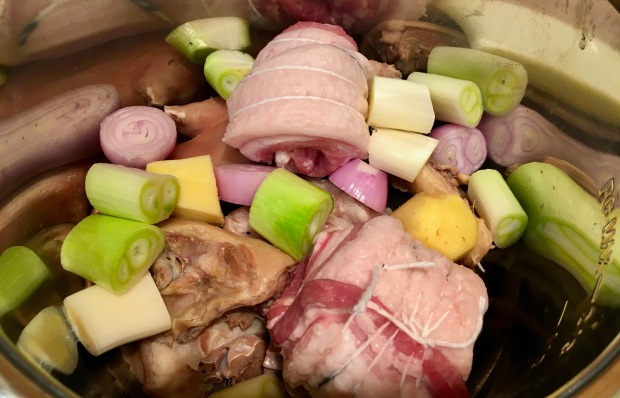
So let’s prep. I like to get my aromatics prepped and set to the side first. Peel and mince your garlic, and set aside. You have a couple options for your ginger. You can either shred/mince it like you did the garlic, or you can julienne it into small pieces. The julienned ginger will introduce that occasional fruity, pungent hit of ginger in a bite of the finished product, while the shredded will meld more homogeneously throughout the dish, so chef’s choice depending on your taste preferences. For the green onions, you are going to separate the whites from the greens. The whites, you can chop finely and set aside with the ginger and garlic (those three will all be hitting the wok at the same time). The greens, you are going to cut into larger pieces, about 2-3 cm long.

For the eggplants, we are using a long eggplant, sometimes called a Chinese or Japanese eggplant, which is going to give us more surface area of the skin of the eggplant, and less seedy flesh. In a pinch, I have used a globe eggplant for this dish, and just cut it into chunks. It did work out, but had a slightly different result. To cut and prepare the long eggplants, I find it easiest to quarter them lengthwise down the centre into four long pieces, and then cut those into the long bits into smaller pieces about 5-7cm/2-3″ long.

The final step in our veg prep is the bell pepper. Core and quarter the pepper, then slice into long, thin-ish pieces. The pepper I used this time was fairly small, so if you have one of the giant monstrosities I have seen and purchased more recently in the grocery store, a half of a pepper is probably MORE than enough!

In a bowl, mix together the ground pork, cornstarch, and salt. This helps to preseason the meat slightly, and the cornstarch will help the pork crisp up slightly while cooking, and will also be a thickening agent for the sauce once it hits the pan.

Final step before heating up the wok and starting the fry up is to mix together the sauce. The shaoxing wine, red wine vinegar, soy sauce, chilli oil and water all get mixed into a small bowl and set aside. If you don’t have shaoxing wine in the pantry, cooking sherry is a decent replacement. But if you have a chance to pick up some shaoxing wine, I would highly encourage it. I hadn’t understood the missing element to so many Chinese recipes I would try until I came across a post about shaoxing wine on the Woks of Life. I hunted it down in my local asian grocery store and they were not kidding. The taste difference that it makes in those same recipes is mind blowing.

Let’s heat up that wok and get cooking! Heat up the wok to medium high heat. Add about 2 tablespoons of vegetable oil (canola, safflower, peanut, corn, or any vegetable oil with a high smoke point will all work here) and 1/2 tablespoon of sesame oil. Once the pan is heated up, and the oils are quite runny, add half the eggplant pieces to the pan. We want to cook them in batches, or else the pan will get crowded and we won’t get the right cook. Stir almost continuously, working to coat all the eggplant pieces with the oils, as well as to maintain a consistent cook through the pieces. Because the primary heat source is at the bottom of the wok, regularly stirring to give all the pieces a little love is important. The eggplant is ready to come out of the pan when it has softened slightly, and there is a light char on the edges of the vegetable. That little bit of char will give that slight smokiness we are looking for, and if we cook for too long, the eggplant will turn into a soggy mess. The flip side of that, though, is not cooking for long enough, which will result in chewy, slightly astringent piece of eggplant, so make sure they have softened, and are not still raw when you take them out. We will have a little more cooking time at the very end for the eggplant, so a slight undercook is better than way too soft. Set the cooked eggplant aside in a dish, then add another 2 tablespoons of vegetable oil and the last 1/2 tablespoon of sesame oil, and cook the second batch of eggplant. Once done, transfer into the same dish with the first batch of cooked eggplant.

Next, add the remaining 2 tablespoons of oil into the pan, and add your aromatics (the ginger, garlic and whites of the green onion). We are going to cook these quick, only until you can catch a good whiff of them cooking, around 30-60 seconds. Add the pork in with the aromatics, and cooking, stirring constantly. You may need to break down pieces if needed as you go; we are trying to keep the ground pork from cooking into large chunks. Continue until the meat is fully cooked through, I find this takes around 5 minutes.

Next, add the anchovy paste, mixing well into the pork, and then the red pepper pieces. Because the red pepper is so long and thin, you will need to be gentle as you stir it in to cook, so you do not break up the pieces too much. We are only cooking the red pepper for about a minute before moving on to the sauce. For the anchovy paste, if you have actual anchovies, and want to cut them into small pieces and add, this will totally work too. The traditional version of this dish uses Chinese salted fish. If you can get your hands on some of that, and rinse, chop, and add that instead, nice work! I bet your dish will taste AMAZING. For me, I have found that the fillets of salted fish are pretty huge for what I can find, and I never manage to use it all within an appropriate amount of time, so I go with the anchovy paste for ease of use.

We are almost at the finish line! Add the pre-mixed sauce in with the meat and red pepper, stirring well. With the cornstarch already in the pork, and the high heat of the wok, this should start to thicken fairly quickly. Once it starts to thicken, add the eggplant back in the dish (and any liquid that may have collected with the eggplant in its dish), stirring well to coat the eggplant with the sauce. Continue stirring and cooking until the eggplant is at just the right level of doneness for your preference. Add the greens of the onion, and stir, cooking for another 30-60 seconds, then immediately transfer to a serving dish. Time to eat! Serve with the steamed rice, and enjoy!

Happy eating.

Sweet and Sticky Five-Spice Lacquered Pork Belly

Lacquered Pork Belly

Prep Time 20 minutes
Cook Time 6 hours
Course Main Course
Servings 4 people

Ingredients
  

Pork Belly

  • 400 g pork belly, approx 1 lb (skin off or on)
  • 1 tsp five-spice powder
  • 1 tsp garlic powder
  • 1 tsp ginger powder
  • 1 tsp salt

Lacquer

  • 2 Tbsp hoisin
  • 1 tsp chili oil
  • 1 tsp five-spice powder
  • 1 Tbsp soy sauce
  • 1 Tbsp rice wine vinegar
  • 1 Tbsp sugar

Instructions
 

  • Preheat over to 200ºF/95ºC
  • Stack a piece of parchment over a piece of aluminum foil (big enough to wrap pork belly). Pat pork belly dry and place on parchment paper. If belly has skin, score the skin in a criss-cross pattern. Sprinkle all surfaces with five-spice, salt, ginger and garlic powder, patting into meat. Wrap pork belly with parchment paper, and then foil. Place in oven on ovenproof dish, fatty side up. Let cook for five hours.
  • Mix together lacquer ingredients. After five hours of cooking, remove pork belly from oven and increase oven temperature to 325ºF/165ºC.
  • Remove pork belly from wrapping and place in ovenproof dish, fatty or skin side up. Spoon some of lacquer on top, and place back in oven.
  • Cook pork belly for one additional hour, removing every 10 minutes to spoon additional lacquer over the pork belly. After one hour of cooking, remove and let sit for 5-10 minutes. Then, move to a cutting board, cut with a sharp knife and serve.
Keyword Five Spice, Lacquered, Pork, Pork Belly, Slow Cooked

And now for the details…

Hello dear friends. I am so very excited to share this recipe with you.

If you have ever been overwhelmed or scared about trying pork belly because it seems too hard or too much, fret not! This recipe is actually very easy. The hardest part? Waiting. Like… a long time. If you thought it was a mistake in the recipe, nope! You read the recipe right. This recipe takes SIX HOURS to cook. BUT the good news about it? The vast majority of that time, you can ignore it altogether. In fact, if you are like me, you may have to set an alarm so you do not forget that it is in the oven! This is very much a “set it and forget it” type recipe. This is a great recipe for when you are going to be home most of the day, but are not going to have time to cook. For me right now in particular, it works well, since we are still working from home in our part of the world, so I throw this in the oven around lunch time and ignore it the rest of the day and BAM. By the end of the day, dinner is pretty much ready to go.

When it comes to the ingredients for this recipe, pretty much everything should be available at your local grocers nowadays. Pork belly was not something that I found was typically carried at our local grocery stores up until the last several years. Well, unless you counted the smoked, salted and sliced pork belly that is American bacon. But more recently, I have noticed the injection of pork belly at a lot of grocers’ meat departments, making it much easier to find. If your local grocery store does not carry pork belly, you might need to find a local butchers. For this recipe you want a whole piece of pork belly, not one that has been sliced or cut into pieces. Pork belly is sold with or without the skin. I have made this recipe with both, and it was worked out great with either, so feel free to use whichever cut you find. We will have a slight change to how we prep it, but more on that in a little bit.

To get this recipe started, let’s preheat the oven to 200ºF/95ºC.

If that feels like a really low temperature, it sure is. We are going for low and slow here to render the fat in the cut, let it seep into every crevice of the meat and result in a succulent, juicy bite when done. If you are worried that 200ºF seems like it would be too low to allow the meat to cook adequately and result in undercooked pork, fret not. The temperature considered “safe” (read: well done) by the Government of Canada is 160ºF. And after spending multiple HOURS in the oven at 200ºF, your pork belly will be cooked all the way through and will most definitely be fully cooked. “But Emily,” you say, “I thought it was okay to eat pork at less than well done??” From what I have read and hear, yes, it is a-okay to eat your pork chop at medium. A lot of the food risk we used to see in the past that required pork to be fully cooked have been minimized through farming and butchering practices. I… still don’t feel fully comfortable with it, if I am being honest, and have the “pork can’t be pink” ingrained in my brain, and still cook all my pork to well done. But, regardless of your acceptable tolerances for pork done-ness, in this particular recipe, we are cooking for the full amount of time to help break down any connective tissue, fully render that fat, and end up with a delectable, tender piece of meat with a very slight chew.

Next step, prepping that belly to be cooked. To start, cut both a piece of parchment paper and a piece of aluminum foil, each big enough to wrap around the belly, and stack parchment on foil. Pat the belly dry of any excess moisture, and place it on top of the parchment, with the foil underneath. The only difference in how we treat skin vs no skin pork belly is right here. If you have a belly with skin, score the skin in a criss-cross pattern, forming little diamonds in the skin. We want to cut through the skin, and can cut a bit into the fat, but want to stop short of cutting too deep that we hit the meat. If you have a belly with no skin, congrats! No additional work required.

Next we season the meat. I estimated about one teaspoon each here of the salt, garlic powder, ginger powder and five-spice powder, but if you use more or less, it is no big deal. Basically, we are sprinkling all four powders onto all sides of the meat, patting them into the pork belly, before turning and getting the next side. Once the pork belly has been seasoned, wrap it in the parchment paper, and the wrap that in the aluminum foil. Before you wrap it, make sure you know which side is the fatty/skin side, because we are going to put the entire package into an oven proof dish with the fatty/skin side facing up, and put that into the oven. And then leave it there. For five hours. You heard that right. No need to touch that sucker for FIVE HOURS. Go live your life. Be free. Well… maybe not totally free. You do have an oven going in your house… so… don’t go too far…

*five hours later*

Next step is where we get that dark, sticky lacquer developing on the belly. We bump the oven up to 325ºF/165ºC and take the belly out of the oven. Before the pork belly goes back into the oven at the higher temperature, unwrap the belly out of the foil and parchment paper, and place it back onto the ovenproof dish, again with fatty/skin side up. If any liquid collected in the the parchment/foil while the belly had been cooking, you can discard it.

Mix together all the lacquer ingredients. Spoon just enough on top of the belly to coat the top surface and place the belly back in the oven. We are going to cook the belly for another hour at this higher temperature, taking it out of the oven every 10 minutes to spoon a bit more lacquer over the top. As it cooks for this last hour, the lacquer will caramelize and cook down into a dark, sticky sweet coating.

Once the hour is up, take the pork belly out of the oven and let it sit for 5-10 minutes in its dish. Transfer it to a cutting board and slice into your desired thickness with a sharp knife. And I mean a really sharp knife. Because that pork belly is so tender from all that low and slow cooking, anything less than a super sharp knife will simply tear that meat up. Seriously, you could probably talk to it a little too harshly and it would fall apart.

Last, but most important, serve and eat! Below, we have the pork belly partnered with some ravioli and a kale caesar salad. Is that kale caesar made from the same caesar dressing as from my Brussel Sprout Caesar Salad? You bet it is. Is that some sparkling rosé to bring it all together? Heck yeah. Enjoy.

Happy eating.

Try a Terrine Tonight! Duck, Pork and Hazelnut Terrine

Duck and Hazelnut Terrine

Prep Time 30 minutes
Cook Time 1 hour
Time in Oven 2 hours
Course Appetizer, Main Course, Snack
Servings 1 Terrine

Ingredients
  

  • 2 duck breasts
  • 1 set duck giblets (organs from 1 whole duck)
  • 450 g ground pork
  • 2 garlic cloves (peeled and shredded)
  • 10 peppercorns
  • 1/2 tsp mustard seeds
  • 3 whole cloves
  • 2 shallots (peeled and minced)
  • 1/2 cup whole hazelnuts
  • 1 cup fresh parsley (chopped)
  • 1 egg
  • 3 Tbsps panko crumbs
  • 3 Tbsps sour cherry preserves
  • 1 tsp salt
  • 2 Tbsps duck fat
  • 2 Tbsps cognac (or other brandy)

Instructions
 

  • Preheat oven to 400ºF/205ºC. Separate skin from the duck breasts. Lay the skins along the bottom of the terrine mold/loaf tin.
  • Add the ducks breasts, giblets and pork to a food processor and pulse until mostly broken down and mixed, leave some of the pieces of meat intact.
  • Using a mortar and pestle, grind the peppercorns, mustard seeds and cloves together.
  • Mix together the meat mixture, spices, garlic, shallots, parsley, egg, panko crumbs, salt, duck fat, and cognac. Fold in the hazelnuts and cherry preserves. Spoon this mixture over the skins in the terrine mold, press it down and smooth out. Cover with foil, place in a water bath in the oven and bake for 1 hour.
  • Turn off oven, but leave terrine in the oven for 2 hours without opening the door. Remove from the oven and allow to cool completely. Slice the terrine and serve with crusty bread. Remaining terrine can be re-covered and stored in the fridge.
Keyword Duck, Duck Breast, Duck Giblets, Hazelnut, Pork

And now for the details…

I am sure I am not the only one, but I have been dreaming and reminiscing of travelling a LOT lately. One of the ways I have been trying to feed my travel bug is through food. I have been doing this a number of ways, like finding new and imported foods (I tried Spanish Lomo for the first time that I got from our local Italian grocer, soooo yummy), getting takeaway from different restaurants (for those in Calgary, I would be remiss to not recommend Bar Von Der Fels, UNA Pizza or Myung Ga), and the last way I have been feeding my travel bug is through trying to recreate foods that we have had when we have been travelling. That last case is where this recipe came from. I was reminiscing of our trip to France several years ago; in particular the spread we would set up for ourselves in the late morning from the goodies we picked up at the local marchés. One of the items I fell in love with there were the terrines. There would be a selection of different terrines, and could including a wide variety of meats, like duck, pork or rabbit. I would simply tell the vendor how thick of a slice I would like and they would cut off the generous slab of terrine and wrap it in thick butcher paper, and hand it over for us to take home. We would pick up baguettes on the way back to where we were staying and then have the terrine with the fresh, crusty bread and a generous dollop of mustard. Oh boy. I am drooling.

If you have never had a terrine before and are looking at the ingredients and thinking “this looks a lot like a meatloaf”… yep! Think of a terrine as a cousin to the traditional North American meatloaf. After all, they are both meat dishes made in a loaf pan and baked in the oven. But the terrine differs in a few ways, one of them being the type of meat used. Terrines often use a mix of different meats, and often use organ meat. In this case, we are using duck and pork, which leaves the delicacy in flavour profile to allow the spices and nuts to also shine. Another way that the terrine often differs is in the fat content. The terrine is usually higher in fat, which is one of the reason why it has some spreadability when smushing it over a piece of crusty bread, or scooping it up with crackers. In our case, we are getting some of the fat content from the pork, but also from the duck skin and the duck fat that is being added to the mix. Finally, terrines are usually served cold or at room temperature. I like to serve it on a plate with other delicious charcuterie bits with mustard and fresh bread, trying to mimic the experience we had (which seems so long ago) in France.

So let’s get to making this thing.

First things first: preheat the oven! Always a good first step, so we do not get to the end of preparation, and then need to wait for the oven to catch up. We are going surprisingly high heat here, 400ºF/205ºC.

Next step, let’s get to the ingredients. The good news: since we have a decent amount of fat here, there is no need to grease the pan! We start by separating the duck skin from the duck breast. The easiest way to do this is to start at an end that the skin is already “floppy” off the meat. You should be able to pinch the meat with one hand, and pinch the skin in the other and start to pull them apart. There will be some connective tissue, so when it starts to pull at the skin a bit too much and you see the skin tearing, use a small knife and cut through the piece connecting the skin to the meat, and then continue to pull apart. Place the skins in your loaf pan and spread them out so they are covering most of the bottom of the pan.

The next step will be to get our spices ready. If you have a spice grinder, feel free to use that, I have an ol’ fashioned mortar and pestle, so that is what I went with. Grind the mustard seeds, peppercorns and cloves until mostly broken down, but leaving a couple little chunks. I feel they add some character and make the dish a bit more charmingly unrefined.

Our next step is to get the meat ready. I got my pork ground so I did not have to mess with a grinder. For the duck, I threw the giblets and duck breasts all together in a food processor and gave them a few whirs to break them down mostly, but leaving a few chunky bits, to try and get that coarse element to the terrine.

The last step is to mix all the ingredients together. I left the hazelnuts and cherry preserves for last, and mixed everything else quite well with my hands. Then, I folded the nuts and preserves in so the preserves did not fully mix in with the rest and you could get occasional bites where the cherries shone through. Pout the entire mixture into the pan over the skins, and press it down.

Finally, it is time to cover the loaf with foil and place in the oven. We will be placing it into a water bath, or bain-marie, to keep the cooking consistent. Place the loaf pan in a larger pan, and fill the outer pan with boiling water until it comes at least halfway up the pan with the terrine. Make sure you do not overfill, we do not want water coming into the terrine pan! Bake the terrine for one hour, then, NO PEEKING, turn off the oven and let the terrine rest for another two hours without opening the oven door.

If you want to go really traditional, this last step is for you! Take the terrine out of the oven, and place a heavy weight directly onto the meat while it cools to room temperature. Some terrine pans have the press included, but there are other DIY options. You could use another loaf pan that is the same size, placing it on top and adding in some weight. You could wrap some cardboard in tin foil and put the weight on top. Or, I have even seen a suggestion to use a brick! What to use as the weight? You could use canned goods, literal hand weights or anything you can find that weighs a few pounds (Julia Child recommends up to 5 pounds!) and you can balance on top of the terrine and press while it cools. The purpose of this step is to compress the terrine as it cools to keep it from forming air bubbles, contracting, and losing its consistency.

Once the terrine has cooled, you can either cut it right out of the pan (this is what we did, no dinner parties for us right now, so let’s just eat!) or flip the terrine onto a plate to serve.

Happy eating

BBQ Pork Ribs in the Instant Pot

Instant Pot BBQ Pork Ribs

Prep Time 5 minutes
Cook Time 30 minutes
Course Main Course
Servings 1 rack of ribs

Ingredients
  

  • 1 rack St. Louis style or spare pork ribs (membrane removed)
  • 1 tsp garlic powder
  • 2 Tbsps chilli powder
  • 1 Tbsp ground cumin
  • 1/2 tsp dried oregano
  • 1 tsp chipotle powder
  • 1 tsp salt
  • 1/4 tsp hickory smoke powder (optional if hard to find)
  • 1 Tbsp cornstarch
  • 2 Tbsps sugar
  • 1 cup beer (alternatives: pineapple juice, cola or chicken broth)
  • 1.5 cups BBQ sauce

Instructions
 

  • Mix together all the herbs, spices with the salt, cornstarch and sugar. Rub this powder into the ribs. Set the rack into the Instant Pot, pour the beer into the bottom. Roll the ribs into a spiral and set onto the rack of the pot, bones vertical. Close and seal, cooking on "Meat" setting for 25 minutes. Remove and slather with BBQ sauce and either place on high temp grill or under a broiler for 3-5 minutes per side to caramelize. Serve with extra sauce.
Keyword BBQ, Grill, Meat, Pork, Ribs

And now for the details…

Okay, so this is another one of those recipes that almost seems too easy to share. The Instant Pot has changed my life when it comes to cooking ribs. Remember that previous method of boiling or baking the ribs for several hours to try and get them tender? NO MORE! The Instant Pot makes this SO EASY, and so fast, that ribs on a weekday are not only a possibility, but a preferred option because of how simple it makes your evening meal.

If you want to make these even faster, you can do what I do and mix up a large batch of the rub and store it in a Tupperware container, so you can even skip measuring out spices when it’s time to make these.

Speaking of the rub, that’s where we start out recipe. In a bowl (or Tupperware), mix together the garlic powder, chilli powder, cumin, oregano, chipotle powder, hickory smoke powder, salt, cornstarch and sugar. If you cannot find hickory smoke powder, just skip that part. I know it took me a long time to hunt it down, and I’ve been treating that stuff like it’s powdered gold. Again, you double, triple, quadruple, or more the amount of those measurements, and just have the rest sitting in a container for the next time you make the ribs.

Next, it’s time to get those ribs ready for cooking! Before you rub everything in, tear off the membrane, also known as the silver skin, on the back of the ribs. It’s not the end of world if you forget this step, but the ribs will have this membrane on them when you eat, and it’s a little chewy and ropy. There are plenty of videos and info out there showing you how to do this, I found this video has great info on how and why to remove the membrane (skip to 1:30 to see the technique ;P).

Next we’ll take that rub and… well… rub… it into the rack of ribs (if you’re storing extra, make sure to set that aside so that you don’t cross-contaminate the spare rub with those ribby fingies). Get right in there and massage the rub into the meat on both sides. To save on using extra dishes, I actually do this right on the packaging the ribs came in 😛

Next, it’s time to cook! Pour the beer into the bottom of the Instant Pot. If you’re not a fan or don’t want to cook with alcohol, you can replace the beer with juice (I recommend pineapple, but orange or apple would work too), broth, or even cola or root beer.

Next, curl the ribs into a spiral and place them so the bones are vertical in the pot. In my case, unfortunately the rack was cut in half in order to fit the packaging, so I just kinda half-circled them around the outside of the pot. I have tried doubling the recipe, and a spiralled double rack JUST fits into the pot. Cover the pot up and set the lid to “Sealed” position. We are going to pressure cook these on the “Meat” setting for 25 minutes.

Once you have that set, we wait. You basically have 25 minutes of your life back. So many options on what to do here. You could make some pretty impressive sides to go with those ribs. OR. You could kick up your heels and enjoy the rest of the can of beer, since there’s more that 1 cup in a can 😉

Once the ribs are done, unseal the lid and let the pressure come back down, then open up that lid and expose the gloriousness that is the cooked ribs. Lay them on a tray and slather them with your favourite BBQ sauce (both sides).

Now you have two options here: you can either finish these off on the grill or in the oven. On the grill, set your heat to medium-high, or in the oven, set your broiler to medium-hi. Either place the ribs right on the grill or under the broiler, and cook them for a few minutes on either side, just long enough to get some darkened, caramelized bits.

Remove from the heat, and either serve up directly with your extra BBQ sauce on the side, or slather on a bit more sauce just before serving.

Happy eating.

Sweet and Sticky Soy Pork Bites

Sweet and Sticky Soy Pork Bites

Prep Time 5 minutes
Cook Time 15 minutes
Course Appetizer, Main Course

Ingredients
  

  • 1 pork tenderloin (cut into 1" pieces)
  • 2 Tbsps olive oil
  • 1 tsp fresh ginger (peeled and shredded)
  • 2 garlic cloves (shredded)
  • 1/4 cup honey
  • 2 Tbsps soy sauce
  • 1 tsp sesame oil
  • 1 tsp chilli oil
  • 1 Tbsp rice wine vinegar
  • salt and pepper (to taste)

Instructions
 

  • Heat the olive oil in a large skillet over medium-high heat. Salt and pepper the pork tenderloin pieces, and sauté until they have been browned. Set aside.
  • Whisk together the rest of the ingredients and add to the pan. Cook for approximately 4 minutes, allowing the sauce to reduce.
  • Add the pork back to the pan, and stir, allowing the sauce to reduce further and stick to the pork pieces. Cook for another 3-4 minutes, then remove from heat and serve.
Keyword Honey, Pork, Soy Sauce

And now for the details…

Into day four of my 14 day quarantine challenge. And pretty much all the ingredients for this recipe came from my fridge/freezer and pantry, except the green onions I used on top for garnish.

Something I have come to be very grateful about during this quarantine is that I had built up a decent stock of supplies in my pantry, fridge, and freezer, and have been able to make use these of during this time.

As far was what are “necessities” and what to have readily available, it will depend so much on what you like to cook normally, how often you cook (i.e. how quickly the different items will be used up), and how much space you have available. There are plenty of articles out there the will give you plenty of ideas and inspiration on the essentials; I would say read through some of these and find what works for you. Keep track of what you tend to use over and over again, and make sure you stock up on those items!

Let’s get to cooking..

We start with cooking the pork tenderloin pieces. Dry them on some paper towels, and season with salt and pepper. Heat the oil in a large pan on medium-high heat.

Cook the pork pieces until they have just browned . They will be slightly undercooked, and that’s a-ok, since we will be adding them back to the heat in a little while. For now, remove them to a plate or dish and set aside.

Whisk together the other ingredients, and add them to the already hot pan. Allow the sauce to come to a boil and continue cooking for another four minutes or so, it will reduce and thicken.

Next, add the pork pieces back into the sauce and stir so the pieces are fully coated with the sauce, continue to stir and cook for another 3-4 minutes, until the pork pieces are fully cooked and the sauce has reduced and is sticking to all pieces of pork.

Transfer the meat and sauce to a serving dish. Sprinkle with some sesame seeds and green onions for garnish. Serve and enjoy!

Happy eating.

Instant Pot Tonkotsu Ramen

Instant Pot Tonkotsu Ramen

Umami-rich Ramen Soup, including a broth from scratch, in way less time thanks to the use of the Instant Pot!
Prep Time 15 minutes
Cook Time 3 hours 45 minutes
Total Time 4 hours
Course Main Course, Soup

Ingredients
  

  • 2 pork trotters (split)
  • 2 chicken backs
  • 2 leeks (green ends trimmed off, cut into chunks)
  • 2 shallots (peeled and cut into chunks)
  • 8 cm piece of ginger (peeled and cut into chunks)
  • 4 baby king oyster mushrooms (sliced, or 1 king oyster mushroom, sliced)
  • 600 g pork belly (rolled and tied tightly with kitchen twine)
  • 4 eggs (soft boiled)
  • 400 g fresh ramen noodles
  • 1 cup fresh or frozen corn kernels
  • 4 baby bok choy (leaves separated)
  • 3 green onions (chopped)
  • 2 Tbsps soy sauve
  • 2 Tbsps mirin

Instructions
 

  • Place pig trotters and chicken backs in a pot on stove of boiling water, reduce temperature to simmer. Simmer for a minimum of 10 minutes, skimming off foam as it cooks. Remove trotters and backs, set aside, discard liquid. Pick out any dark or bloody bits from trotters and backs.
  • Place trotters, backs, leeks, shallots, ginger, mushrooms, and pot belly in instant pot. Close pot and cook on "soup/broth" setting for 2.5 hours.
  • Place soy sauce, mirin and 4 Tbsps water in ziplock bag, place eggs in bag, and place in refrigerator, turn occasionally (can be done night before).
  • After 2.5 hours, release pressure and open. Remove belly, wrap tightly in cling film wrap and place in refrigerator. Close Instant Pot back up, set for another 60 minutes on "soup/broth" setting.
  • Once done, release pressure, then strain broth and throw out solids.
  • In separate pot on stove, boil water. Using a small mesh strainer, cook ramen in water until done, remove and strain, and place in bowls. Using same mesh strainer, cook bok choy leaves in same pot of boiling water for 30-60 seconds, strain.
  • Take pork belly from refrigerator, remove cling film and slice thinly. Arrange pork belly, bok choy, corn and green onions in bowl over ramen noodles. Ladle hot broth over other ingredients, top with halved eggs and serve.
Keyword Broth, Egg, Noodles, Pork, Pork Belly, Ramen, Soup, Tonkotsu

And now for the details…

Ramen. Delicious, delicious ramen. Until about a decade ago, I had no idea what real ramen was or could be. Before that, my brain associated the word ramen with Mr. Noodles or Ichiban, and I had no idea that there was so much more that ramen had to offer than instant noodles.

Since then, I have sought out ramen wherever I may roam. My favourite that I have tried so far is from the chain Tenkaippin in Japan. We made return trips to the same restaurant in Kyoto, several years ago. The broth is super flavourful, thick and rich. I have dreams about it even still. This recipe… is not that soup unfortunately. But, it is a nice rich broth that is pretty tasty, if I do say so myself. Cooking for an extended period of time in the Instant Pot is allowing the collagen to release from trotters and chicken backs, providing a thick mouth feel.

Let’s get started. We will start by “cleaning” the pig trotters and chicken backs. Bring a pot to a rolling boil and add the trotters and backs. Reduce to a simmer and cook for around 10 minutes, skimming off any gunky foam off the top. Once that’s done, dump the liquid. Using a fork, knife, or chopstick, we are going to pick at the trotters and back, removing any darkened bits or pieces that obviously have blood. We are doing this to clean out any bloody bits so we have a nice clear broth, rather than a skanky, cloudy, dark broth.

That icky looking foam is what you skim off and dispose of…

Once cleaned, place the trotters and backs in your instant pot. Stack in the leeks, shallots, ginger, and mushrooms. We are also going to roll the pork belly pieces and tie them tight with butchers twine, and place that in the pot with everything else.

Fill the pot with water up to the “MAX” line, and then close the pot, ensuring it is in the “Sealing” position and set for 2.5 hours on the “Soup/Broth” setting.

While the broth is cooking, we’ll set the eggs to marinating. We are making ajitsuke tamago, or seasoned eggs, to add to the ramen later. Mix the soy sauce, mirin, and 4 tablespoons of water in a ziplock bag, and then place your soft boiled eggs inside (need a refresher on how to soft boil an egg? Directions are included in this recipe). Close the ziplock up tight so as little air as possible is left inside, and then place in the fridge. Turn them around after an hour or two so they marinate evenly on all sides.

After 2.5 hours of cooking, release the pressure from the pot, and open ‘er up. Remove the pork belly, then close the pot back up, including resetting to “Sealing” position and set the pot back to “Soup/Broth” setting and cook again for 60 minutes. Wrap the pork belly tightly in cling wrap, and place in the refrigerator. The pork belly is more than cooked by now, and chilling the belly will allow us to cut it nice and thin to place in the bowl later.

Once the broth is done, strain it into a container, and discard any solids. I like using cheese cloth to help with the straining to get rid of any small, gritty bits.

Time to get everything ready. Boil water in a pot, and place the ramen noodles in a wire mesh strainer. Dip the strainer into the pot to cook the noodles, and when done, drain the noodles and place in the bottom of a large bowl.

Using the same strainer and boiling water, cook the bok choy until the leave just turn vibrant green. Place the boy choy, green onions, and corn into the bowl. Remove the pork belly from the fridge, and take out of the cling wrap. Slice the pork belly thinly and place in the ramen bowl.

Finish the soup off by taking the eggs out of the marinating liquid, cutting in half, and placing in the bowl. Ladle the still-hot broth over the soup contents, and serve immediately. Enjoy immediately!

Happy eating.

Pork Kimchi Stew (Kimchi Jjigae)

Kimchi Jjigae

A Korean stew made using Kimchi, pork belly and tofu
Cook Time 30 minutes
Total Time 30 minutes
Course Main Course, Soup

Ingredients
  

  • 700 g pork belly (1.5 lbs, cut in small slices)
  • 300 g kimchi (2/3 lbs, chopped loosely)
  • 1 garlic clove
  • 2 Tbsps soy sauce (dark)
  • 1 Tbsp mirin
  • 2 Tbsps gochujang
  • 3 cups chicken or pork broth
  • 2 cups water
  • 1 bunch green onions (cut into 1" pieces)
  • 1 package shimeji mushrooms (trimmed)
  • 1/2 package medium tofu (~170g, sliced)
  • 2 tsp butter

Instructions
 

  • Sauté the pork on medium-high heat until browned. Add the chopped kimchi, reserving the kimchi liquid, and stir regularly until kimchi is heated fully. Add the water and broth. Add the soy sauce, mirin,  gochujang, and kimchi liquid. Stir and cook until the stew starts to simmer. Stir in the shredded garlic. Add the mushroom and the green onions, stirring to mix. Lay the tofu across the top of the stew, spooning some of the stew over the tofu to coat. Cover the soup and cook for 5-10 minutes or until the mushrooms and tofu are cooked through. Spoon the stew into bowls and drop about 1 tsp of butter on the top of each bowl. Serve with a side bowl of cooked white rice.
Keyword Kimchi, Pork, Stew, Tofu

And now for the details…

I know what you must be thinking… ummm… Emily, I didn’t realize you were Korean…? No, no I am not. And what do I know about authentic Korean cooking? Not much at all, except that what Korean food I have eaten is delicious and I will do what I can to recreate it. Particularly this stew. This stew was love at first bite when I tried it at Ogam Chicken. It has all the things you could hope for in a stew. The flavour is a mouth-watering combination of salty, umami-rich, spicy, and tangy. With the little chunks of pork, kimchi, and tofu, this stew is also quite hearty. Pair it with a bowl of white rice and it is pure magic.

Eating kimchi jjigae in restaurants, you often get it served in a hot stone bowl called a dolsot. I do have a dolsot that I received as a gift. But alas, I still have not used it, as it does not work so well (i.e. at all) on an induction stove. I will need to get myself a hot plate to resolve this issue! Until then, a heavy bottomed pot will need to do the job.

Cooking with new ingredients is always both scary and exciting. There were a number of ingredients in this recipe that I had never used for cooking until I made this stew the first time.

Gochujang, which is a chilli paste, was a brand new ingredient for me the first time I made jjigae. I find it more earthy than spicy, although it definitely does provide some heat. It’s a deep, rich red and has an almost smoky yet sweet quality to it that really deepens the flavour of the dish.

Kimchi itself was something I had eaten on a number occasions, but had never cooked with at home. My favourite is baechu kimchi, which is made from the whole Napa cabbage. Luckily, it is usually the easiest to find in stores as well. Kimchi can be quite different brand-to-brand, and the store I get my ingredients from also does some fresh house-made kimchi as well. They will vary in the level of tartness, saltiness, and spiciness, which will change the way the stew ultimately tastes. Play around with the different kinds to find one you enjoy.

Let’s get to cooking.

Start by preparing your ingredients. Cut the green onions into 1″ pieces and set them aside. Take the kimchi out of its liquid, allowing most of the liquid to drain back into its container (set the liquid aside, we will be using that!), and chop the kimchi roughly to get some bite-sized pieced. Set the kimchi aside. Trim the mushrooms and set them aside. I use shimeji mushrooms because I enjoy them so much, but if you prefer white or brown button mushrooms, simply cut them into quarters or halves, depending on the size of the mushrooms (cut them into 1/8th’s if they are really big). Slice the tofu into 5-6mm (~1/4″) slices and set aside. Lastly, cut the pork belly into small, bite-sized slices.

We start by cooking the pork belly. Many recipes will call to add the pork belly to the broth once it is prepared, but I like cooking the pork first, getting a nice build up of the pork fat as it renders, and caramelizing the meat slightly. Add the pork belly to your pot with the heat set at medium-high. Sauté until the meat has cooked through almost completely and has started to brown. Stir this regularly, as I find the pork belly will try to stick to the bottom of the pot. If there is an large amount of fat pooling in the bottom of the pot, drain some, but keep the majority of the fat in the pot.

Once the pork belly is cooked through, add the kimchi to the pot, stirring regularly until any liquid that remained with the kimchi has cooked off and the kimchi is heated all the way through.

Next we start to add our liquid. Add the broth and the water, stirring while paying particular attention to the bottom of the pot to help stir in any of the caramelized pork that may have stuck to the bottom of the pot. Then, add the soy sauce, mirin and gochujang. Add a tablespoon or two of the kimchi liquid into the pot and allow everything to heat up until the stew starts to simmer.

Taste test the broth at this point to see if it is meeting your taste preference. Add more kimchi liquid if you want to increase the spiciness, saltiness and tartness of the broth. Now is also the point when you will add the shredded garlic to the stew. Lower the temperature to about medium or medium-low.

Next, add your mushrooms and green onions, and stir them into the broth. Then lay the tofu across the top, and spoon some of the broth over the tofu to coat it. I forgot to buy tofu the first time I made this for photos, so please excuse the, er, temporary costume (i.e. pot) change in this next photo.

Cover the pot an allow the stew to… well… stew… for about 8-10 minutes. You’ll know it’s done when the tofu is heated through completely and everything is a nice, bubbly container of deliciousness.

Finally, we eat. Spoon the stew out into bowls, top with about 1 tsp of butter per bowl, and serve on its own or with a small bowl of cooked white rice.

Happy eating.

Carnitas Salad with Buttermilk Cilantro-Lime Dressing

Carnitas Salad with Buttermilk Lime Ranch Dressing

Prep Time 30 minutes
Cook Time 1 hour 10 minutes
Course Main Course

Ingredients
  

Carnitas

  • 2 lbs pork shoulder roast
  • 2 tsp cumin
  • 2 tsp oregano
  • 1 tsp chili powder
  • 2 tsp salt
  • 1 tsp fresh ground pepper
  • 1 small onion (cut in large chunks)
  • 4 garlic cloves (trimmed and halved)
  • 1/2 cup pineapple juice

Salad

  • 8 cups green leaf lettuce (washed and torn into bite-sized pieces)
  • 1 avocado (peeled, pitted and sliced)
  • 1 cup cherry tomatoes (halved)
  • 3/4 cup frozen corn (browned in a dry pan)

Salad

  • 1/4 cup buttermilk
  • 1/4 cup mayonnaise
  • 1 lime (juiced)
  • 2 Tbsps fresh cilantro (cut fine)
  • 1 garlic clove (grated)
  • 1/2 tsp salt
  • 1/2 tsp sugar
  • 1/2 tsp paprika

Instructions
 

  • The carnitas can be made in an instant pot or slow cooker.
    Either way, place the shoulder in the pot, rub down with the spices, covering as much of the surface as possible, letting the rest fall to the bottom of the pot. Add the onions and garlic, then pour in the juice. If cooking in the slow cooker, cook on low for 8 hours. If cooking in the instant pot, cook on the "meat" setting for 55 minutes, ensuring the pot is sealed for pressure cooking. Once the meat is cooked, let it cool for a bit, then tear it roughly into chunks. Reserve the liquid and add the meat to a frying pan at medium to high heat to crisp up the meat. Once the meat is starting to brown, slowly add the liquid, then allow it to cook down until the liquid has cooked into the meat and the sugars from the liquid have caramelized the meat.
    Whisk all the dressing ingredients together.
    Assemble your salad, top with the crisped carnitas and drizzle with the dressing.
Keyword Instant Pot, Pork, Pork Shoulder, Salad, Salad Dressing

And now for the details…

A bit “healthier” then the first few posts, my husband and I are resetting our eating a bit after the rich foods we had taken in over the several months. We are reducing our simple carbohydrate intake (which, to be honest, was not too hard once we started cutting out treats throughout the day, afternoon snacks, and bread with every meal), and have been focusing on dinners that are filling, fresh and flavourful.

This meal is one of my favourites because it’s got the freshness from the greens and the cilantro dressing, while also bringing in the heartiness and umami-rich carnitas.

I might be a little loose in calling this recipe “carnitas”. Traditionally carnitas is pork cooked low and slow in lard, similar to a confit. Probably a better title for what I am making here would be “pan-fried, slow-cooked pork shoulder”, but that’s just not nearly as fun to say.

We start everything off preparing our pork shoulder, since it needs the longest time to prepare and cook. I have done this recipe before in two different ways: in our slow cooker and our instant pot. Both work, but to be honest, it turns out better in the slow cooker. For the photos today, I have done the recipe in the instant pot.

Start by mixing the carnitas spices together in a small bowl. Place your shoulder in the pot, and rub the spice mix all over the meat, trying to coat the entire surface area. Place the shallots and garlic in the pot with the shoulder, then pour the juice into the bottom of the pot.

When you place the lid on the instant pot, ensure the vent is set to “sealing”, since we are going to be pressure cooking our meat. Set the pot to the “meat” setting, and cook the shoulder for 55 minutes.

While the meat is cooking, we can prepare our salad toppings and dressing. Set a dry pan on the stove at medium- to high-heat. Place the frozen corn into the pan, and stir regularly, allowing the corn to char slightly. Be cautious! Even though it’s not popcorn, some of the kernels may actually “pop” out of the pan under the high heat.

Next, let’s make our dressing. I love buttermilk dressings. They’re creamy and tangy, offering a nice balance of flavours. I also feel they necessitate a decent amount of garlic, because what goes better with richness than a nice garlicky punch to the tastebuds? To really allow the garlic to suffuse the entire dressing, I use my garlic grate plate, which basically destroys the garlic and breaks it down into a fine mash, which then lends to tiny bits of garlic spreading throughout the entire dressing. My mom got me this garlic plate over a decade ago, and it is a staple in my kitchen.

Those little ridges are what break down the garlic. Using the plate is easy; just peel the garlic, hold it in your fingers and then grind it into the plate.

Start by mixing together your buttermilk and mayo. I used the full fat buttermilk, as well as Japanese mayo for my recipe. I wanted that added richness to the dressing, to help balance the acidity of the lime juice and the freshness of the cilantro. Add the rest of the dressing ingredients and mix together.

By about now, your pork is likely ready to come out of the pot. Take out the shoulder, reserve the liquid, and tear the meat into chunks. Place a large pan on medium-high heat and transfer the pork into the pan. Once the meat has browned a bit, add the juices and let them cook down until the liquid has boiled off and the meat is starting to caramelize.

Finally, assemble your salad with your toppings, leaving a little nest in the middle of the salad for your pork. Pile the pork in the middle, drizzle with the dressing, and enjoy!

Until next time, happy eating!

A Prairies attempt at cuisine Québécoise in three parts… Part II: Ragoût de Boulettes

Ragoût de Boulettes

Recipe translated from the recipe courtesy of Chef Cuisto, link available below
Prep Time 30 minutes
Cook Time 1 hour
Course Main Course
Servings 6 people

Ingredients
  

  • 2 lbs ground pork
  • 1 onion diced fine
  • 1/4 tsp ground cloves
  • 1/4 tsp dry mustard
  • 2-3 Tbsps flour
  • 4 Tbsps butter
  • 4 cups boiling water
  • 1/2 cup toasted flour
  • Salt and pepper (to taste)

Instructions
 

  • Melt the butter in a heavy bottomed pot, then sauté the balls, turning gently, to brown on all sides. Once all sides have browned, add the boiling water, cover the pot and simmer on low for one hour. Remove the balls, then thicken the broth by slowly adding the toasted flour until desired consistency. Add the gravy to the meatballs and serve.
Keyword Gravy, Main Course, Meat, Meatballs

And now for the details…

Ragoût de Boulettes or Meatball…euh…. Ragout.

Okay, so I have no idea of the traduction for ragout… I’ve always just heard folks refer to it as, well, ragout. Whoops… right. “Traduction.” French for “translation”. Certainly Franglais would need to make its way into one of these posts!

I can’t take really any credit for how this recipe turned out… like at all. As I said in the previous blog, this Quebequoise cuisine night was a joint effort, and Krystal did all the heavy lifting for the Ragoût. And it turned out AMAZEBALLS. Seriously. So good. Our credit for this recipe goes to Chef Cuisto, as we had never made these before and needed some help. The recipe turned out really, really well.

Krystal mixing the onions with spices before adding the pork to form the meatballs.

I feel as though I need to take this time to mention the fact that Krystal is a dietician. Now, her and I have had a number of conversations regarding food, diets, nutrition, and the like (fun fact: Krystal supported me while I was training for my first half Ironman. She helped me with everything from hydration to timing of nutrition to ensure I maximized my recovery). And in all of this, we have talked a lot about “healthy” food choices. When Krystal and I get together, often the meal choices we have made are for fairly rich foods (our first ever cooking adventure included molten chocolate lava cake). And the lucky recipients of our efforts often tease Krystal about her being a dietician and the food choices we make. But one of the things that I have learned through all these experiences is that all food is healthy. Preparing food socially with friends is healthy. Rich foods are healthy. “Healthy” foods are healthy. What I have learned most is that a balanced diet is key and having a healthy relationship with food is extremely important. Which I do my best to focus on, because I love food. I like it a lot. Alot alot…

So with that, lets start talking about the food!

Before we get into the cooking, a quick blurb on “farine grillée”, or toasted flour: When Krystal’s boyfriend had been telling us about ragoût de boulettes, he had mentioned making it with “farine grillée” to which Krystal responded with “eh?” And then later when she was telling me about what I translated in my brain incorrectly as “grilled flour”, I also responded with “eh??” And then we found out… it’s actually very simple. Toast the flour in the bottom of a dry pot on medium heat until it turns light brown and toasty… therefore: farine grillée. The toasted flour adds a nice flavour and reduces that “raw” taste you may get when you add flour to a recipe to thicken it up. Note: the more you toast, the less the thickening power… of the flour. (hee hee, I rhymed)

Alrighty, let’s get to cooking. Start out by combining pork, onions and spices, and forming into balls, and lightly cover them in flour. Melt the butter in a heavy bottomed pot to get ready to brown the meatballs.

Place the meatballs in a single layer of the pot and brown the meatballs at medium high heat, turning them gently to get all the sides.

A gentle hand is needed while flipping the meatballs to avoid breakage.

Once the meatballs have been browned on all sides, pour the boiling water into the pot, turn the heat down to a simmer, cover the pot and let the meatballs simmer for 1 hour.

You can use some of this time to toast your flour. In our search, Krystal and I found a few methods. You can bake the flour spread thinly across a cookie sheet until the desired level of doneness. You can actually purchase your farine grillée pre-toasted, at a several levels of toastiness. No seriously, it comes in a flour bag same as all-purpose. See an example here. The method we chose to use was to toast the flour on medium high heat in a dry pot until the flour released a slightly nutty smell and was a nice golden brown.

Once your meatballs have cooked for an hour, remove the balls to a serving dish, then slowly add the farine grillée, whisking as you add to avoid clumping, and cook at medium to medium high heat, allowing the gravy to thicken. Pour the gravy over the meatballs, and serve with patates pilées (mashed potatoes)

Enjoy!

Up next… haricots verts with crispy shallots and caramelized nuts.

A Prairies attempt at cuisine Québécoise in three parts… Part I: Tourtière

Tourtière

A meat pie recipe originating from the Canadian province Québec. Original recipe for the filling is courtesy of Recettes du Québec (link in text below), with modifications to suit the needs of this recipe
Prep Time 15 minutes
Cook Time 2 hours
Resting Time (for dough) 12 hours
Course Main Course
Servings 1 pie

Ingredients
  

Tourtière Crust

  • 2 cups flour
  • 1.5 cups butter cold
  • 1.5 Tbsp kosher salt (cut to 1 Tbsp if using salted butter)
  • 4 Tbsps cold water (extra if needed)

Tourtière Filling

  • 2 lbs ground pork
  • 4 cloves garlic minced
  • 2 shallots medium sized, diced small
  • 1 cup boiling water
  • 2 small potatoes peeled and grated
  • 1 tsp cinnamon
  • 1 tsp ground cloves
  • 1/4 tsp ground ginger
  • 1/4 tsp ground coriander
  • 1 tsp salt
  • 1/2 tsp fresh ground pepper

Instructions
 

Crust

  • Mix together flour and salt. Cut the butter into the flour until the butter is about pea-sized. Add the water and mix, adding additional water as required until the dough starts to form up. Press the dough together into a ball and let sit in a fridge for a minimum of 2 hours, up to overnight.

Filling

  • Brown the meat with the garlic and shallots. Once all the meat is cooked through, add the potatoes, water and spices. Cover and simmer for approximately 1 hour. Remove from heat and move on to assembly.

Assembly

  • When ready to use, take the dough out of the fridge and divide into two halves. Form each half into disks, and then roll them out to desired thickness. Fold each dough into quarters, score one of the halves to prepare for top section. Place bottom section in pie pan, poke with fork, fill with filling, then place top section. Pinch around edges, then trim off the excess sections. Bake at 375ºF for 45-60 minutes, until golden brown and bubbling.
Keyword Baking, Meat Pie, Pie, Pork, Savoury Pie

And now for the details…

While I was home over the holidays (yes, it took me until now to post… *le sigh*), I got the opportunity to cook with one of my really good friends, Krystal. Both of us live in different cities, and we rarely get to see each other, but have been able to visit the last few times we both have come home for Christmas.

When we get together to cook, we have a habit of turning it into our very own faux cooking show, full of cheesy smiles, exaggerated cheery banter, and any food facts we may have about what we are cooking. “Emily, why don’t you tell me more about shallots.” “Well Krystal, shallots are a type of onion, but are milder in flavour and sometimes carry the flavour of garlic…” *overly melodramatic fake laughter*

Every time we do this, we choose a theme for the meal and take great joy in trying to figure out what the theme will be. We ended up zoning in on French Canadian fare as the theme for this cooking adventure, and lucky for us, since Krystal had started dating a gent from Québec, we were regaled with all kinds of ideas for the menu. The suggestions included a whole lotta meat and carbs which we narrowed down to tourtière, ragoût de boulettes, and mashed potatoes. The only suggestions for veggies were pickles and a shredded carrot salad. So we went online to find out more about French Canadian food to see what we could find for vegetables. Fun fact that we discovered: French Canadian food was heavily influenced by French and Irish food. Another fun fact: there are not a lot of vegetable options when you do a Google search for Irish cuisine. So we decided to go French-ish and added haricot verts to the menu. Krystal remembered having a dish of beans with caramelized walnuts and onions at a restaurant in Québec, and so: enter haricot verts with caramelized walnuts and crispy shallots.

The results of our efforts!

For this post, we are going to make tourtière. I started the night before to give the dough enough time to rest in the fridge. The crust we are making is a butter crust, which means there is no lard. It would be great for vegetarians if it wasn’t for… well… the meat filling 😉

I would suggest cutting the butter into the flour while it is still cold. Then the butter breaks apart instead of smooshing (yes, smooshing), which I find lends to me overworking the flour to cut the butter down to size. I am suggesting Kosher salt here, but any salt will do. I am just a bit of a saltaholic and I like that “bite” of salt you get when it doesn’t break down completely in the dough. If you are sodium adverse, cut the sodium down in any and all of my recipes 😛

The original recipe I was following for the dough had a terrible ratio of flour to butter to water. After I had cut the butter into the flour and salt, I added the suggested amount of water and you can see the liquid mess I ended up with in the following photo. I ended up cutting way more butter into way more flour, and mixing it into the liquid mess to try and get something that would work. This meant I was working the flour way more than I was hoping to, and I feel as though my crust was “tougher” than I would have liked.

I made significant changes to the recipe that will hopefully help you improve your experience! Start with the first small amount of water, and lightly mix everything together. I am suggesting to start with this, and only add more water as needed, by the tablespoon. There will be a few extra dry bits, but as long as the dough is mostly forming up, try and pull those dry bits in and let the dough rest together instead of adding way more liquid and ending up with too much. I made round two tourtière with the new recipe, and as you can see it turned out much better!!

After you pull the dough all together, wrap it in parchment or waxed paper and let it rest in the fridge in an air proof container. Either a ziplock bag or a Tupperware container would work great for this. By resting, it will allow the moisture to hit up those dry bits, as well as lets the gluten relax. Maybe even play it a little Frankie Goes to Hollywood if you think it will help 😉

The next bit is to get your filling ready. The original recipe we used to help us through the filling was courtesy of the site Recettes du Québec, and I have made some modifications to meet the tastes I was trying to get to. Start by dicing your garlic and shallots. Add them to a dry pot on medium-high heat until they have just begun to brown.

Next, add the pork and sauté the meat with the shallots and garlic until the meat has browned, breaking up the meat if it forms into larger chunks. While the meat is cooking, peel your potatoes and shred them using a grater.

Add the potatoes, spices and boiling water to the pot, cover, and lower the heat WAY down to a simmer. Allow this to simmer for approximately an hour.

About 15 minutes prior to the filling being ready, preheat the oven to 350ºF. Take your dough out of the fridge and separate into two halves, rolling each half into a ball. On a clean, floured surface, flatten one of the halves and roll out until desired thickness. To help transfer to you pie pan, fold the dough into quarters, transfer, then unfold in the pan. Perforate the bottom crust with a fork to avoid bubbling of the crust during cooking.

When rolling out the top half, add your choice design into the pastry before topping off your pie. The pattern allows steam to release during cooking, and makes sure you don’t end up with a blow out of your dough!

Once you have topped off your pie, pinch the edges to seal them up, then trim the ends to get a nice clean pie. Now it’s off to the oven for your tourtière to bake! I put my pie on a baking sheet to catch any unwanted messes in case there was overflow.

Bake for 45-60 minutes, or until the pastry is golden brown. Let it chill at room temperature for about 15 minutes before digging in. Then, slice that sucker up and enjoy!!

Coming up next time… Ragoût de boullettes!