Heat the olive oil in a large skillet over medium-high heat. Salt and pepper the pork tenderloin pieces, and sauté until they have been browned. Set aside.
Whisk together the rest of the ingredients and add to the pan. Cook for approximately 4 minutes, allowing the sauce to reduce.
Add the pork back to the pan, and stir, allowing the sauce to reduce further and stick to the pork pieces. Cook for another 3-4 minutes, then remove from heat and serve.
And now for the details…
Into day four of my 14 day quarantine challenge. And pretty much all the ingredients for this recipe came from my fridge/freezer and pantry, except the green onions I used on top for garnish.
Something I have come to be very grateful about during this quarantine is that I had built up a decent stock of supplies in my pantry, fridge, and freezer, and have been able to make use these of during this time.
As far was what are “necessities” and what to have readily available, it will depend so much on what you like to cook normally, how often you cook (i.e. how quickly the different items will be used up), and how much space you have available. There are plenty of articles out there the will give you plenty of ideas and inspiration on the essentials; I would say read through some of these and find what works for you. Keep track of what you tend to use over and over again, and make sure you stock up on those items!
Let’s get to cooking..
We start with cooking the pork tenderloin pieces. Dry them on some paper towels, and season with salt and pepper. Heat the oil in a large pan on medium-high heat.
Cook the pork pieces until they have just browned . They will be slightly undercooked, and that’s a-ok, since we will be adding them back to the heat in a little while. For now, remove them to a plate or dish and set aside.
Whisk together the other ingredients, and add them to the already hot pan. Allow the sauce to come to a boil and continue cooking for another four minutes or so, it will reduce and thicken.
Next, add the pork pieces back into the sauce and stir so the pieces are fully coated with the sauce, continue to stir and cook for another 3-4 minutes, until the pork pieces are fully cooked and the sauce has reduced and is sticking to all pieces of pork.
Transfer the meat and sauce to a serving dish. Sprinkle with some sesame seeds and green onions for garnish. Serve and enjoy!
Cook bacon in a large pan to desired level of doneness. Set aside and drain most bacon fat.
Keep some fat in pan and toast the bread in the pan.
Put mayo on two of the slices. Place bacon, spinach and tomatoes. Drizzle with honey. Add salt and pepper to taste. Top with other slice of bread. Serve.
And now for the details…
Okay, so yes, this a pretty simple recipe. But… well… it was delicious. And… I have limited resources to work with 😛
We’re into day four of quarantine, and day three of recipe challenge. Today’s recipe is nice and easy. Rather than a BLT, because… well… I had no lettuce… I decided instead to go off-script and go for a BST, since I did have spinach. And then I thought… can I do something even more different? And realized I had some liquid honey in the pantry that would be a great complement the tartness of the tomatoes and the saltiness of the bacon.
And so, the BSTH was born!
I don’t know that I would recommend urban dictionary-ing BSTH… it is not the “theme” I am going for here… *eep*
Let’s get to cooking.
To start out, we will be cooking out bacon. Cook in a large pan on medium-high heat, and transfer the bacon to a paper towel-lined plate.
Drain most of the bacon fat from the pan, but leave some. This is what we are going to use to toast our bread. On medium high heat, smear the the bread pieces into the bacon fat so they soak up some of it up, then let them toast on both sides to a nice golden brown.
Remove the bread pieces to plates. Spread the mayo on one piece of the bread. We will use the mayo as glue to stick the spinach in place. Place several of the leaves of spinach on the bread.
Add the bacon, and then place the tomato pieces on top. I did not have regular tomatoes here. Again, quarantine mystery box was my source, and there were only cherry tomatoes available to me. There were a few bigger ones that I sliced to be able to fit the sandwich, and they worked really well, actually, but small to medium tomatoes would probably fit a little better.
To finish this sandwich off, drizzle the liquid honey over your ingredients, and then top with the other slice of bread.
I served this sandwich with some delicious chips that I’d procured from Urban Grub a few weeks ago, before we were travelling, that were delicious with this meal. The flavour I had purchased was “Mmmm, tastes like roast chicken” and they were indeed pretty “Mmmm”-worthy.
Serve your sandwich with your side of choice, or on its own, and enjoy.
Heat oven to 200ºC/400ºF. Place shallot slices on large cookie sheet lined with parchment paper. Drizzle with 3 tablespoons olive oil. Place in oven for 7 minutes. Remove and flip. Place back in oven for 5-7 minutes.
Remove and add celery and apples, mixing to coat all with oil. Place back in oven for 5 minutes.
Sprinkle kale over other fruit/vegetables, place back in oven for 3-8 minutes or until kale has softened, but not turned crispy.
Mix together currants, vinegar, syrup, mustard, 2 tablespoons of oil and salt.
Remove fruit/vegetables from sheet to serving dish. Drizzle with vinaigrette. Sprinkle with walnuts. Serve.
And now for the details…
Back for day two of the 14-day-quarantine-recipe-posting-challenge.
Today’s recipe is a warm kale salad. This is a great recipe to throw together when you don’t want to have to spend a whole lot of time thinking about what you are putting together or spend time babysitting a recipe. Yes, there are many removals and adds back into the oven, but as long as you have cut and prepared everything in advance, you can move pretty quickly through each step and use the time in between to either prepare the other elements of your menu, or sip some wine. Or both? Wine not.
If you are normally not a fan of kale, this may be a good recipe to try. Fresh kale definitely has a bite to it that a lot of people find unappealing. To be honest, I really enjoy it, but my tastes in food might be questionable; I’m the one who hates pancakes and French toast, remember? Because we cook the kale for a short time in this recipe, it will soften the kale, as well as cut down the bitterness a little bit. If you have not enjoyed fresh kale salad recipes in the past, give this a try, you might be pleasantly surprised. But if this still is not the recipe for you, I can entirely understand. Kale isn’t for everyone.
For this recipe, I got a chance to use purple, or Redbor, kale. It is what was provided to me by that incredibly generous friend I mentioned in the last post who dropped off a slew of fresh produce for me to use! I viewed this as a sort of Mystery Box cooking challenge, where the ingredients she provided were my “basket”, and now I am finding recipes to use these ingredients for the rest of the week! If you can’t find Redbor kale, fret not. Green, curly kale or dinosaur kale will work just as well.
Let’s get to cooking.
Start out by heating the oven to 200ºC/400ºF. While the oven is heating, slice the shallots fairly thick, maybe ~5mm (3/8″). We want them fairly thick, because we will be turning them over halfway through, and thinly sliced shallots are just going to flop apart when you try to turn them over. Lay them flat on a cookie sheet lined with parchment paper, and then drizzle with 3 tablespoons of the olive oil, flipping or lifting the pieces if you need, to ensure they are well coated with the oil. Once the oven has heated up, place the sheet in oven and cook for 7 minutes.
While the shallots are cooking, prepare the rest of the ingredients. I usually start by putting the currants into the vinegar and syrup, since I like to give them a bit of soak time to soften and absorb the liquid.
Next, wash and slice the celery, and set aside.
Wash and core the apples, then slice them into fairly thin slices, no more than 5mm thick.
When the shallots are done with the first 7 minutes, remove the sheet from the oven, and turn the shallots over to the other side. I find two forks seems to work best to do this. If the shallots fall apart while you do this, don’t worry too much, try to flip the majority as well as you can, then return them to the oven for another 5-7 minutes, or until they have caramelized.
Once done, remove the sheet again, and add the celery and apples, stirring everything together to coat all pieces with the excess olive oil. Place the sheet back in the oven for another 5 minutes.
Finally, place the kale above the other ingredients on the sheet and put back into the oven a final time for 3-8 minutes (will vary greatly on whether you have a convection oven or not). We want to cook them just until the kale has softened, but has not all turn dried and crispy. A few crispy edges are okay, and I find add to the texture of the salad, but I made the mistake when I moved to our new house with the convection oven of cooking for 5 minutes, and all the kale had turned essentially into kale chips… not what I was going for…
Finally, using a fork, whisk the mustard, salt and olive oil in with the currant, syrup and vinegar, and get ready to plate your salad.
Remove the veggies and fruits from the sheet to your serving dish. I usually like to remove the kale first and lay it as the base, then scoop the rest of the items on top. Drizzle with the currant vinaigrette, spooning any leftover currants onto the salad, and then top with the toasted walnuts, crumbling slightly.
I felt as though this salad could have used a cheese element of some kind, maybe some goat’s cheese or bleu cheese. But, well, quarantine. Feel free to add either of those if you want a salty, creamy element added to the salad.
Blend together kimchi and mayo in blender or small food processor until mostly smooth.
In a large pan, cook bacon. Set aside, and drain any excess fat.
Cook eggs in remaining bacon fat until preferred level of doneness.
Add some of the kimchi mayo to the bottom of two bowls. Split rice between bowls, add eggs, bacon and spinach. Top with green onion and remainder of kimchi mayo. Serve.
And now for the details…
We just got back into Canada yesterday from Spain and are self-isolating for at least the next two weeks. It was pretty stressful getting home, as we tried to push our travel forward by a week and a half, with many of the flights getting booked up before we had a chance to secure our way back. We finally managed to book the flights, and we are super lucky to have an amazing support network here. A friend of ours dropped off groceries for us at the house before we got home so we are well stocked while we stay at home to eliminate any exposure to others. What to do while in quarantine for two weeks? Why not a 14 day challenge of one post every day using what we have in the freezer/pantry, plus the fresh veggies and fruits provided by our amazing friend!
This is the meal we had yesterday evening when we got home. Jet lagged and trying to come down from the stress of essentially fleeing for home, we wanted something fairly simple and quick, but also comforting. we happened to have bacon in the freezer, kimchi in the fridge, and rice in the pantry. Along with the fresh veg and eggs our friend brought us, this seemed like a pretty quick and easy meal to throw together while chilling with some TV and a glass of red wine to take off the edge.
Rice bowls seem to be trending right now, but my husband remembers eggs and rice being served to him for a quick meal frequently as a kid. So with what we had available to us, this recipe was born. After I made this dish, it was requested that this dish become our go-to for a quick meal going forward! In its creation, I may have been inspired by Empire Provision and would highly recommend you try out their “My Bowl’s Got Seoul” if you make it there for brunch.
Okay, let’s start cooking.
We start everything out, of course, with cooking the rice. I didn’t specify what kind of white rice here, but my personal preference is for jasmine rice. Completely up to you to take this extra step, but it has been ingrained into me by my husband: wash the rice!!! This means rinsing the rice in cold water until the water runs clear. This will avoid clumpy, gummy rice, and if you are a textural eater, it will enhance your eating experience 😉
While the rice is cooking, put the kimchi and mayo into a blender or small food processor and blend until mostly smooth. If you are willing to put in the extra time and get it super smooth, all the power you. I was tired and hangry and just wanted to eat, so mine was still a little lumpy, more the texture of a pesto than a mayo.
Next, take a large pan, and cook your bacon over medium-high heat. The flexibility of this dish is huge; the amounts and measurements in the recipe are completely guidelines and easy to modify. If you want more bacon, cook more bacon! If you want more eggs, cook more eggs! Feeding four people instead of two? Double the recipe!
Once the bacon is done, set it aside in a dish lined with paper towels. Drain most of the bacon grease out of the pan (why not drain it into a container and use it as a cooking fat alternative for future meals?), and add your eggs. We did ours sunny-side up with soft yolks (a runny, bright orange yolk over the rice? YASSSSSSS), but this is totally up to your preferences. Do I need to learn how to cook my eggs so they look prettier and not floating all over the pan? Maybe. But again: hangry.
While the bacon and eggs are cooking, loosely chop the spinach, and chop the green onions.
We plate this meal by placing some of the kimchi mayo on the bottom of our bowls. Next, add your rice (still hot!), and spread it out to become the base of your bowl. Spreading the rice out is so that everything goes on top and the rice becomes the delicious vehicle that everything else soaks into. Top the rice with the spinach, then add the eggs and bacon on top. Finish it off with a large dollop of the kimchi mayo, and a sprinkling of green onions, and dig in immediately!
4baby king oyster mushrooms(sliced, or 1 king oyster mushroom, sliced)
600gpork belly(rolled and tied tightly with kitchen twine)
4eggs(soft boiled)
400gfresh ramen noodles
1cupfresh or frozen corn kernels
4baby bok choy(leaves separated)
3green onions(chopped)
2Tbspssoy sauve
2Tbspsmirin
Method
Place pig trotters and chicken backs in a pot on stove of boiling water, reduce temperature to simmer. Simmer for a minimum of 10 minutes, skimming off foam as it cooks. Remove trotters and backs, set aside, discard liquid. Pick out any dark or bloody bits from trotters and backs.
Place trotters, backs, leeks, shallots, ginger, mushrooms, and pot belly in instant pot. Close pot and cook on "soup/broth" setting for 2.5 hours.
Place soy sauce, mirin and 4 Tbsps water in ziplock bag, place eggs in bag, and place in refrigerator, turn occasionally (can be done night before).
After 2.5 hours, release pressure and open. Remove belly, wrap tightly in cling film wrap and place in refrigerator. Close Instant Pot back up, set for another 60 minutes on "soup/broth" setting.
Once done, release pressure, then strain broth and throw out solids.
In separate pot on stove, boil water. Using a small mesh strainer, cook ramen in water until done, remove and strain, and place in bowls. Using same mesh strainer, cook bok choy leaves in same pot of boiling water for 30-60 seconds, strain.
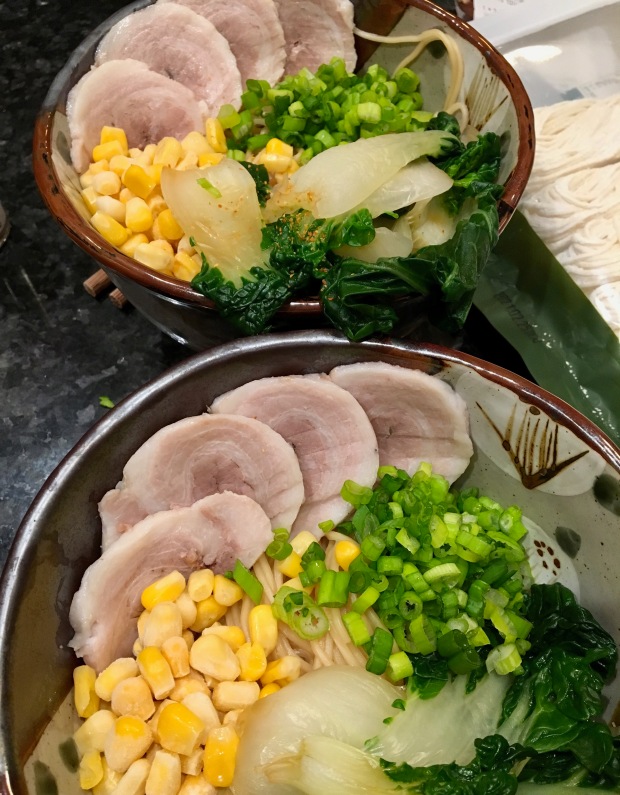
Take pork belly from refrigerator, remove cling film and slice thinly. Arrange pork belly, bok choy, corn and green onions in bowl over ramen noodles. Ladle hot broth over other ingredients, top with halved eggs and serve.
And now for the details…
Ramen. Delicious, delicious ramen. Until about a decade ago, I had no idea what real ramen was or could be. Before that, my brain associated the word ramen with Mr. Noodles or Ichiban, and I had no idea that there was so much more that ramen had to offer than instant noodles.
Since then, I have sought out ramen wherever I may roam. My favourite that I have tried so far is from the chain Tenkaippin in Japan. We made return trips to the same restaurant in Kyoto, several years ago. The broth is super flavourful, thick and rich. I have dreams about it even still. This recipe… is not that soup unfortunately. But, it is a nice rich broth that is pretty tasty, if I do say so myself. Cooking for an extended period of time in the Instant Pot is allowing the collagen to release from trotters and chicken backs, providing a thick mouth feel.
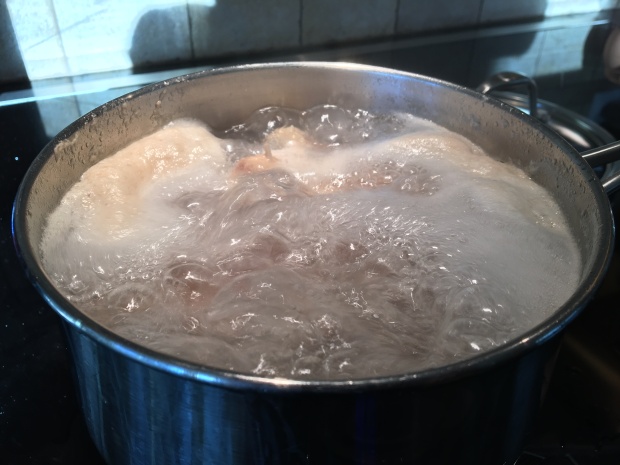
Let’s get started. We will start by “cleaning” the pig trotters and chicken backs. Bring a pot to a rolling boil and add the trotters and backs. Reduce to a simmer and cook for around 10 minutes, skimming off any gunky foam off the top. Once that’s done, dump the liquid. Using a fork, knife, or chopstick, we are going to pick at the trotters and back, removing any darkened bits or pieces that obviously have blood. We are doing this to clean out any bloody bits so we have a nice clear broth, rather than a skanky, cloudy, dark broth.
That icky looking foam is what you skim off and dispose of…
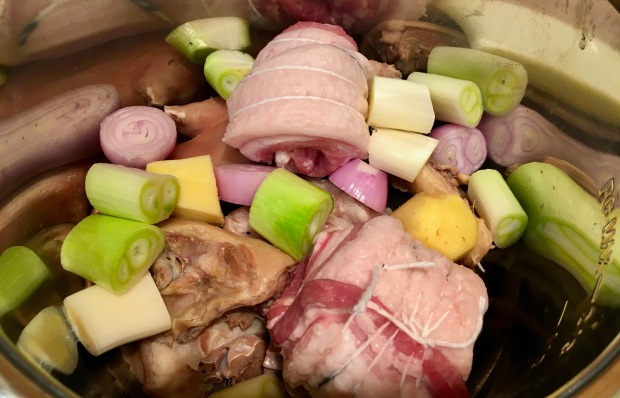
Once cleaned, place the trotters and backs in your instant pot. Stack in the leeks, shallots, ginger, and mushrooms. We are also going to roll the pork belly pieces and tie them tight with butchers twine, and place that in the pot with everything else.
Fill the pot with water up to the “MAX” line, and then close the pot, ensuring it is in the “Sealing” position and set for 2.5 hours on the “Soup/Broth” setting.
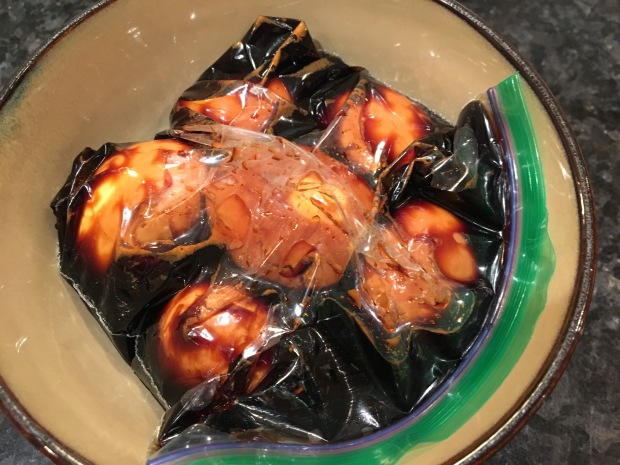
While the broth is cooking, we’ll set the eggs to marinating. We are making ajitsuke tamago, or seasoned eggs, to add to the ramen later. Mix the soy sauce, mirin, and 4 tablespoons of water in a ziplock bag, and then place your soft boiled eggs inside (need a refresher on how to soft boil an egg? Directions are included in this recipe). Close the ziplock up tight so as little air as possible is left inside, and then place in the fridge. Turn them around after an hour or two so they marinate evenly on all sides.
After 2.5 hours of cooking, release the pressure from the pot, and open ‘er up. Remove the pork belly, then close the pot back up, including resetting to “Sealing” position and set the pot back to “Soup/Broth” setting and cook again for 60 minutes. Wrap the pork belly tightly in cling wrap, and place in the refrigerator. The pork belly is more than cooked by now, and chilling the belly will allow us to cut it nice and thin to place in the bowl later.
Once the broth is done, strain it into a container, and discard any solids. I like using cheese cloth to help with the straining to get rid of any small, gritty bits.
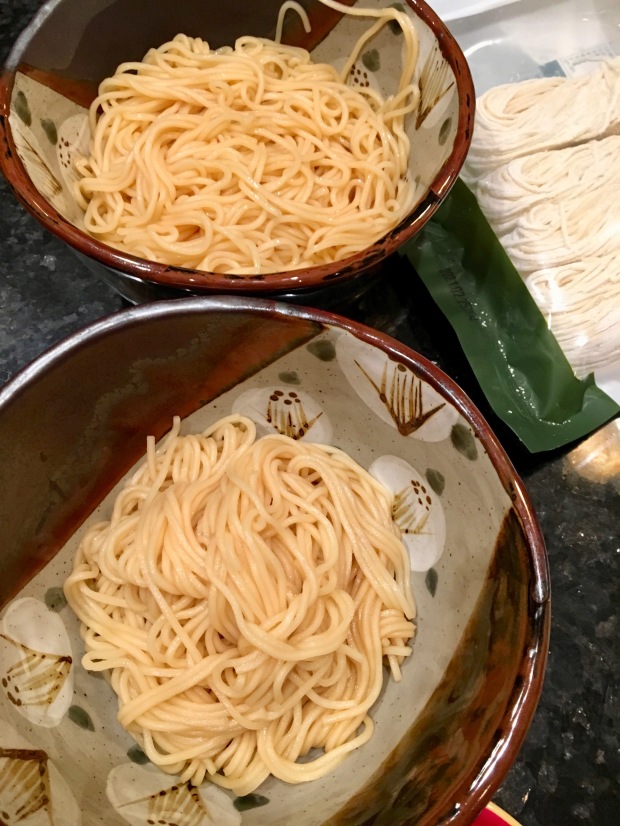
Time to get everything ready. Boil water in a pot, and place the ramen noodles in a wire mesh strainer. Dip the strainer into the pot to cook the noodles, and when done, drain the noodles and place in the bottom of a large bowl.
Using the same strainer and boiling water, cook the bok choy until the leave just turn vibrant green. Place the boy choy, green onions, and corn into the bowl. Remove the pork belly from the fridge, and take out of the cling wrap. Slice the pork belly thinly and place in the ramen bowl.
Finish the soup off by taking the eggs out of the marinating liquid, cutting in half, and placing in the bowl. Ladle the still-hot broth over the soup contents, and serve immediately. Enjoy immediately!