Chicken Vino Bianco (Olive Garden-ish)

Chicken Vino Bianco

A copycat recipe of the Olive Garden Chicken Vino Bianco
Prep Time 10 minutes
Cook Time 20 minutes
Total Time 30 minutes
Course Main Course

Ingredients
  

  • 2 chicken breasts (butterflied and cut into medallions)
  • 2 roma tomatoes (seeded and diced)
  • 2 shallots (diced)
  • 3 cups mushrooms (oyster or cremini, diced)
  • 1/4 cup flour (all-purpose)
  • salt and pepper (to taste)
  • 3 Tbsps olive oil
  • 1/4 cups butter (plus 2 Tbsps)
  • 1/4 cup chicken broth
  • 1/2 cup white wine
  • 250 g pasta (cooked al dente)

Instructions
 

  • Season the chicken fillets with salt and pepper, and sprinkle with flour.
  • Add 2 Tbsps of the olive oil and 1 Tbsp of the butter to a pan on medium-high heat until the butter is melted.
  • Place the chicken breasts in the pan and cook until golden brown and turn. Add another 1 Tbsp of butter to the pan and cook the medallions until the inside temperature reaches 75ºC (165ºF).
  • Remove chicken from the pan, and set aside. Add the remaining 1 Tbsp olive oil to the pan, add the shallots and sauté, add the mushrooms and sauté until soft. Add the tomatoes, then add the chicken broth and white wine. Cook down until the liquid is reduced significantly. Add 1/4 cup of butter and melt, stirring into the sauce.
  • Add the chicken back into the pan, turning to coat. Place the pasta in a large shallow dish, then top with sauce and chicken. Serve.
Keyword Chicken, Mushrooms, Pasta, Tomatoes, Wine

And now for the details…

I had a period of time in my early twenties when I was borderline obsessed with the Olive Garden. Raised eyebrows and cringes, I’m sure, from the foodies out there. But I have to admit, I still enjoy visiting, particularly for the lunch of endless soup, salad and breadsticks. Their Zuppa Toscana? Delicious. Yep. I’m losing creditability from the foodie hipsters as I type. I recognize your need to shudder and turn away, but am not changing my mind on this one. Sorry folks, I love food. All food. In my mind, food sources do not need to be subversive, exclusive, or cutting edge to be delicious.

A favourite dish, which unfortunately I have not seen on their menu for well over a decade, was Chicken Vino Bianco. Through some trial and error, I think I have come pretty close to recreating it, and now am sharing with all of you! Pair this with a salad with Olive Garden salad dressing from Costco, and we are bringing the restaurant home!

We start by butterflying the chicken breasts and then cutting them into medallions. This pink cutting board? It is specific for my meat prep! To avoid cross-contamination, I have this separate board that I use strictly for raw meats, fish, and poultry. Safety first people! Now, salt and pepper each side of the medallions, and then dust them with flour. Shake off any excess flour and we are ready to start sautéing!

Heat up some olive oil at medium-high heat and melt the two tablespoons of butter into the oil. Once the butter is completely melted and starts bubbling slightly, add the chicken in a single layer, and cook until browned on both sides and completely cooked through the middle.

Set the chicken aside, but keep the pan hot. Add the shallots and a bit more olive oil if there is little of the oil left in the pan after cooking the chicken. Sauté the shallot until fragrant, then add the mushrooms. Cook until the mushrooms have just begun to turn soft. Next, we add the wine and cook down until the wine has almost completed reduced, there should be little liquid left in the pan.

(Now is also a good time to boil your water for your pasta.)

This is just after adding the wine, lots of liquid to lose yet!

We add our tomatoes next, and allow them to cook down for just a short bit of time, releasing some of their liquid, and softening slightly. Cooking for too long will lose our nice bright colour from the tomatoes, and cause them to smoosh in with the other ingredients, getting lost in the mix.

(Have you added pasta to your water yet? Get that going so you have pasta and sauce at the same time!)

Our last step is to melt in the 1/4 cup of butter, which is going to bring the liquid element back in, creating a nice sauce, and then bring the chicken back into the pan. Spoon sauce over the chicken, getting everything nice and saucy. Do a quick taste test here to see if you need any additional salt or fresh ground pepper. Add more S&P to taste.

Place your pasta in a large dish, then top with the chicken and sauce. If you would like, you can garnish with some fresh parsley and parmesan cheese.

Happy eating.

Tacos with Chimichurri Flank Steak and Buttermilk Cole Slaw

Tacos with Chimichurri Flank Steak and Buttermik Coleslaw

A taco recipe making use of my Green and Garlicky Chimichurri sauce and Creamy Buttermilk Coleslaw recipe (links to recipes below)
Prep Time 30 minutes
Cook Time 15 minutes
Total Time 45 minutes
Course Main Course

Ingredients
  

  • 1 recipe Green and Garlicky Chimichurri Sauce (recipe link below)
  • 1 recipe Creamy Buttermilk Coleslaw (recipe link below)
  • 1 kg flank steak (2 lbs)
  • 1/2 cup fresh cilantro (stemmed and chopped)
  • 1/4 cup crème fraîche
  • 1 tsp chipotle oil (e.g. Huipi Chil Salsa Mango Chipotle)
  • 8-12 corn tortillas
  • 1/2 cup vegetable oil (canola or other)

Instructions
 

  • Place the flank steak in a ziplock bag with 3/4 of the chimichurri sauce, reserving 1/4 of the sauce, set aside. Ensure the steak is fully covered with the sauce, release any air from the bag, seal, and marinate in a refrigerator for minimum 1 hours, or overnight.
  • Remove from the bag, and dispose of the bag and any leftover sauce. Barbecue the flank steak at medium-high heat until desired level of doneness. Remove from the heat and set aside for 10-15 minutes.
  • Mix the crème fraîche with the chipotle oil until evenly mixed, set aside.
  • Heat the canola oil at medium-high heat in a shallow pan until hot. Add the tortillas, one at a time, turning after 10-30 seconds on each side, and place to the side on a towel.
  • Cut the flank steak across the grain into strips
  • Serve all items, and assemble tacos, with steak, Coleslaw, chimichurri sauce, chipotle sauce, and fresh cilantro.
Keyword BBQ, Chimichurri, Coleslaw, Flank Steak, Steak, Taco

And now for the details…

Yep, I’m pulling a buttload of previous recipes into this one. The Garlicky Chimichurri sauce and Creamy Buttermilk Cole slaw find new meaning in these delicious tacos that are sure to be a crowd pleaser. And is that the Ratatouille recipe in the background as an optional side to this meal? Oh you bet your sweet ass…ets it is.

I had actually made all these elements separately earlier and realized how complementary they would all be together as one. And so… these tacos were born!

Flank steak, although flavourful and meaty, is a fairly tough cut of meat. Luckily, that also means that it is usually quite affordable, although the trendiness has boosted its market value of late. Flank steak needs the chimichurri marinade to help break it down to provide its juicy, tender grilled perfection for this dish. In addition to marinating, we will be cutting the steak across the grain, which will help give the impression of tenderness.

We will start by marinading our steak in the chimichurri sauce. Add the steak and about 3/4 of the chimichurri sauce into a ziploc bag. Reserve the rest of the chimichurri in the fridge to serve with the tacos. If you are environmentally conscious and do not want to waste a bag, feel free to use a container that you can seal. Just makes sure the steak is evenly coated by the marinade, and try to turn it over partway through its marinading process. Let the steak sit in all that savoury scrumptiousness in the fridge overnight. Think of it as treating you steak to a spa-like body treatment. Everything needs to fully sink in.

You can prepare the cole slaw the night before when you are getting the steak ready for its body wrap, or just before you are ready to serve the rest of your meal. I would recommend the day before, though, since I feel cole slaw tastes better the next day. You won’t need to whole recipe of slaw for the tacos, and since it keeps so well in the fridge, you will be stocked with a side dish for a couple of days afterward!

Remove the flank steak from it marinade, and throw away the leftover marinade. Barbecue the steak on medium-high heat, until your preferred level of doneness. This site has a great chart for the different temperatures to aim for, and estimated cooking times.

Once the steak is done cooking, remove it from the heat and let it rest for at least 10 minutes prior to cutting. When you are ready, cut it against the grain. Cutting it against the grain will make the bite feel less stringy, since you have already cut the muscle fibre short, giving it the feel of tenderness when you are eating.

While you are waiting for the steak to rest, you can prepare your crème fraîche and tortillas. The crème fraîche is the easiest, stirring it together with the oil until they have mixed completely. Once you are done, heat the canola oil to medium-high heat, then place the tortillas in the hot oil, one at a time, flipping after only about 20 seconds. You have to watch this quite closely, cooking too long will result in crunchy edges and the tacos will fall apart when you try to bend them to eat. Transfer them from the heat to a paper towel-lined plate.

When the tacos are ready, serve them with the steak, reserved chimichurri, chipotle crème fraîche, cilantro, and cole slaw. Assemble your tacos at the table, and enjoy!

Happy eating.

The Simple Side Dish: Easy Creamy Buttermilk Coleslaw

Creamy Buttermilk Coleslaw

Prep Time 20 minutes
Course Side Dish

Ingredients
  

  • 1 small cabbage (sliced thinly)
  • 2 large carrots (peeled and shredded)
  • 1/2 onion (shredded)
  • 2 garlic cloves (shredded)
  • 1 Tbsp dijon mustard
  • 1/4 cup mayonnaise
  • 1/2 cup buttermilk
  • 1 Tbsp red wine vinegar
  • 1 tsp salt
  • fresh ground pepper (to taste)

Instructions
 

  • Mix together the cabbage and carrots. Whisk together the rest of the ingredients in the dressing, then pour over the vegetables and toss until evenly coated.
Keyword Cabbage, Coleslaw, Salad, Vegetables, Vegetarian

And now for the details…

Well, this recipe is not terrible pretty, but it sure is yummy. I feel as though the Netflix show ‘Ugly Delicious’ could take its title and attach it to this side. Cole slaw’s are not usually overly pretty and do not offer the same presentation possibilities as many other dishes, but are tasty and very versatile in their use. I mean, really, what other salad do you know that you can put together completely, dress, and have it not only taste great the next day, but often even better than it did the first!

And man, does this salad have lasting power. I will make it at the beginning of the week, and we often have it multiple times throughout the week, minimizing the evening meal prep, and it holds well when taking it to work as a side.

Prep on this salad is relatively easy, but is definitely easier with the use of a very sharp knife. I use my Japanese knife to cut the cabbage quite fine, since this is my preference. If a super sharp knife is not available to you, feel free to use a food processor to shred your cabbage, carrots, and onions. They will not be as fine, but will still be fresh and crunchy and will soak up the dressing.

A quick note on cabbage: I have used green cabbage, pretty standard, in this recipe. You can use Napa or savoy instead, but the salad will not last quite as long. My grandma used to grow cabbage that would form earlier than the green cabbage. It was sweeter and more tender than its later-blooming cousin, but either work well for cole slaws.

After your veggies have been shredded and mixed, whisk together the dressing ingredients. To get a better consistency to the mix, stir the garlic and onions in with the dressing ingredients, not with the veggies.

Finally, pour the dressing over the vegetables and toss vigorously, until everything has mixed well together. Serve the cole slaw on its own as a side, or as a topping (hint: it goes really well on tacos… future post? Highly likely.)

Happy eating.

Garlicky Chimichurri Sauce for Grilled Meats, Tofu and Halloumi

Green and Garlicky Chimichurri

Prep Time 15 minutes
Total Time 15 minutes
Course Side Dish
Servings 1 cup sauce

Ingredients
  

  • 7 cloves garlic (chopped)
  • 1 shallot (chopped)
  • 3 cups Italian parsley (chopped)
  • 1/2 lime (juiced)
  • 1/2 cup olive oil
  • 1 Tbsp red wine vinegar
  • 1/2 tsp red chilli flakes
  • 1 tsp salt
  • 1/4 tsp dried oregano

Instructions
 

  • In a small food processor, place the garlic and shallot and pulse until quite fine. Add the parsley, red wine vinegar, lime juice, and spices, and pulse until fairly fine. Add the olive oil and purée until desired texture.
Keyword Chimichurri, Garlic, Parsley, Sauce

And now for the details…

I am a big fan of sauces in general, and one favourite in our household is chimichurri sauce. And how could it not be? It’s savoury and salty, with a bit of tang. I’m drooling right now just thinking about it. It makes for a great companion with steak or other grilled meats, which is its typical use in its country of origin, Argentina. But I have also really enjoyed chimichurri on halloumi cheese, or as a sauce in tacos.

I think the other reason I am so enthralled with this sauce is that the predominant ingredient is parsley. For me, parsley is an herb that often seems to fall by the wayside of its stronger-flavoured peers like basil, cilantro, or mint. In fact, for a long time, I thought parsley had little to no flavour and was just a garnish to add a green splash of colour to a recipe. But as recipes like chimichurri and tabbouleh entered my life, I started to see parsley take centre stage, and realized the fresh herbaceousness that parsley can bring to the table.

For my recipe, I am calling for Italian parsley, which is flat-leafed, and I find is “wetter” than it’s cousin, curly parsley. You could absolutely use curly parsley instead, but I prefer the texture I get out of Italian parsley.

We will start by loosely chopping the shallots and garlic, and adding them to the food processor. I am going fairly heavy-handed with the garlic in this recipe. If you are wanting a less garlicky experience, feel free to cut down the amount of garlic cloves you add. Pulse the shallots and garlic until they are fairly finely minced.

Next, loosely chop your parsley, removing any large stems, and add it to your food processor with the red wine vinegar, lime juice, and spices.

Pulse all the ingredients together until it has formed a bit of a paste, and the parsley is mostly broken down. Then add your olive oil and blitz the mixture until you have your desired texture.

Pour out into a small bowl and serve with your meal of choice!

Happy eating.

The Ultimate Vegetable Dish: Ratatouille

Ratatouille with Boursin Cheese

Prep Time 20 minutes
Cook Time 50 minutes
Course Main Course, Side Dish

Ingredients
  

  • 3 garlic cloves (peeled and minced)
  • 1/2 onion (peeled and diced)
  • 2 Tbsps olive oil (plus 1 Tbsp for topping)
  • 1+1/2 cups passata (or canned puréed tomatoes)
  • 1/2 cup fresh basil (chopped)
  • 1 small to medium green zucchini (sliced thin)
  • 1 small to medium yellow zucchini (sliced thin)
  • 1 small to medium eggplant (sliced thin)
  • 3 medium tomatoes (sliced thin)
  • 1 tsp salt
  • fresh ground pepper (to taste)
  • 1-2 Tbsps pesto
  • 1/4 cup Garlic and Herb Boursin cheese (crumbled)

Instructions
 

  • Preheat oven to 375ºF.
  • Mince the garlic and dice the onion. Heat a cast iron pan over medium high heat, adding the olive oil. Add the garlic and onion and sauté until the onion has softened and the garlic is fragrant. Add the passata and stir until the mixed consistently and the passata is heated through.
  • Remove from the heat and sprinkle the basil overtop, reserving 1 Tbsp of basil for topping at the end. Arrange the vegetables on the sauce, alternating between the different vegetables (photo above was eggplant, tomato, yellow zucchini, green zucchini). Drizzle with pesto. Cover the pan wither either an oven-ready lid, or with tin foil. Place in the oven and bake for 40 minutes, then remove foil and bake for another 10-20 minutes, until vegetables have reached desired level of doneness.
  • Remove from the oven, top with olive oil, cheese and basil, then serve.
Keyword Cheese, Eggplant, Tomatoes, Vegetables, Zucchini

And now for the details…

I am a bit of a Disney freak. I. Love. Disney. Cannot help myself. We have no kids, and yet I have seen pretty much every Disney cartoon or animated movie ever released. And am emotionally affected by said movies. (Up! Who wrote this screenplay? I am a sobbing mess every time I watch it… within 10 minutes)

And Ratatouille? Well. It was a Disney movie and about a rat who is obsessed with cooking perfectly blended ingredients. I could picture the harmony Remy refers to as he contemplates the flavour combinations that not only match, but bring the dish to life.

And after having watched that movie and having loved it… over a decade ago… I still had not made ratatouille. It was time.

Let’s get to cooking.

We will be cooking everything in a cast iron pan, which will allow an easy transition from stove to oven. If you do not have a cast iron pan, use an oven ready pan, which will work just as well. Not sure if your pan is oven ready? Typically it would have said so on the label, and may even note it on the bottom of the pan. But most pans that have no plastic or rubber pieces and are revited, rather than welded, should be able to withstand the heat of shifting into the oven.

Let’s start with the onions and garlic, which we will sauté in the olive oil until the onions have softened and the garlic is fragrant. Try to avoid cooking too long and caramelizing the onions or garlic.

While you are waiting for the onions and garlic to cook, slice the rest of the veggies into thin slices, consistent in size, and set them to the side.

Add the tomato passata to the pan, and stir until the garlic and onion have been thoroughly mixed in and the passata has heated until just bubbling. Add salt and pepper to the sauce to your taste. Remove from the heat and sprinkle the tomato sauce with the basil, reserving 1 Tbsp of the basil to the side for garnishing the ratatouille when it is done.

Next, we are going to add our veggies directly on top of the tomato sauce in our pan, keeping with a consistent pattern to increase both the visual appeal of the dish, but also allow us a nice bite of all four veggies in one once the dish is cooked and ready. I chose to go with the closest to ROYGBIV as I could with my colour distribution, going with tomato (R), zucchini (Y), zucchini (G), and eggplant (V), and I could see expanding this out to include the rest of the spectrum with, say, orange bell peppers (O), or even stretching this recipe with purple potatoes (I), but I stuck with some of the tried and true veggies in this recipe.

Extra veggies in the background? Yep. Just meant a second pan of ‘touille!

Next is our baking process. Before moving on, I drizzled some pesto over the ratatouille to emphasize the basil flavour. Cover the pan with tin foil or an oven ready lid, and place it in the oven for around 40 minutes. Depending on how thickly or thinly you have stacked your vegetables, you may need to monitor the cooking process at the 30 minute mark to check for doneness. The vegetables should be mostly done, but not completely done yet (the eggplant will have a bit of bounce left to it). At this point, remove the lid or tin foil and allow the ratatouille to cook for another 10-20 minutes, until the vegetables have caramelized slightly, and are completely done. Remove the pan from the oven, drizzle with the remaining olive oil, crumble with some of the Boursin on top, and sprinkle the reserved basil overtop, then serve! From our experience, it goes great with barbecued salmon or chimichurri flank steak tacos (you better believe those recipes are coming!), but this dish is so delicious, it could make up a meal of its own with some crusty bread, or pair with a whole selection of dishes!

Happy eating.

Cocoa Butter Banana Bread with Chocolate Chunks and Pecans

Cocoa Butter Banana Bread

Prep Time 30 minutes
Cook Time 2 hours 15 minutes
Course Breakfast, Dessert
Servings 1 loaf

Ingredients
  

  • 2 ripe bananas
  • 1/2 cup cocoa butter (melted)
  • 2 eggs
  • 1/3 cup whole milk
  • 1 cup vanilla sugar
  • 1 tsp vanilla
  • 2 cups flour (pastry or all-purpose)
  • 1 tsp baking soda
  • 1 tsp baking powder
  • 1/4 cup ground flax
  • 1 tsp salt
  • 1 cup dark chocolate (broken into small pieces)
  • 1 cup pecans (chopped)

Instructions
 

  • Mash the bananas with a fork until mostly smooth. Mix the melted cocoa butter, bananas, eggs, milk, sugar, and vanilla. 
  • Sift together the flour, baking soda, and baking powder, then stir in the flax and salt. 
  • Stir together the dry and wet ingredients until the dry ingredients have just been moistened. Stir in the chocolate and pecans, then pour into a prepared 5"x9" loaf pan. 
  • Bake for 75 minutes at 325ºF until a toothpick inserted in the middle of the loaf comes out clean.
Keyword Banana, Banana Bread, Chocolate, Cocoa Butter, Loaf

And now for the details…

Before getting into the full story, I should probably mention that this banana loaf was much more in the crumby cake side of texture as opposed to the more typical ultra moist banana bread. This is a texture I prefer, but if you like the super smooshy type of banana bread, this is not the loaf for you.

As far as where my inspiration came from, it was from, as usual, meandering around my grocery store. I randomly found some raw cocoa butter on sale. I stood in front of the shelf for quite awhile with the bag in my hand. What was I going to use it for? No idea. It’s supposed to be really good for you. But what are these purported health benefits of this fat compared to most others? And how would I use it? I think I melt it down as a fat replacement in meals? Surely I can figure something out. Hadn’t I heard of people putting it into smoothies at the very least? If I used it for cooking, would it make everything taste like chocolate? But most importantly it’s on sale… how could I say no?

Well, I took it home… and it sat sad and lonely in my pantry closet for months. So yeah, it was on sale, and I bought it, and then I almost forgot about the gorram thing.

So months went by and one day I had some uber ripe bananas that clearly needed a home in a baked good. Which I suppose is not saying a lot for me… once a banana has one brown spot on it, it’s too ripe for fresh eating, and is officially a baking banana. I do thoroughly enjoy me some banana baked goods, however, and a good banana bread is a pretty delicious snacking option. And then, I remembered *ba-ba-da-baaaaaa* cocoa butter! Now could be its big break!

Looking into the cocoa butter since I bought it, the health benefits that I’d thought I’d heard or read about seemed… weak. Does it provide a good fat source for folks functioning off a keto diet? It sure does… like pretty much any fat source out there. Is it quite high in phytosterols, which have claim to lowering LDL cholesterol? Yes it is… like many vegetable oils. But… I don’t follow a keto diet, and while I try to maintain an overall healthy and balanced diet, phytosterol intake is not something I am monitoring. Sure hope this stuff is delicious, cause that’s the main thing I am now focused on. Worse case, I suppose, I could slather it on my body instead and have an expensive, but delicious smelling moisturizer!

Let’s get to cooking.

My mistake when making this was to start with mashing the bananas. What I really should have started with was getting the melting process of the cocoa butter going. Cocoa butter is clearly a winner from a shelf stability perspective. It’s melting point is higher than coconut oil or butter, and it takes quite bit longer to melt down to a useable liquid than most other fat options I have used. One of my favourite parts, though: when a little bit of the melted butter smashed onto my hands while stirring, and I rubbed it into my skin instead of wiping it off. Seriously, great moisturizer if nothing else.

Before we get to the next step, preheat the oven to 325ºF.

Once you have the butter melted and the bananas mashed, mix the two together, than add in the eggs, milk, sugar, and vanilla. I used vanilla sugar in the recipe, which I have in my pantry by throwing a used vanilla pod into some sugar in a hermetic glass jar in the pantry. Regular sugar would do just just fine, just increase your vanilla addition to about 1.5 teaspoons.

In a separate bowl, mix together the flour, baking powder, baking soda, flax, and salt. You can buy flax pre-ground, but I buy the flax whole and grind it just before you use it. I have a separate coffee grinder that I keep specifically for grinding seeds and spices, which I used to grind the flax.

Next, mix the dry and wet ingredients until they are just combined. Next is to add the chocolate and pecans, and stir into the batter until fairly evenly mixed in.

Grease the loaf pan, and line it with parchment paper. Turn the batter out into the prepared pan, and place into the preheated oven. Bake for around 75 minutes, or until a toothpick inserted in the loaf comes out clean.

Remove the pan from the oven, let it cool, then cut and enjoy!

Happy eating.

A Fresh, Summer Risotto with Zucchini and Pesto

Zucchini Pesto Risotto

An easy risotto, with the fresh, summery additions of zucchini and pesto
Prep Time 5 minutes
Cook Time 40 minutes
Total Time 45 minutes
Course Side Dish

Ingredients
  

  • 1.5 shallots (minced)
  • 1 large garlic clove (minced)
  • 2 Tbsps olive oil
  • 3/4 cup white wine
  • 4 cups turkey broth
  • 1.5 cups arborio rice
  • 1 medium zucchini (spiralized)
  • 1/2 cup parmesan cheese (shredded)
  • 2 Tbsps pesto
  • fresh basil (chopped, for garnish)

Instructions
 

  • Sauté the shallots and garlic in the olive oil until fragrant, but not yet brown. Add the rice, and stir constantly until the rice has started to become translucent, 1-2 minutes. Add the wine and stir continuously until the liquid has mostly been absorbed. Add the broth 1/2 cup at a time, stirring regularly between each pour, and waiting until the liquid has been mostly absorbed between adds.
  • Once the rice has reached almost the desired consistency (~3 cups of broth), add the zucchini and stir gently into the risotto. Add the remaining broth in the same manner as the rest, until the desired consistency is reached, then remove from the heat and stir in the parmesan cheese.
  • Turn out into a serving platter, top with the basil and pesto, and serve.
Keyword Parmesan, Pesto, Rice, Risotto, Zucchini

And now for the details…

I love risotto. It is one of my favourite dishes. But I don’t make it often. Not because it’s difficult, but because it’s a bit demanding. Seriously, talk about high maintenance. It requires regular attention from the moment you start cooking, needing to add the liquid bit by bit, and stir regularly to ensure you don’t end up with a layer of dried or burnt rice coating the bottom of the pot. And because you add the liquid gradually, the cooking time is usually 20-30 minutes of unceasing hovering like a helicopter mom to ensure the result is as desired. But that result? Pure deliciousness. A creamy, lustrous texture, with tiny “popping” bites of rice grain centres.

Risotto seems to go great with vegetables. And for this particular recipe, I had some nice zucchini in the fridge that seemed to be calling to be added. To bump the flavour up even more, I chose to top this off with some pesto (bought, I regret to say, I got a bit lazy with that one) and some fresh basil.

Let’s get to cooking. We will start by heating the broth. In a small to medium pot, heat your broth on low heat and hold it on low heat for the duration of the cooking. I used turkey broth, since I has some homemade broth in the freezer, and I find that turkey broth adds additional richness to the risotto. But a chicken broth would work, or a vegetable broth if you would like to make this a vegetarian dish.

Once the broth is heating on the stove, mince the garlic and shallots, and spiralize your zucchini. Set the zucchini aside, and add the garlic and shallots to a second pot, with the oil, on medium heat. Stir until fragrant and the shallots have slightly softened. Then, add the arborio rice and stir. Continue to cook and stir until the majority of the rice kernels have turned translucent, with just a bit of opaqueness in the middle of the kernel, about 1-2 minutes. Why do we cook the rice dry before adding our liquid? From the research I have done, it is to end up with a slightly skin around the rice kernel, to ensure the rice maintains a bit of that “bite”, instead of a mushy porridge-like consistency. To be honest, I have never tried risotto without doing this step, so I am not entirely sure the overall effect on the dish if I skipped it.

Next, add the wine and stir until most of the liquid has been absorbed by the rice. After the wine, we will add the broth bit by bit (about 1/2 cup at a time), stirring between each addition. Do not make the next addition until the liquid has been almost completely absorbed by the rice from the previous addition.

Scrape the rice on the sides of the pot down regularly, to ensure all the rice kernels are being cooked rather than dried out. Once you are nearing the end of your broth (around 1 cup left), taste test the rice to check the consistency. I like a bit of bite to my risotto, so I do not add all the liquid. But if you prefer a creamier texture, continue to add more broth until just before your desired consistency. When you are nearing the end of the cooking, with just a bit more bite than you would like, add the zucchini, and stir.

The zucchini will cook and soften quite quickly. Add a bit more broth if needed and pull the risotto off the heat. Add the shredded parmesan and stir well until the parmesan is melted and consistently mixed into the risotto.

Turn the risotto out into a serving platter, and top with you pesto. I was lazy this time around and used a pesto I got from my local Italian grocer. But there are plenty of recipes out there for fairly simple pestos, with basil, garlic, olive oil, parmesan, salt, and pine nuts.

After topping the risotto with the pesto, sprinkle with the fresh, chopped basil, and serve.

Happy eating.

Grilled Apricot Salad with Radicchio and Mint

Grilled Apricot Salad

Prep Time 15 minutes
Cook Time 5 minutes
Course Main Course, Side Dish

Ingredients
  

  • 4 apricots (washed, halved and pitted)
  • 1 head radicchio (cored and sliced)
  • 1/2 cup fresh mint (washed and chopped)
  • 1/2 bulb fresh fennel (cored and sliced thin)
  • 2 Tbsps bleu cheese (crumbled)
  • 4 Tbsps pecans (toasted and chopped)
  • 2 Tbsps dijon mustard
  • 2 Tbsps white wine vinegar
  • 2+4 Tbsps olive oil

Instructions
 

  • Cut apricots in half and remove pits. Coat with 2 Tbsp olive oil. Place on a bbq at medium-high heat, turning halfway through until cooked through (about 4-5 minutes total). Remove from grill and set aside. Place radicchio and fennel on a plate. Whisk together the mustard, vinegar and 4 Tbsp oil until emulsified. Pour over the vegetables. Top with apricots. Sprinkle with mint, cheese and pecans, and serve.
Keyword Apricot, BBQ, Bleu Cheese, Grill, Mint, Salad, Salad Dressing

And now for the details…

I have a radicculous love for radicchio (oh yes, I went that cheesy). As I get older, I have come to enjoy more and more the bitter element that many foods provide that I could not appreciate when I was younger. Coffee, strong tea, dark chocolate, grapefruit, red wine and, of course: radicchio. There is something about bringing the bitterness together with sweet, sour, and creamy that amps all those flavours up a notch and creates a taste explosion.

A favourite salad we had in France was incredibly simple: endive, crumbled bleu cheese and mustard dressing. This recipe is taking that super simple salad and giving it a tiny bump up. We are adding in the sweet and sour of the grilled apricots, not to mention the earthiness that comes out of those grill marks. We are pulling in the freshness and sweetness of the mint and fennel. And we are adding a bit of crunch with the toasted pecans. Plus, the slight bitter note of the pecan skins matches so wonderfully with the bitterness of the radicchio. And the creamy, salty bleu cheese? Yes, thank you.

So with that: let’s get to making this salad a reality.

Start by prepping your veggies. Wash and dry the radicchio. Cut it into halves, and core the hard centre out before slicing the rest of it into strips.

Next, wash and core your fennel, and slice it into very thin strips. Raw fennel is quite crunchy, so you want those nice thin pieces to bring forward the juiciness and sweetness of the fennel while not being the focus of the bite when you are trying to chew. Add the fennel to the radicchio in your plate and toss to mix the two.

Next, cut the apricots into halves and pull them off their pits. Add the olive oil and toss to coat the apricots lightly with some olive oil so they do not stick to the grill. Place them on a medium-high grill, allowing them to brown slightly on the one side before turning and browning on the other side. Remove them from the grill and set them to the side while you prep the rest of the salad.

Mix the vinegar and the mustard together. Slowly add the oil, whisking the entire time, so that the mixture emulsifies.

Emulsify: what does this mean? It is mixing liquids together (e.g. oil and vinegar), which normally separate, but mixing them with another ingredient so they mix together and stay fairly stable as a homogeneous mix, instead of separating the moment after you have swished them together. In other words, the emulsifier is your facilitator to make sure the vinegar and oil continue to get along. In this case, mustard is our emulsifier. We mix the mustard and vinegar together first, to allow the mustard and vinegar to get to know each other and build a relationship. Then, we add the oil while whisking, and the whole blend comes together beautifully, while remaining a stable mix. Y’see, mustard introduces itself to oil all slick-like, and mustard pulls in vinegar and makes sure oil and vinegar get to be best friends too, without wanting to be apart from each other the moment they come together. Oh wow. Mustard is basically the world’s best wing (wo)man. Yes this sounds hokey. And of course there is a scientific explanation. In fact this article speaks much more to the emulsifying qualities of mustard.

Finally, we can finish off our salad. Place the apricots over the radicchio and fennel. Sprinkle the mint overtop and crumble the bleu cheese over the salad. The easiest method for crumbling the bleu cheese? Fingies. Make sure you take the cheese out straight out of the fridge, which will make it a bit easier to crumble, then squish the sh*t out of it between your fingers as you sprinkle it over your salad. Finish the salad off with some toasted pecans and drizzle with your dressing, then serve.

Happy eating.

Easy Grilled Carrots with an Ume and Soy Glaze

Grilled Carrots with Ume and Soy Glaze

Prep Time 5 minutes
Cook Time 15 minutes
Total Time 20 minutes
Course Side Dish

Ingredients
  

  • 6 medium-sized carrots (peeled or washed/scrubbed)
  • 1 Tbsp soy sauce
  • 1 garlic clove (grated)
  • 1 tsp fresh ginger (peeled and grated)
  • 1 Tbsp plum (ume) extract syrup (can substitute with maple syrup)
  • 1 Tbsp rice wine vinegar
  • 1 tsp sesame oil
  • dash cayenne pepper
  • 2 Tbsps olive oil
  • lettuce (as garnish)

Instructions
 

  • Clean carrots well with vegetable scrub brush. Mix the marinade ingredients together. Brush carrots with marinade and place on a medium-high grill. Turn regularly, brushing with more marinade each time, until cooked through. Serve.
Keyword BBQ, Carrot, Grill, Soy Sauce, Vegetables

And now for the details…

I was hunting through my fridge at the end of the weekend for another veggie to go with our meal. I was hoping to find something I could grill, but the vegetable bin was pretty much empty and all I had left was celery and carrots. I have never really associated either with grilling, but at the same time, why not?

I chose the carrots, and if I was going to do them on the grill, I clearly needed to dress them with something. Some kind of dressing that would be sweet, salty, maybe even a tad bit spicy. I was already going down the thought process of soy and rice wine vinegar. But when I was debating between sugar or honey in my brain for the sweetness factor, I remembered another option I have in my fridge: plum extract.

I found the plum extract at our Japanese/Korean grocery store and bought it on a whim, without much thinking what I would do with it. The original inkling to buy it came from memories of the homemade Ume wine (a wine made from soaking Ume plums in liquor) we had at the ryokan we stayed in when we were in Nara, Japan. That Ume wine has haunted my since. It was sweet, tart, and fruity, and quite thick due to the high alcohol content. I figured this extract could be added to sparkling water and at least give me some remembrance of the flavour of that wine. But I regularly forget about it and it sits on the shelf of the fridge door, morosely waiting for the day it can be pulled out and become a feature of one of our meals (yes, I truly do feel this way about inanimate objects, I cannot help myself. Can’t you just see the sad eyes the bottle must be giving me every time I close the fridge and haven’t chosen it?) Now is it’s time!

After we have cleaned the carrots and set them aside, we will whisk the marinade ingredients (i.e. all the remaining ingredients in the recipe) together in a small bowl with a fork (or a tiny whisk; nod to you Binging with Babish). Yes, even the plum extract.

Next, brush the carrots on all sides with the marinade, and place on the hot grill.

As the carrots cook, check in on them every couple of minutes. Re-brush with the marinade liberally, turn them, then let them cook some more.

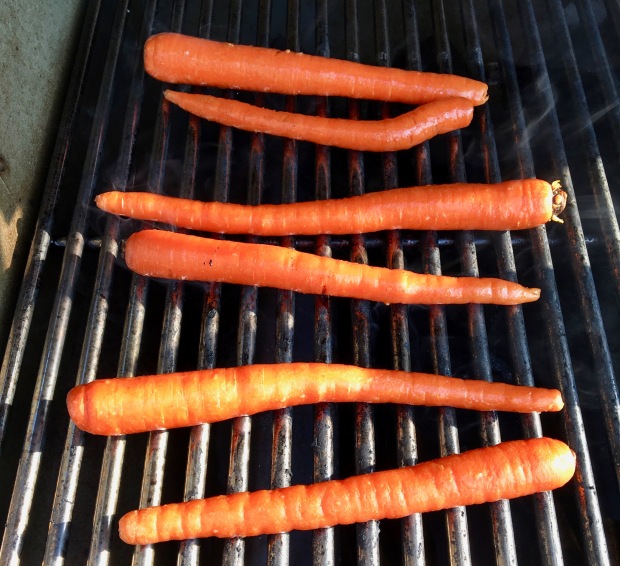
Pretty soon, the carrots will kind of look like misshapen wieners with grill marks. As long as they have cooked to your preferred level of softness, they are ready to come off the grill. Plate them, and brush them one last time with the marinade, and maybe adding a bit of lettuce for a super kitschy presentation, and you are ready to enjoy!

Happy eating.

How to Have Dessert for Breakfast: Passionfruit Chia Pudding with Berry Jam

Passionfruit Chia Pudding with Berry Jam

Prep Time 30 minutes
Resting Time (minimum) 1 hour
Course Breakfast, Dessert
Servings 5 Servings

Ingredients
  

  • 1 cup fresh strawberries (cored and cut into small pieces)
  • 1/2 cup fresh raspberries
  • 1 Tbsp honey
  • 1+1 tsps vanilla extract
  • 800 ml coconut milk (27 oz)
  • 1/3 cup passionfruit purée
  • 2 Tbsps turbinado sugar
  • 1/2 cup white chia seeds
  • 4 Tbsps shaved coconut (toasted, for garnish)

Instructions
 

  • Wash and cut strawberries into small chunks. Wash raspberries and add both to pot. Cook on low-medium heat, until cooked down (~10 minutes). Add 1 tsp vanilla and honey, cook until honey is dissolved. Cool and place in five sealable containers.
  • Mix together milk, passionfruit purée, 1 tsp vanilla and sugar until the sugar is dissolved. Add the chia seeds until just mixed, and pour over the compote. Seal the containers and let set in the fridge for a minimum of 60 minutes, or overnight.
  • When ready to eat, top with coconut and serve.
Keyword Berries, Chia, Coconut Milk, Compote, Passionfruit, Pudding

And now for the details…

I’ve been needing a good breakfast option lately, and have gotten into the bad habit of buying it at my coffee shop on the way to work. The option I have been purchasing frequently? Chia pudding with a fruit compote, similar to a jam. And every time I buy it, I question why I buy instead of make. It is relatively easy to make and WAAAAAAY cheaper for me to make it at home and take it to work instead of purchasing. Not to mention, I would be producing way less waste by making it in a reusable container instead of throwing the bought plastic into the recycling bin every day.

And so… I made some! In this recipe, I chose to amp up the pudding with some passionfruit purée, and made the compote from strawberries and raspberries that I had in the fridge, which were starting to look a little rough.

We start with our compote. Wash and trim the strawberries and cut into small chunks. These strawberries had seen better days and I needed to trim around the brown spots as well.

Place the strawberries into a medium sized pot and set them on the stove at medium-low heat. Wash the raspberries and add them to the pot with the strawberries.

Let the berries cook, stirring regularly to avoid the fruit from burning on the bottom of your pot, until they have softened and are breaking down into an almost jammy consistency. Add the honey and 1 tsp of vanilla, stirring until completely mixed in. Then allow to cool completely.

Next we will mix our pudding. Start by mixing the coconut milk and passionfruit purée together. The passionfruit is going to balance the creaminess of your coconut milk by adding a tart, fruity, and slightly floral flavour to your pudding. Passionfruit purée… where do I find it, you may ask? There are a few options. You could buy fresh passionfruit from a grocer who offers them, hope you have waited the right amount of time for them to ripen enough (unripe passionfruit are quite tasteless, make sure the fruit skin is super wrinkly), scoop the pulp to a blender, add a bit of water, purée, then strain and separate the liquid form the seeds. You could do that. Or… you can find it at your local latin market in the freezer section! You might be able to tell which option I prefer…
Add your sugar and vanilla, and stir until the sugar has completely dissolved. Finally, add your chia and stir until completely blended. Try to avoid stirring too much, which can make the pudding “tough”.

To get the pudding ready to serve, start by pouring your compote into your containers. I used a pastry bag made from parchment paper (a trick I learned by binging on Anna Olson shows) to help me avoid slopping up the sides of the container while I was pouring.

Next, pour in your chia pudding. Be careful to do this gently so it does not end up mixing into the compote and all ending up as one big blended mess!

And now? Put a lid on it! Bahahaha I’m so funny. But seriously. Cap your puddings and put them in the fridge to set. The chia seeds will soak up the liquid from the coconut milk and passionfruit purée and turn into more of a pudding texture. Once you are ready to eat (leave it at least overnight), top your pudding with some toasted coconut for texture (bake your coconut on a cookie tray at 350ºF until they are golden brown and cool), and eat!

Happy eating.